3D Printed Keychain
Getting familiar with the world of 3D
PURPOSE:
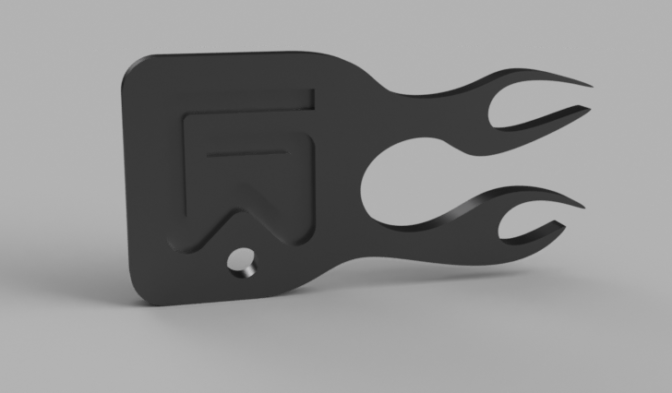
In this activity, you will design and print a plastic keychain of your own design.
BRAINSTORM on PAPER!
ON PAPER (not Fusion) draw at least 6 different potential designs for your keychain. Be CREATIVE!
-
- Must have at least 3 INITIALS
- You’re just looking for IDEAS
- Keep it SIMPLE
- MUST be more than a basic square, rectangle, or circle
- MUST be visually appealing
- MUST have a hole close to an edge for your key ring
NOW SHOW your best design to your instructor!
OPEN FUSION360
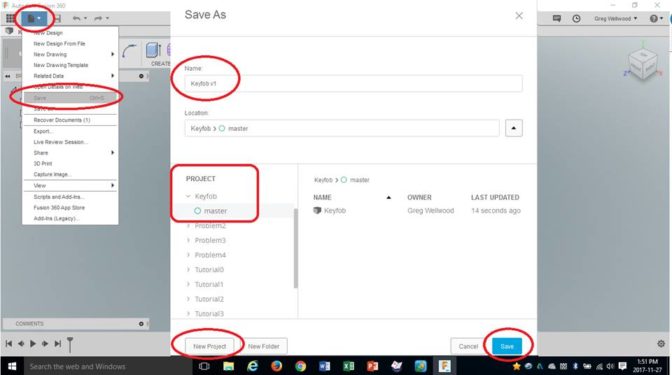
From the FILE menu, select SAVE AS and give it a project name (keychain) and a file name (keychain). Get in the habit of naming and placing files in a logical, organized way – you will thank me later.
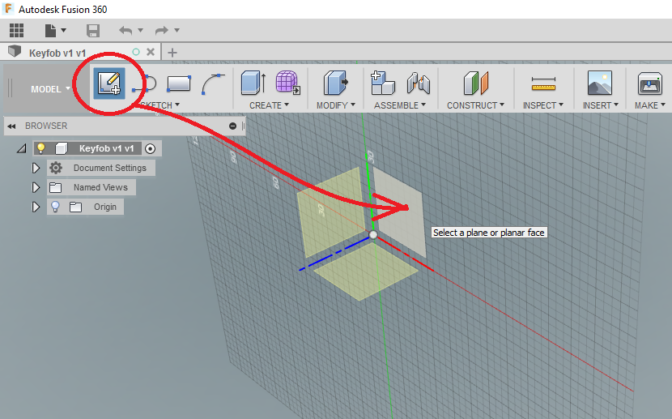
Click the SKETCH icon of the Ribbon Menu, and select the X,Y plan on your screen.
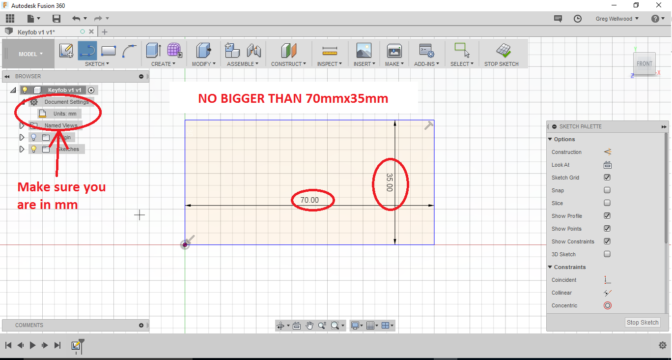
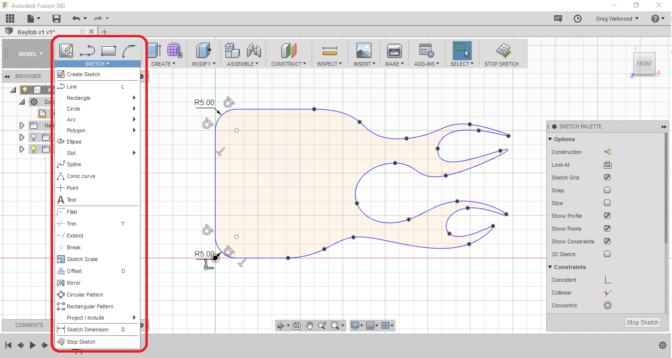
Your Keyfob must be no bigger than 70mmx35mm. Below, I used LINE command in the Sketch Menu to draw a box 70mmx35mm.
Using various commands in the Sketch Menu, draw a cool shape. Figure out how each command works.
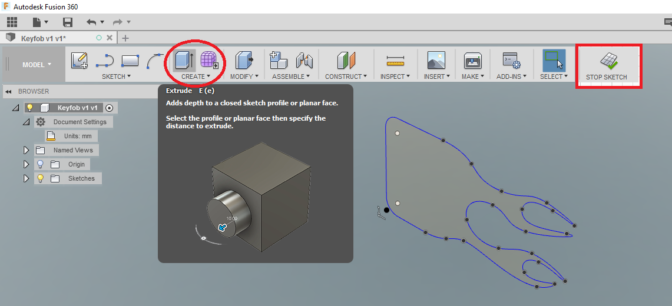
Once you are done, click “STOP SKETCH” and then select the EXTRUDE icon in the CREATE tab of the Ribbon Menu
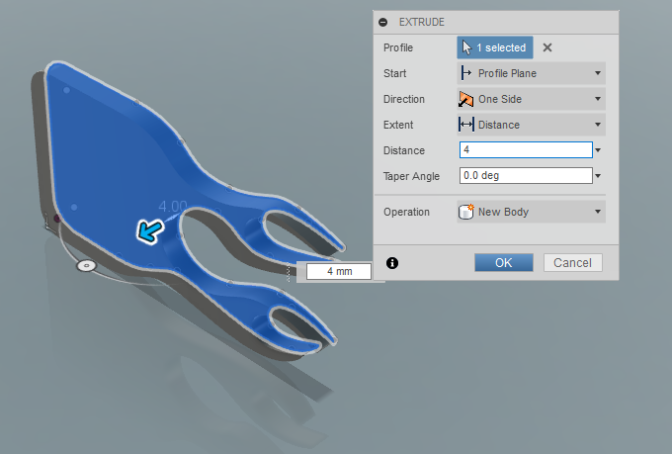
Extrude the SKETCH into a SOLID, somewhere 2mm to 5mm.
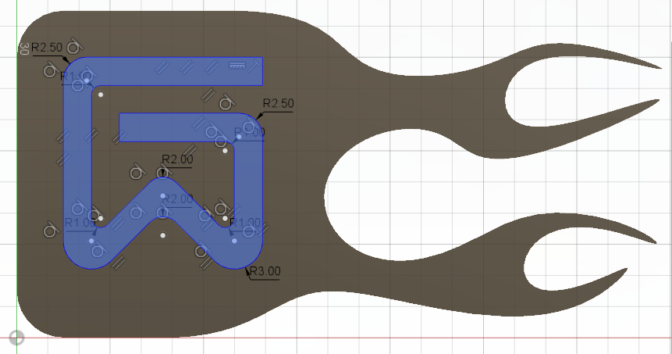
You can SKETCH a LOGO on the surface, by using SKETCH again, but this time clicking the surface you want the logo to be on. Make sure the sketch is CLOSED (no open ends – that doesn’t work)
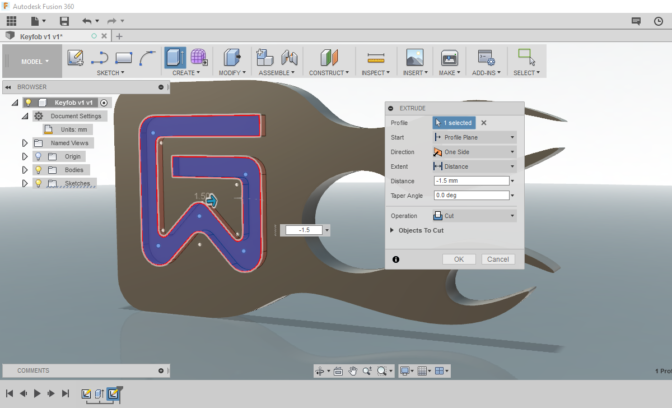
You can extrude that logo UP as a SOLID (the logo will be PROUD (that means: sticking above), or you can extrude IN, as a CUT
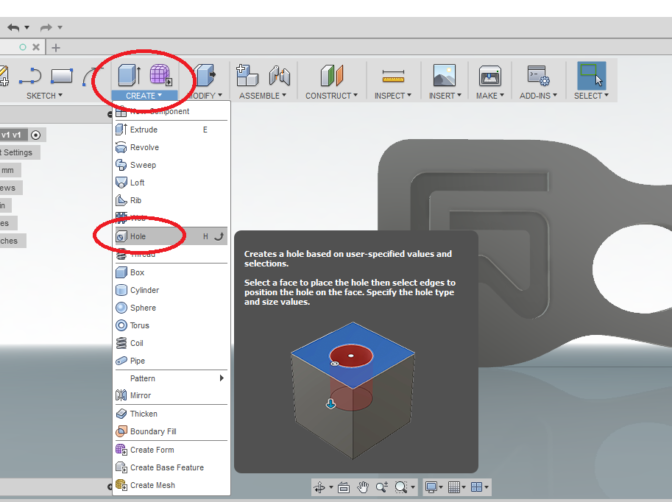
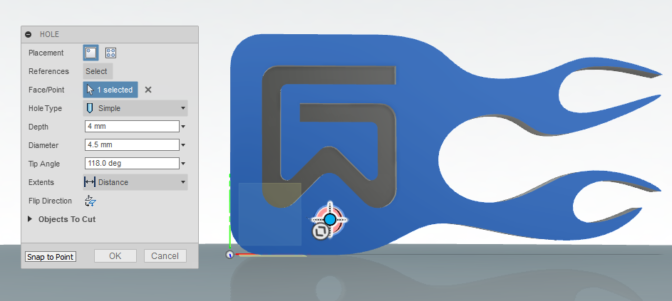
You will need a hole for your key ring. Try to keep the hole about 3mm from any edge. Too thin, and the plastic will break.
HAVE YOUR INSTRUCTOR CHECK YOUR WORK. If you get a “send it” you are ready to print!
Refer to the “How to 3D Print” page if you need a refresher
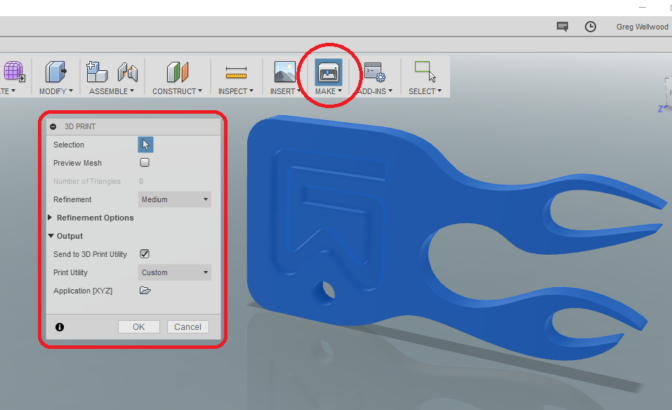
If it is not installed on your computer, you will need to EXPORT your project as an STL file (STereo Lithography), and send THAT to the Flash Print 5 slicer.
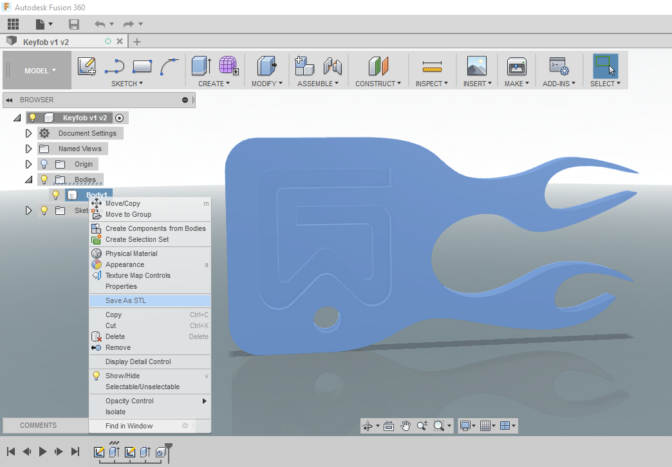
Go to the BODIES section of the BROWSER
Right-Click on the BODY you want to print, and click “Save As STL“
OPEN the STL with your 3D Printer software
Have your Instructor check your design.
Now complete Tutorial 3
