Tutorial 6: Sweeps and Lofts
Introduction
Sweeping and lofting are useful techniques for designing parts which may be difficult to model with extrusions or revolves. Unlike those other modeling techniques, sweeps and lofts allow for parts with varying cross-sections and parts that twist or bend. In this section, you will create a constant cross-section U-shaped part using a sweep and a vase using a loft.
Think of a SWEEP as an EXTRUDE that FOLLOWS A PATH.
Think of a LOFT as an EXTRUDE that CHANGES CROSS-SECTIONAL SHAPE.
Creating a Swept Part
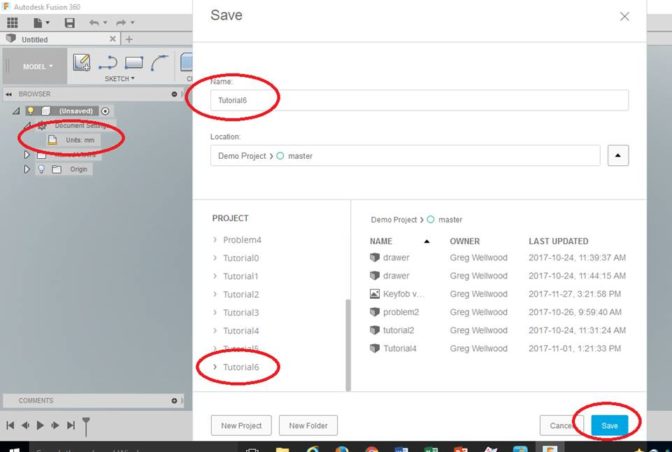
Start Fusion 360. Select the “Save” Icon, create a [NEW PROJECT] folder named “Tutorial6“, and from the BROWSER make sure it is [Units: mm].
YOU MUST KEEP YOUR FILES ORGANIZED! FOLDERS, NAMES, and LOCATIONS ARE IMPORTANT TO KEEPING YOUR FILES ORGANIZED!
In order to create a SWEEP, Fusion first needs to know a PROFILE, and a PATH for the profile to follow.
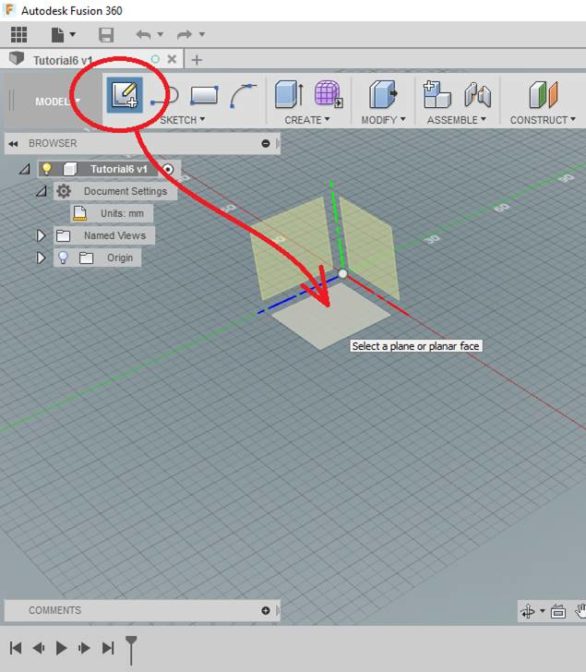
Start by selecting CREATE SKETCH from the Sketch Tab of the Ribbon Menu, and select the Horizontal Sketch Plane
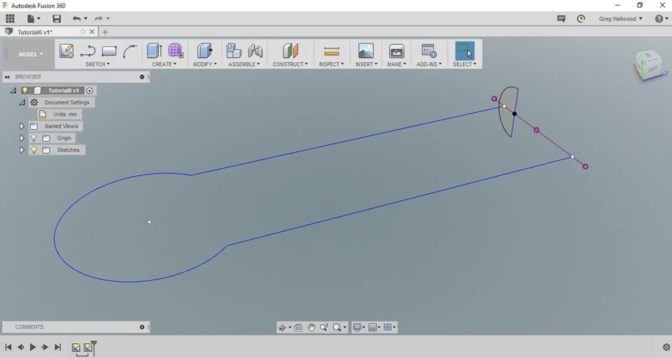
Draw the image as shown below as a PATH, then click [FINISH SKETCH]. You need the legs to START and END on the Horizontal line (a work plane we will need later). Kind of looks like a cotter pin.
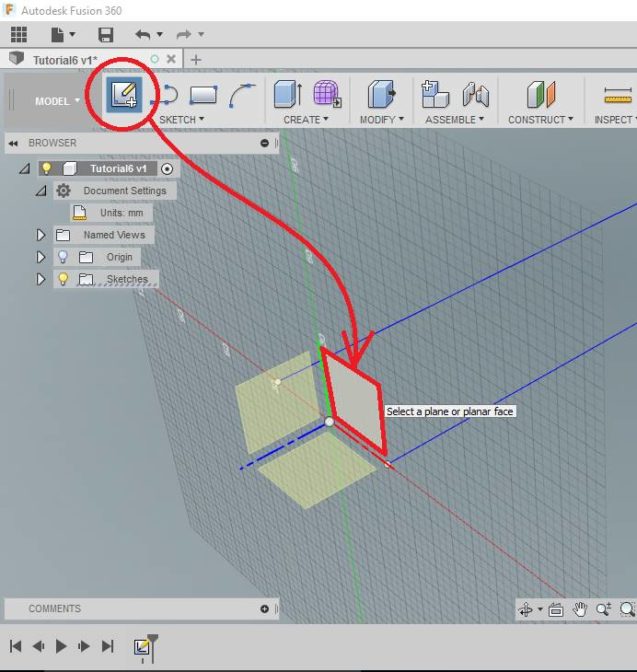
Next select Create Sketch from the Sketch Tab of the Ribbon Menu, and select the vertical sketch plane where the legs started and ended.
Sketch a PROFILE that looks like this, and click [FINISH SKETCH]. The Profile doesn’t actually have to touch the path for this to work. Looks like a semi-circle.
You should now see a PROFILE and a PATH on the screen.
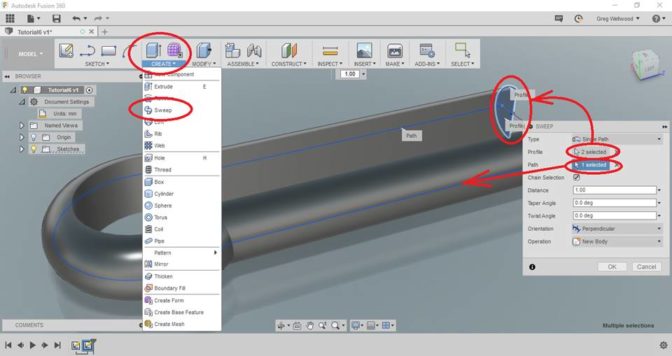
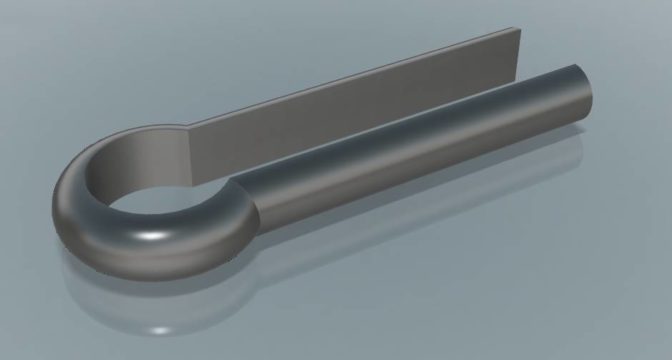
Select SWEEP from the CREATE Tab of the Ribbon Menu. For the Profile, click the semi-circle sketch you made (I had to click both halves on mine), and for the Path, click the Cotter-Pin shaped sketch you drew. Fusion should work its magic.
Make sure you save your work!
Creating a Lofted Part
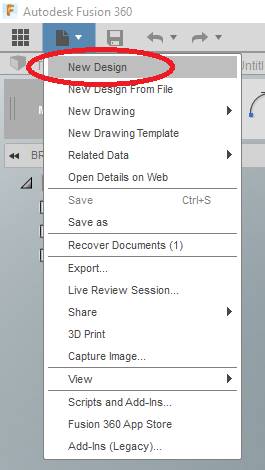
Click NEW DESIGN from the FILE icon at the top of your screen….
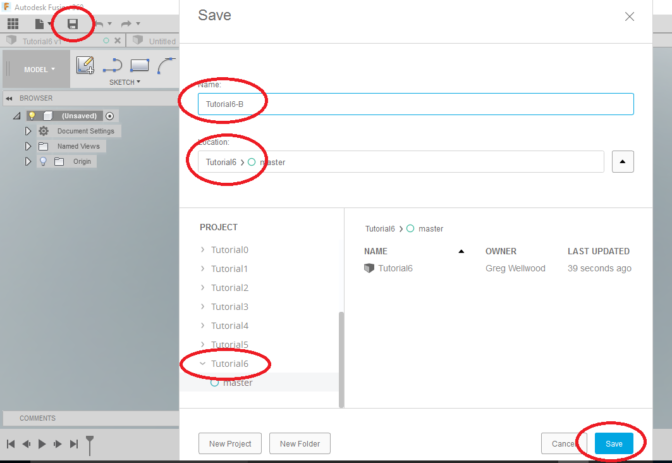
Name this new file Tutorial6-B and save it in the SAME FOLDER (Tutorial6)
We are going to draw a series of shapes on a series of Planes. Fusion will “connect” the profile of these shapes into a solid.
First, we are going to create the planes.
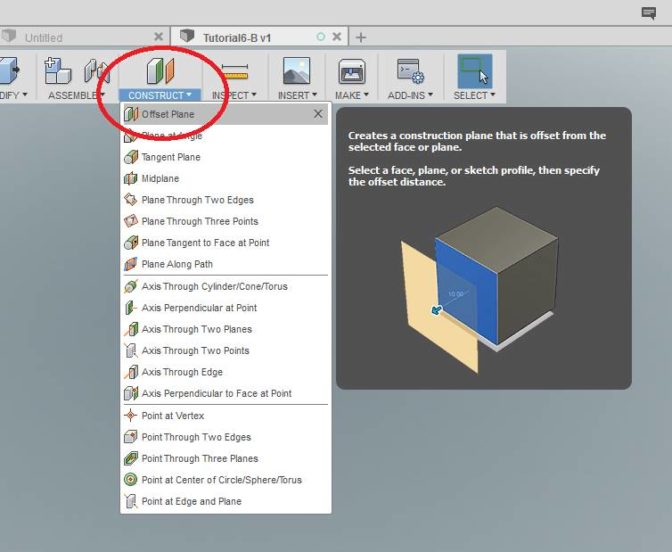
Select OFFSET PLANE from the CONSTRUCT Tab of the Ribbon Menu.
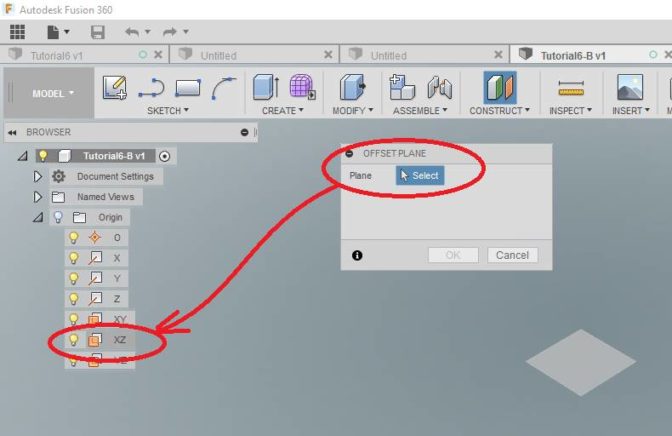
Pick the XZ Plane from the BROWSER, since that existing plane will not be visible.
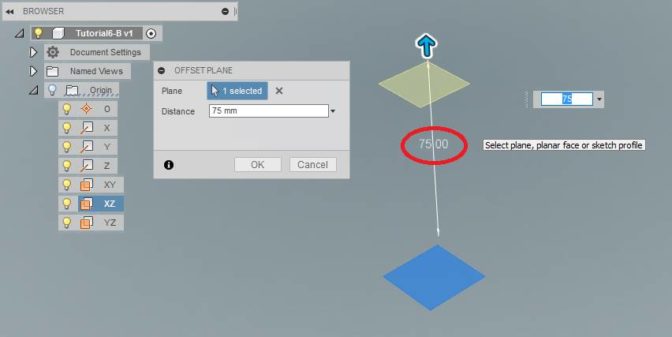
Enter a DISTANCE of 75mm for the location of the new Plane. This will show up as Plane1 in the Timeline at the bottom of your screen.
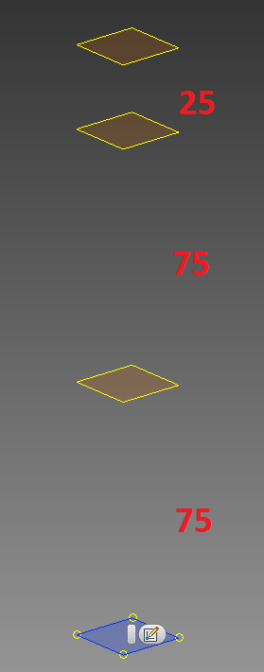
Add another Plane 75mm above your new one, and another Plane 25mm above that. Like so:
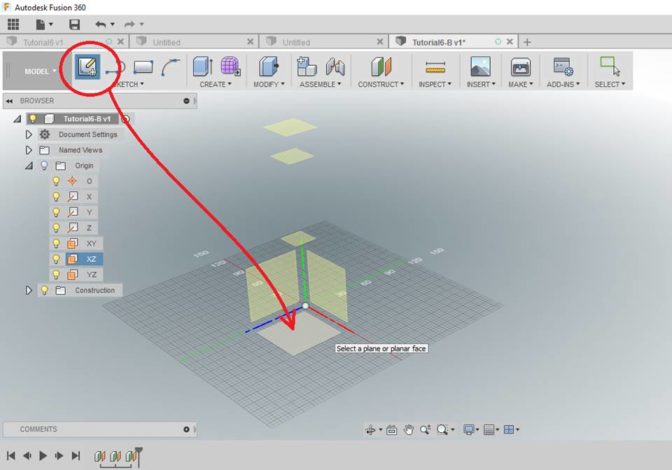
Click CREATE SKETCH from the SKETCH Tab of the Ribbon Menu, and select the Origin XZ Plane
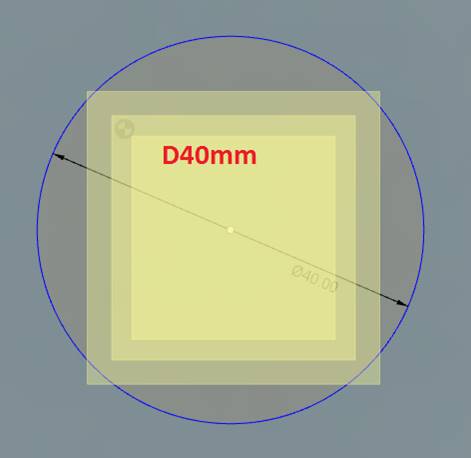
SKETCH a circle with a diameter of 40mm
Create a 60mm circle on Plane1 (Try to reference the original circle center for these)
Create a 30mm circle on Plane2
Create a 50mm circle on Plane3
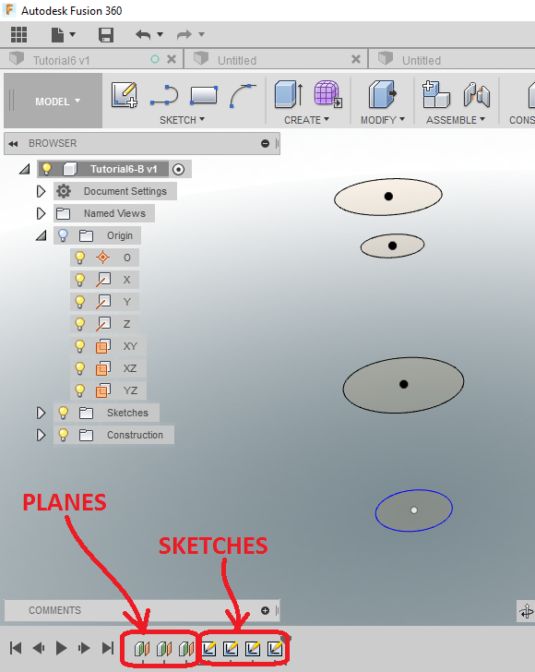
You should have something like this:
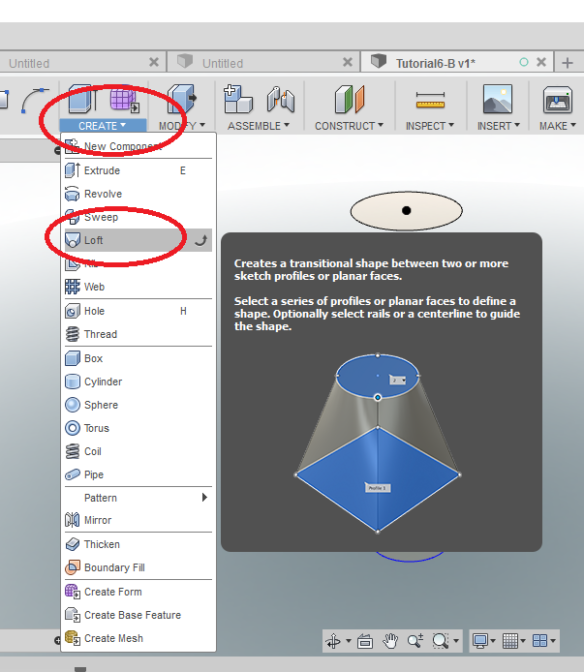
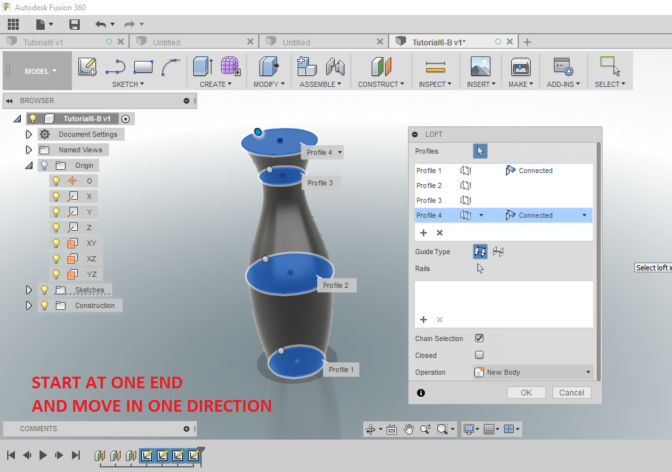
Click LOFT from the CREATE Tab of the Ribbon Menu
Starting at the BOTTOM circle, select all the circles in order from bottom to top. Fusion will create a solid using those surfaces. You should see this:
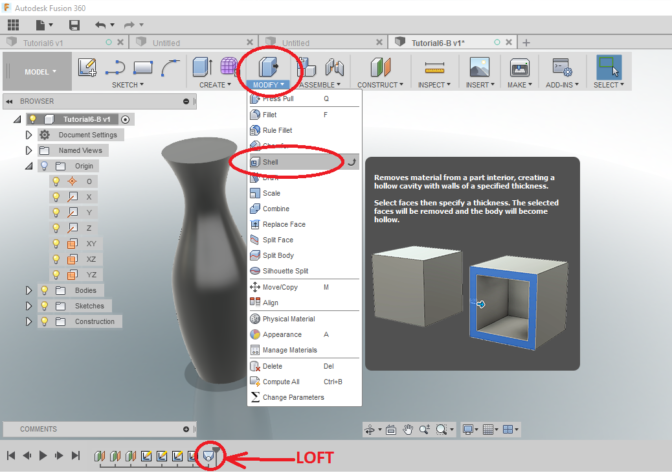
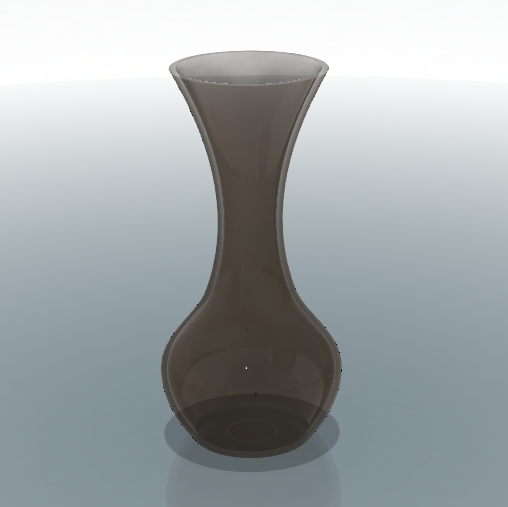
Use SHELL from the MODIFY Tab of the Ribbon Menu to make this vase a more usable vase.
You can totally change the shape of your part by simply changing the distances between the Planes, Fusion will adjust the object.
WANT IT MARKED?
Use the SNIPPING TOOL to do a WINDOW screen capture, and save the files into the HANDIN FOLDER with YOUR NAME and TUTORIAL/PROBLEM NAME (ie: wellwood-tutorial-1.png)
Now complete Problem 6.
Problem 6: Sweeps and Lofts
Introduction
Attempt this problem after completing Tutorial 6. The problem will test your knowledge of sweeps and lofts.
Problem Statements (There are 2 Parts to Create)
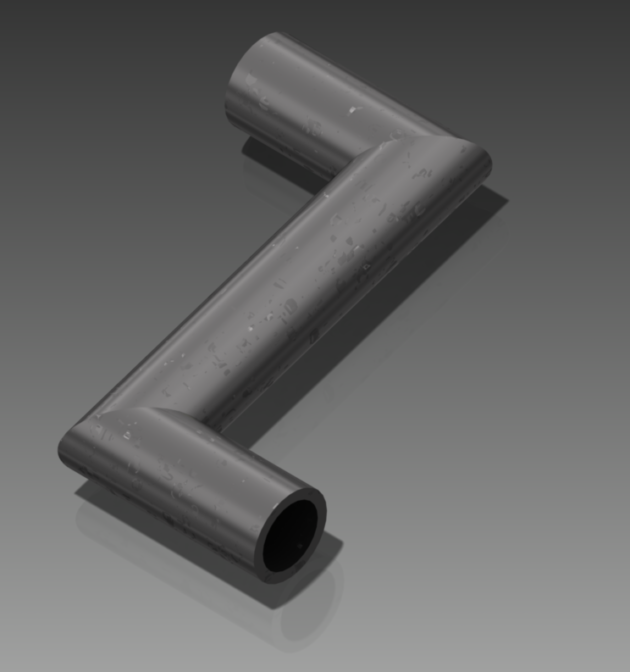
Create the pipe shown below using a SWEEP. Create the trajectory with three straight lines. The outer diameter of the pipe must be 20mm, and the inner diameter should be 15mm.
Create the part shown below using a LOFT. Hint: All of the cross-sections should be square.
WANT IT MARKED?
Use the SNIPPING TOOL to do a WINDOW screen capture, and save the file into the HANDIN FOLDER with YOUR NAME and TUTORIAL/PROBLEM NAME (ie: wellwood-tutorial-1.png)
Now complete Tutorial 7
