Looking Out the Window – Writing Composition
categories: English 9
 Loading...
My Riverside Rapid Digital Portfolio
Loading...
Define:
We have been working on a group challenge in science class where we must filter waste water. We had to consider what others had done before us to filter water and how we could create our own filter. The main problem we had to solve during this project was to filter agricultural waste water from the farm Edible Agriculture so that it was clean enough to be released into the Pitt River. To make sure our filter would solve that problem, we did some research on other filters that had been made. Then we designed our own filter with the things we learned, and tested it to see if it would work. The materials we had access to for our filter included cheesecloth, carbon pieces, sand, filter paper, and cotton.
Discover:
Water filters function by allowing liquid to flow through something but still holding on to the solid pieces in it, therefore taking them out of the water. The water is slippery, so it slides through the filter, but big pieces of dirt get stuck in the filter. Sometimes during filtration, only the clean liquid is used and the solids that were taken out are discarded. Other times, the solid that was filtered out is also used. Filters can be made of many different mediums and types of equipment. There are different methods of filtration and some are as simple as a plastic pop bottle with sand inside, which is what we did for our own filter!
The problem of trying to clean dirty water has been addressed in many ways by people in the past. The earliest recorded information about water purification was in 2,000 BC. Some different ways water was purified in the past were boiling water over a fire, heating water using the sun, straining water through cloth, dipping hot iron into water, and using gravel, stones or seeds. Early humans would dig a deep hole in the sand close to a muddy river, and the sand would filter the water so that it was clear.
All these ways of water filtration have helped us to improve the design of the modern filters we have today. Common water filters in modern houses can be in different forms. Some examples are filters inside water pitchers, sink faucet filters, refrigerator filters, and filters under the sink. All of these filter types have pros and cons such as cost, installation, and speed of the filtration process.
Dream:
Before designing our filter we came up with some ideas of how it could look. We knew we were going to put different layers it the filter but some things we considered were the order of those layers and the design of the filter body. We wanted to catch the clean water in a specific way so we had to design the filter body in a way that could do so. We were worried about removing both the visible toxins in the water as well as the microscopic ones. We also wanted to use different techniques and materials in the filter instead of just one.
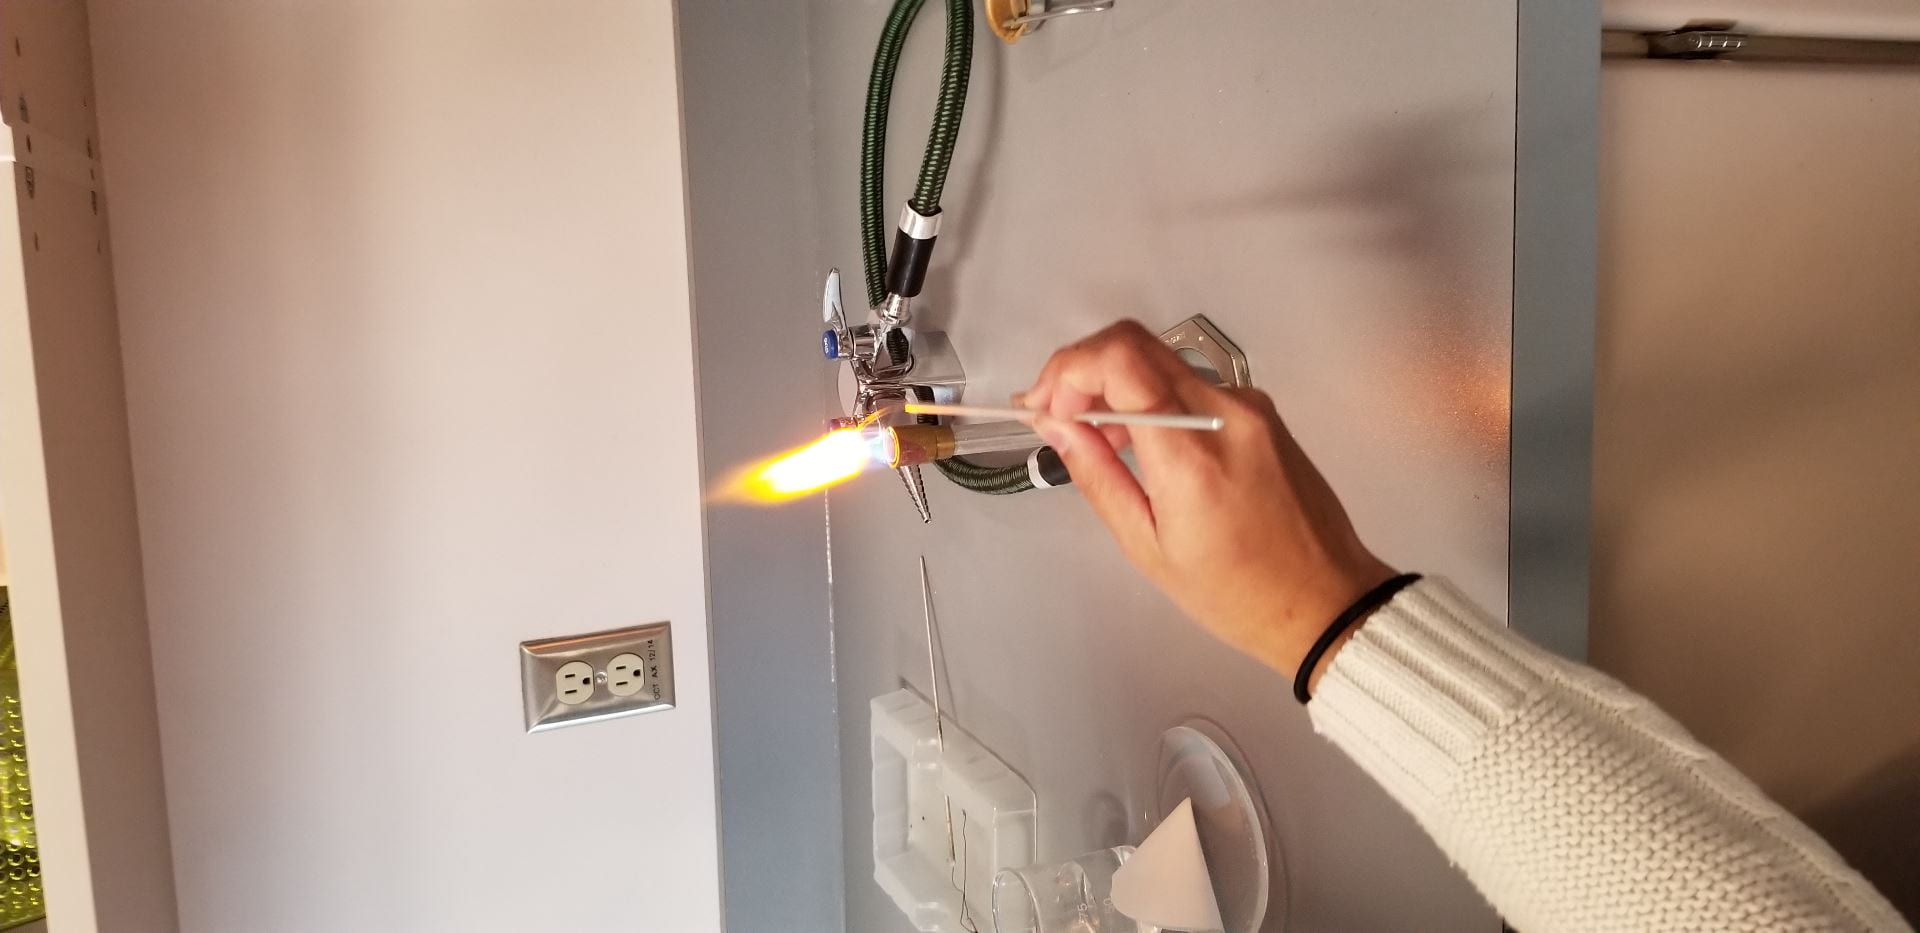
Before actually designing it, we tested a few chemicals in the flame of a Bunsen burner. We also tested the waste water (that we had separated into liquid and solid) in the flame. We wanted to know if any of the chemicals we tested were present in our waste water. That way we might be able to better design the filter so that it could remove those specific toxins.
These are the solid chemicals that we tested:

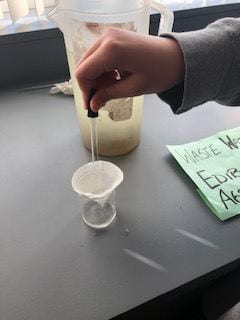
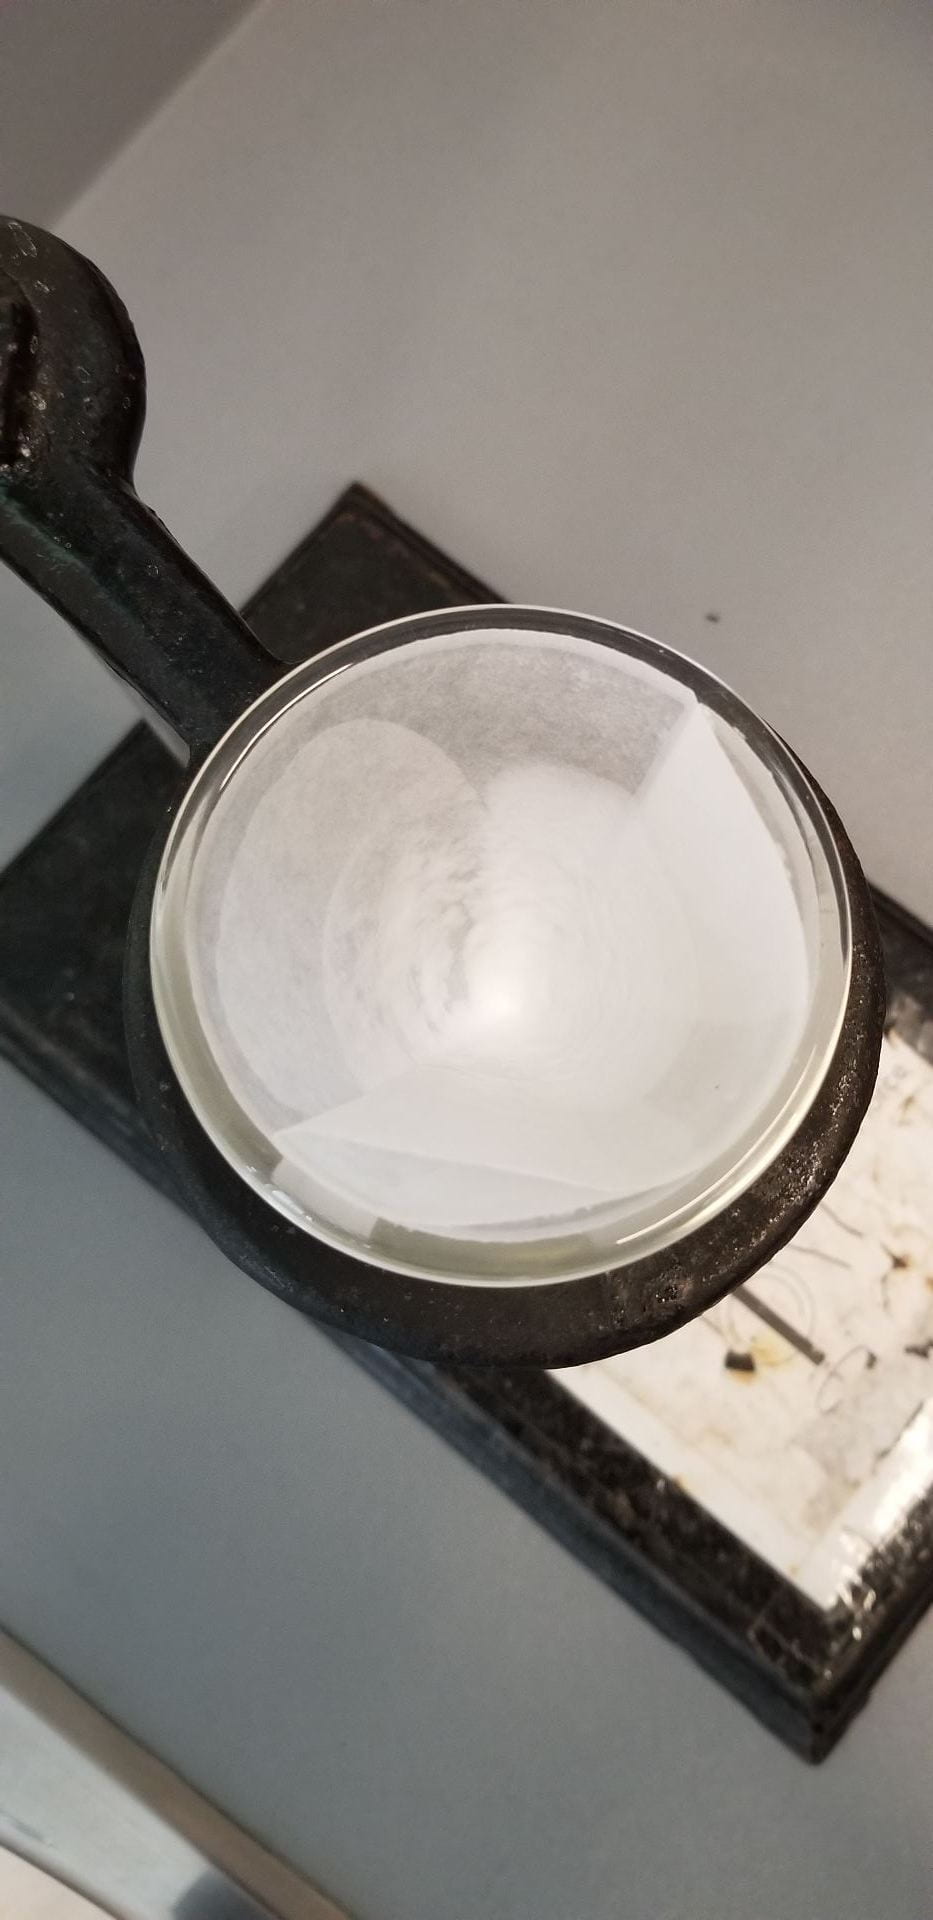
This is when we filtered a small amount of waste water to separate the solid from the liquid:

Here is a table showing the flame colours of each solid when we tested them:
| Type of Solid | Colour of Flame |
| Sodium Chloride (NaCl) | Orange |
| Copper Chloride (CuCl) | Blue, green and a little bit orange |
| Strontium Chloride (SrCl) | Red |
| Our solid (separated from the waste water) | A little bit orange |
Since the solid that came from the waste water made the flame a little bit orange, we hypothesized that there might be sosium chloride, or salt, in it.
Deliver:
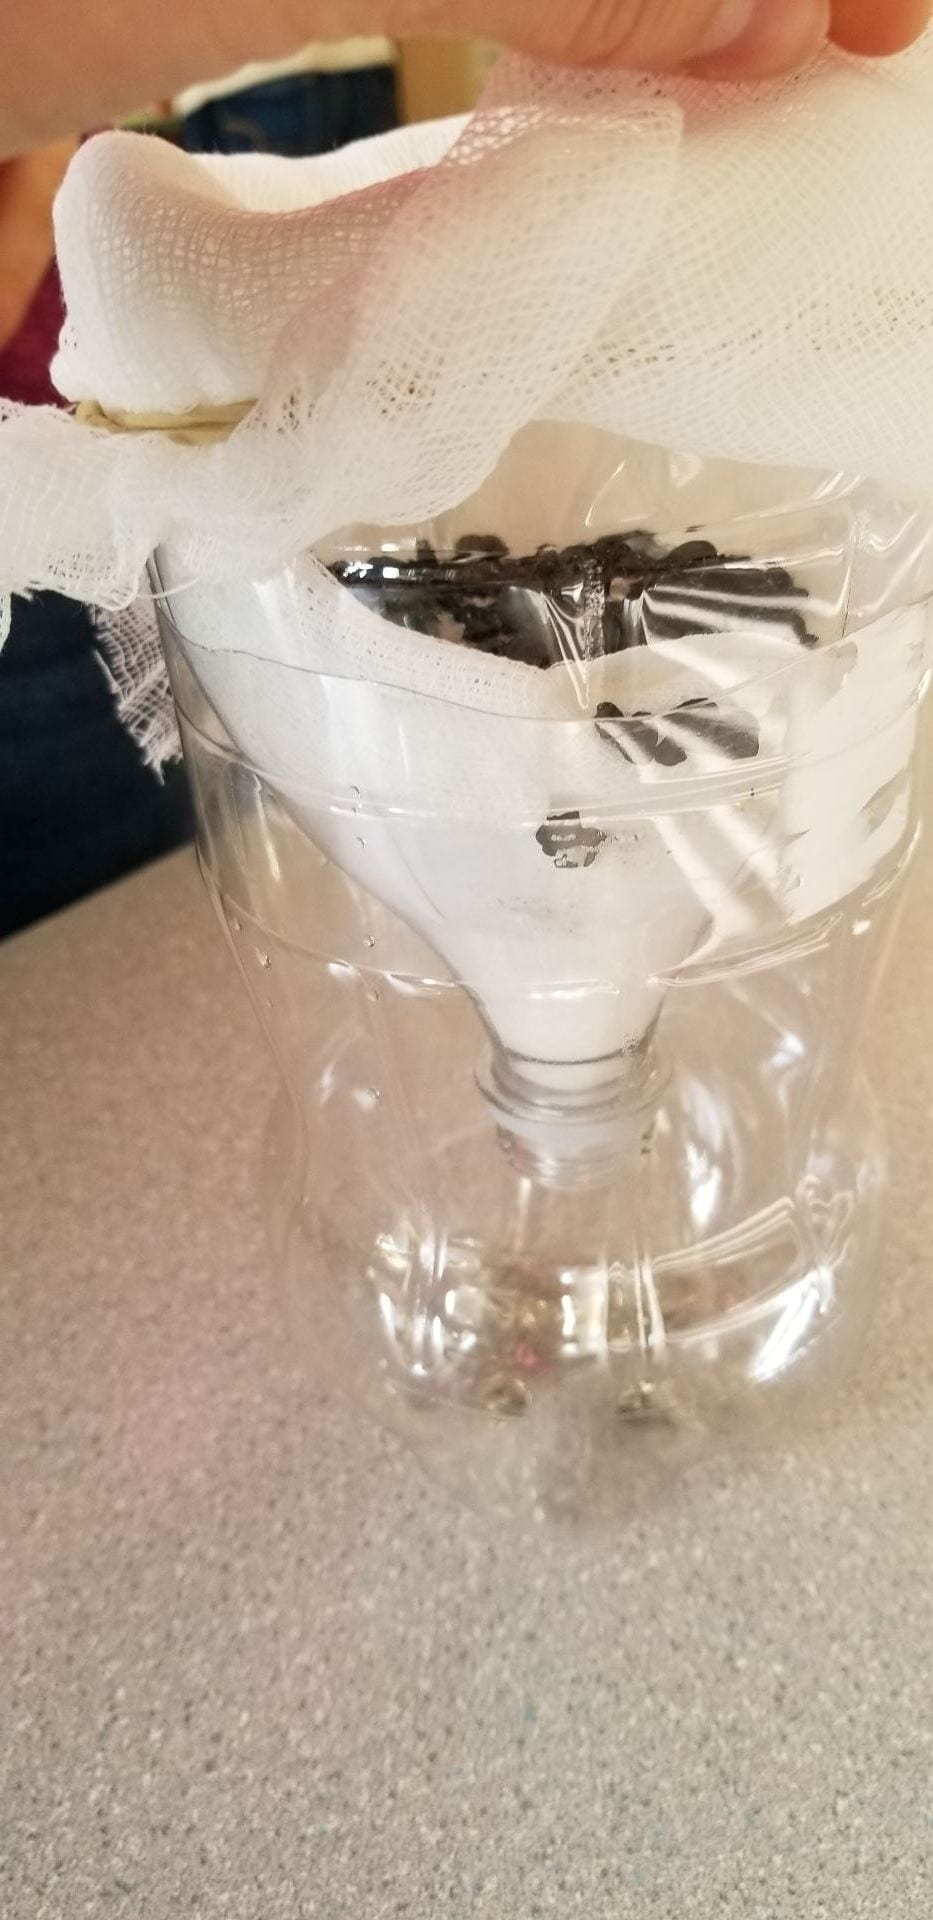
We decided that our filter design would solve the problem by focusing on the big pieces of dirt first and then slowly focusing on the smaller pieces. For our prototype, we cut the bottle in half and flipped the top half inside the bottom one. We decided to build our filter with different layers inside to slowly get rid of dirt and toxins in the water. As the water went through the filter it would slowly get cleaner and cleaner. Each layer had a specific purpose so that by the time the water reached the bottom it should not have had any remaining dirt in it.
We used cheesecloth held by an elastic as the first layer, to remove the big pieces of dirt or leaves. After that we put carbon pieces. Carbon can take out any toxins, chemicals, smells or tastes in the water even if they have been dissolved. Sometimes carbon is activated, so it has a positive charge. This means it will attract the chemicals. We also put sand underneath the carbon. It is similar to the carbon, as it also draws out pollutants or dirt. Since it is a natural material, it makes the final water safer because there aren’t any harmful things being used.
Then we put a second layer of cheese cloth to hold in the sand and carbon so it wouldn’t end up in our final clean water. We put cotton underneath that, and finally filter paper at the mouth of the bottle. The cotton was to take out any remaining pieces if dirt that had gotton past the carbon and sand. Since the filter paper is very fine, it only lets out water. We thought the filter paper should be the final step in the filtration process because it has the smallest holes so filters out anything solid, even if it is very small. This is the finished filter:

These are the observations and results of our prototype:
Before filtration:
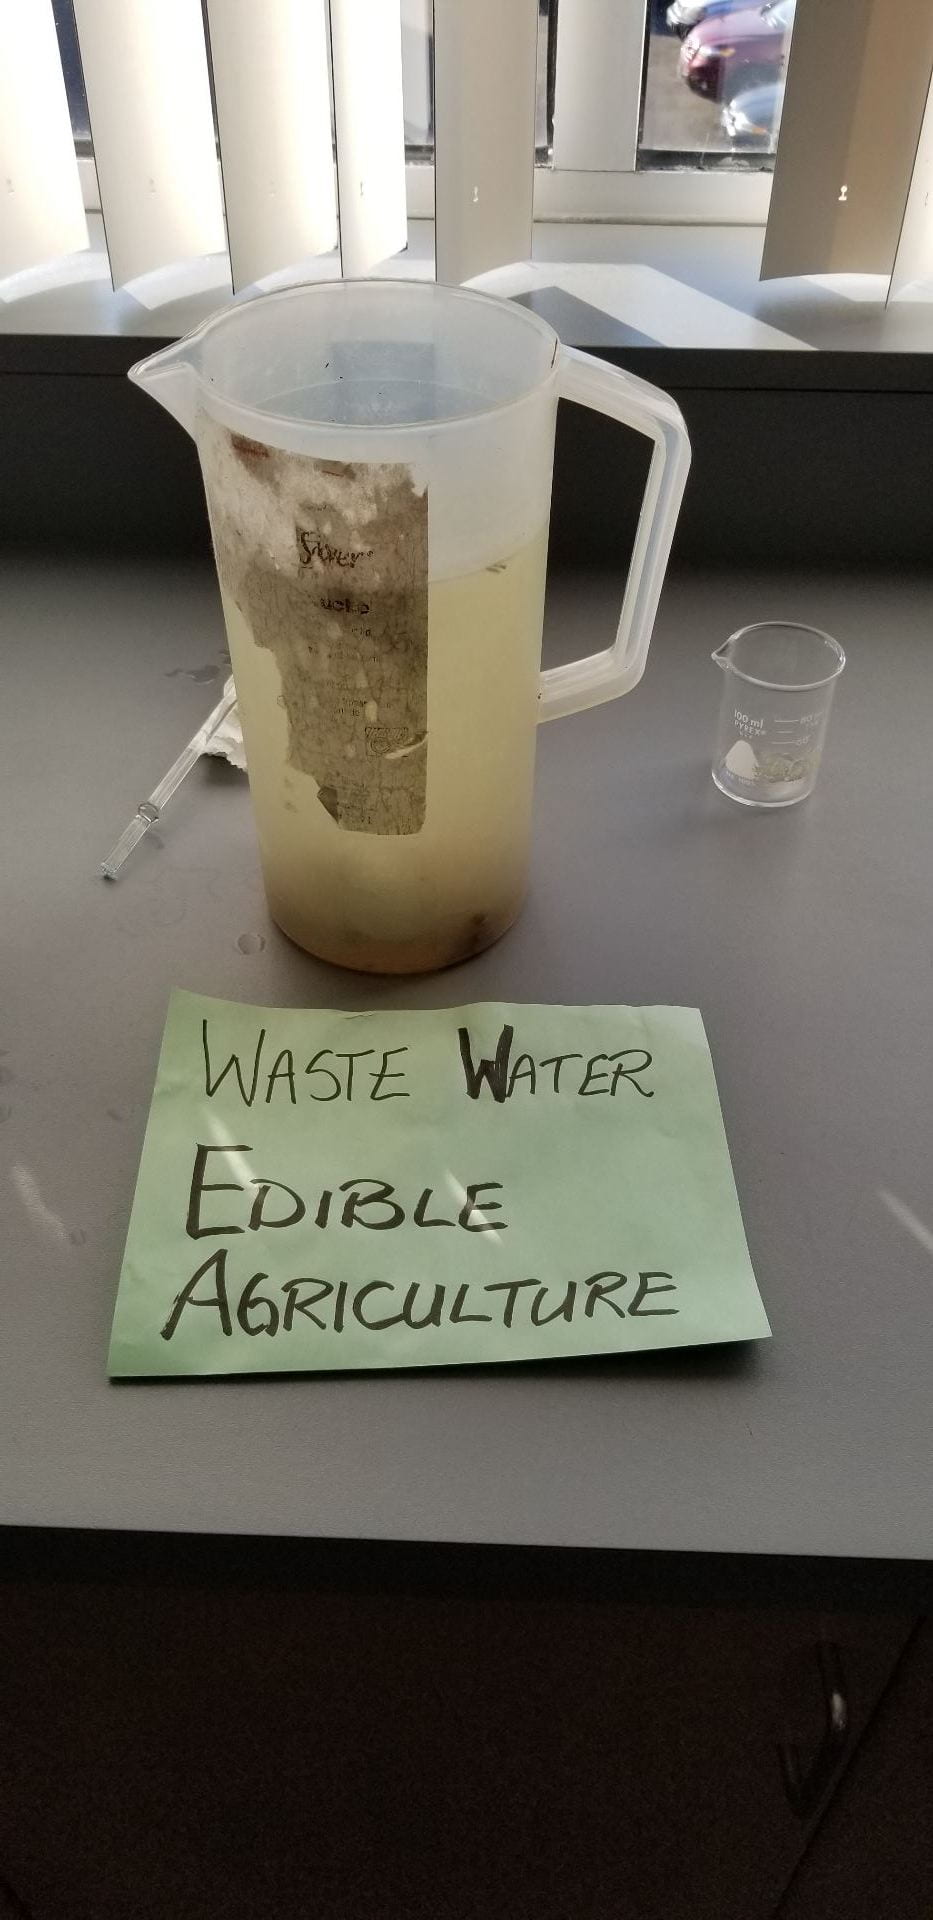
The waste water was transparent with a yellow colour. There were pieces of dirt, hair, and pine needles in it. It had a pH of 5. This is the waste water:

This is when we tested the pH:

During filtration:
This is what the filter looked like when we were ready to pour the water into it:
As we poured the waste water onto the cheesecloth (at the top of the filter), we saw the water go through the layers and slowly drip out the bottom. As the bottle caught the filtered water, we noticed that the dirt had been removed and we couldn’t see any visible pieces in the water like we could before.
After filtration:
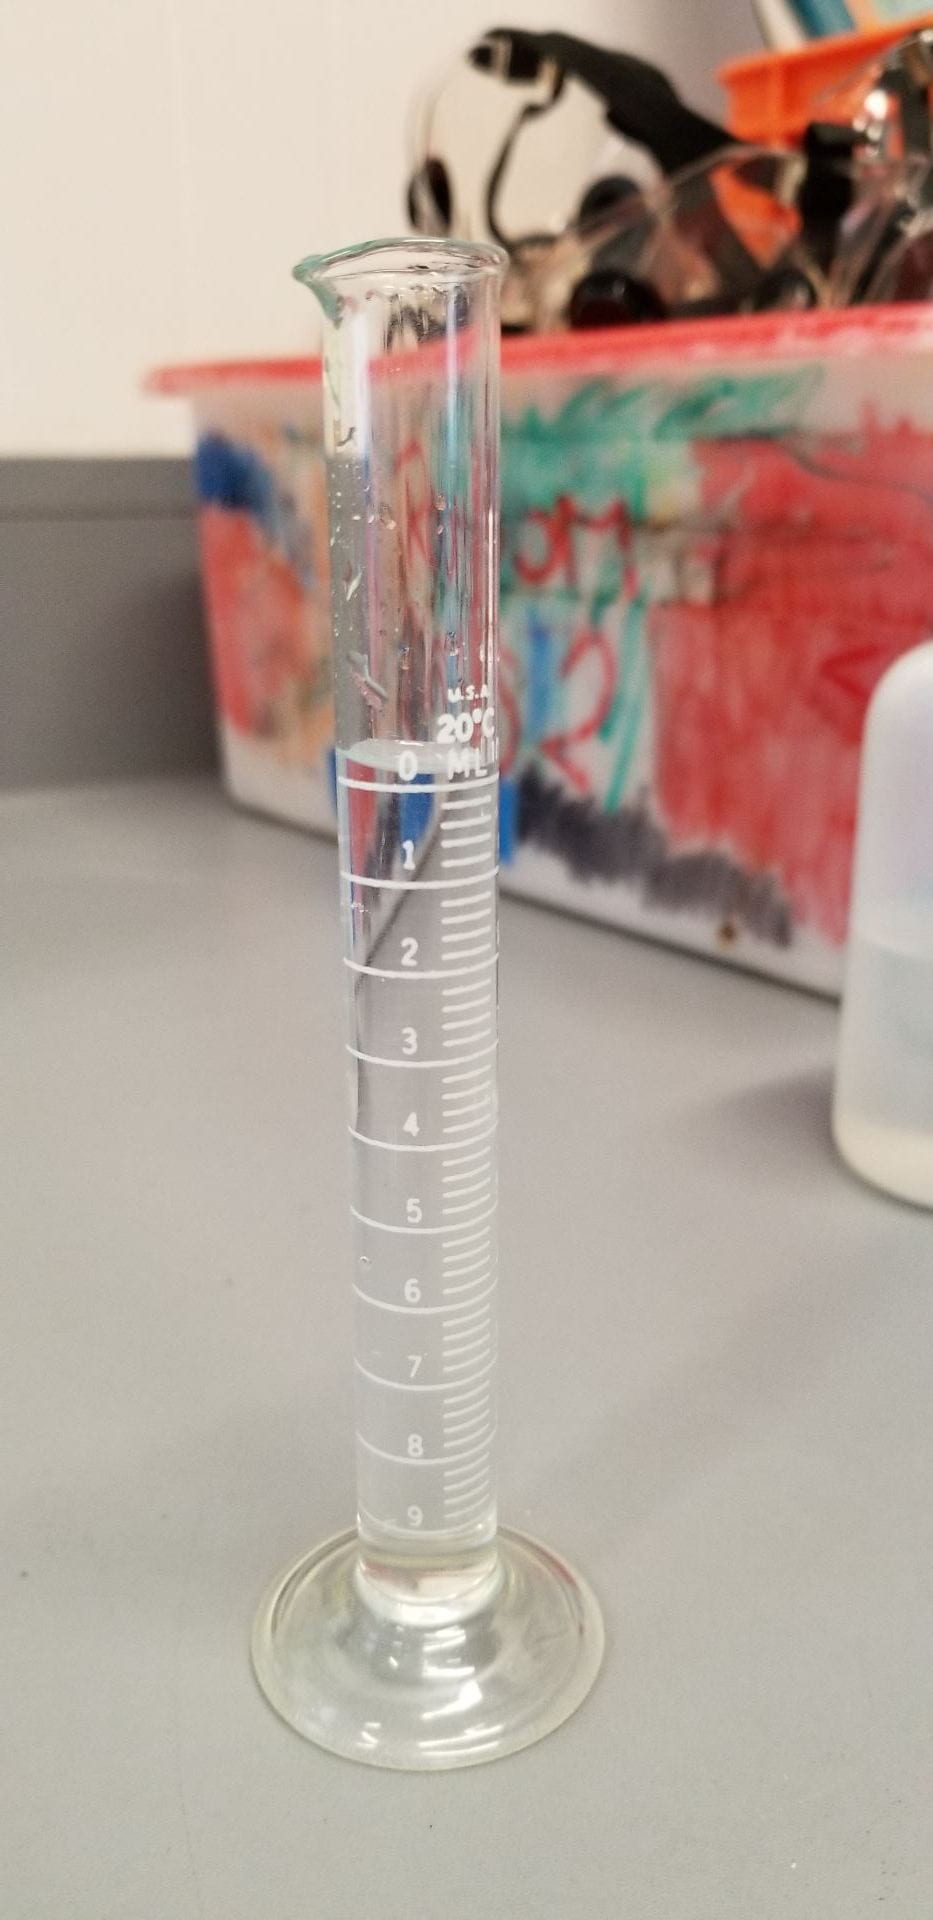
After filtering the waste water, it was transparent and mostly clear with a slight yellow colour. There was no visible hair or dirt in it. The pH of the filtered water was still 5. Although the visible dirt had been removed, we decided to filter it again to see if we could make the colour completely clear.
The big bottle has the water in it that we filtered once. The small beaker has the water that we filtered twice. We could tell that the water was a little bit more clear after filtering it twice, but still not 100% clear.

Debrief:
I think the process went well overall and our filter was affective in solving the problem. The design of our filter mostly worked how we wanted it to. The big pieces of dirt in the water were removed and the water was definitely cleaner at the end. The materials preformed as I had expected them to and our filter held its shape.
The only thing that didn’t go so well was that the water was still a bit yellow at the end instead of being clear like we wanted it to. Because of the second filtering that we did, I can infer that filtering it many times makes the water clearer and could take away more toxins. If we had more time, I think we could have filtered it again and again to see if it would make a noticeable change.
Also, we didn’t get a chance to try and change the sodium levels. In the future, I would have done a bit more research on that and try to find out how we could lower the sodium. To further improve our filter I could also add more carbon because we only added a tiny bit. Since I know that the carbon draws out toxins and dissolved chemicals, I think the water would have been clearer if we added a bigger layer of carbon.
Overall, I had fun doing this project and trying to solve the problem! I learned many interesting facts about how water was filtered in the past and how each material worked in our own filter.
Bibliography: (all citations done by EasyBib.com)
“Choosing Home Water Filters & Other Water Treatment Systems.” Centers for Disease Control and Prevention, Centers for Disease Control and Prevention, 3 June 2014, http://www.cdc.gov/healthywater/drinking/home-water-treatment/water-filters/step3.html.
Duvauchelle, Joshua. “Natural Materials Used for Water Filtration.” LIVESTRONG.COM, Leaf Group, http://www.livestrong.com/article/165592-natural-materials-used-for-water-filtration/.
The Editors of Encyclopaedia Britannica. “Filtration.” Encyclopædia Britannica, Encyclopædia Britannica, Inc., 7 June 2017, http://www.britannica.com/science/filtration-chemistry.
“THE HISTORY OF CLEAN DRINKING WATER.” The History of Clean Drinking Water | APEC Water, APEC Water Systems, http://www.freedrinkingwater.com/resource-history-of-clean-drinking-water.htm.
“Make a Water Filter.” Kids’ Games, Animals, Photos, Stories, and More, National Geographic Society, 22 Nov. 2019, kids.nationalgeographic.com/explore/books/how-things-work/water-wonders/.
All photos taken by me or my group members for this project.
In science this week we did a lab on observing chemical change. We mixed different liquid chemicals and tested them (in solid form) over a Bunsen burner.
Purpose:
The purpose of the lab was to see what substances are produced when a chemical reaction occurred.
Procedure:
For the entire procedure, refer to page 3-3C: Observing Changes in Matter.
Although we followd the procedue on the page we made a few changes to the chemicals used and the amounts of those chemicals. Instead of using Calcium Chloride (CaCl₂) and Lithium Carbonate (Li₂CO₃), we used Sodium Carbonate (Na₂CO₃) and Strontium Chloride (SrCl₂). We also changed the amounts of those chemicals from 25 mL of each one to 10 mL of each one.
Data and Observations:
In general the two reactants, sodium carbonate and strontium chloride looked the same at the beginning of the experiment. This is a data table of the physical properties that I observed.
|
Observations of Beginning Reactants |
||
| Reactant: | Sodium Carbonate | Strontium Chloride |
| Colour: | No colour | No colour |
| Consistency: | Thin | Thin |
| Transparency: | Completely transparent | Completely transparent |

(Sodium Carbonate and Strontium Chloride)
Observations of Changes:
After mixing the two reactants the chemical that formed was milky and white. It was actually two separate materials.We used filter paper to separate the two and found that one was white and powdery while the other was clear like the first two reactants at the start. I think this was a chemical change because a new substance was created, that was made of two different materials.


(The new substance)
(A video of filtering the new substance)
Flame Test Results:
When we passed Sodium Carbonate ions (in powder form) through the Bunsen burner flame, the flame turned bright orange. When we passed Strontium Chloride ions (in powder form) through the Bunsen burner flame, the flame turned slightly orange and mostly red.
The unknown solid that was the product of our reaction turned orange when passed through the flame. It was the same colour as the first flame test, Sodium Carbonate.

(The flame before anything was passed through it)
(The orange flame)
Analysis:
After testing all three solids in the Bunsen burner flame, I believe that the unknown solid was the Sodium that had been mixed into the unknown solid. Since Sodium is a metal, and it turned orange in the flame test, the unknown solid is also sodium because it turned orange too. They were both white powders as well, which means that the plain sodium ions and the unknown powder have both similar chemical and physical properties. This is why I think that the unknown white powder is sodium.
I think that the unknown liquid that had been filtered through the paper was Chlorine, because there had to be a part of Strontium Chlorine in the final substance, and Strontium is a metal. The sodium was already the metal in the substance. This is why I think that the liquid that had been filtered was Chlorine.
In a chemical reaction, the atoms at the start must be there at the end because they can’t disappear. They can change partners though, so I think the Sodium bonded with the Chlorine and the Strontium bonded with the Carbonate. Also, Sodium and Chlorine make each other neutral because their charges equal 0. ( -1 + 1 = 0) Therefore the Strontium and the Carbonate must have also bonded. Their charges match up as well. (-2 + 2 = 0)
(The unknown white powder in the filter)
Conclusion:
In conclusion, I think that the final unknown product that we tested was partly Sodium (the powder) and partly Chlorine (the liquid).
During this lab I learned about chemical change and how there was a new substance created when the two substances were mixed. Although the new substance had different physical properties, the atoms were the same because they were there at the start and cannot be destroyed or created.
If I was to do this experiment again, I would make the observation table of the reactants right at the start of the experiment. That was it would be more clear to me and easier to put into my blog. I would also take more photos of the flame test to clearly see both colours. I think since the flame only turned the colour for a few seconds when the compound was passed through, it was difficult to get a clear photo.
During this experiment about chemical change, I learned what happens when two reactants are mixed and how to filter them apart. I also learned how to properly use a Bunsen burner and test a solid. I hope to do more of these types of experiments in the future!

On take your kid to work day I went with my mom, who is a costume cutter for the show Riverdale. I learned a lot about how T.V. shows are made and how it takes a lot of time to create every episode. I got to meet many people who were involved with Riverdale, including the costume designer, a director of photography (the D.O.P.), the production assistant, the production coordinator and people from props.
Here is the TOKTW assignment:


Here are some pictures of the production office:


Overall, I learned so much during TOKTW and I would definitely be interested in a job in the film industry in the future!
This is a self-reflection that I wrote about my lantern project in Art Studio 3D:
Loading...
Here are some photos of the lantern when I finished it:


My big question about climate change is how can I reduce my effect on climate change through my passion of cooking?
Food is one of my biggest passions. I love to cook and bake, make old recipes, and create new ones. I am in the kitchen very often, either making a meal or experimenting with a new recipe. I know that food can have a big impact on our world and on climate change. I want to know how I can be more conscious when I am cooking so that it is better for the environment. I want to be able to use ingredients that are better for our planet, and get them in ways that are environmental. I came up with three simple solutions that I can use when I cook to help reduce my impact on our climate.
Solution 1:
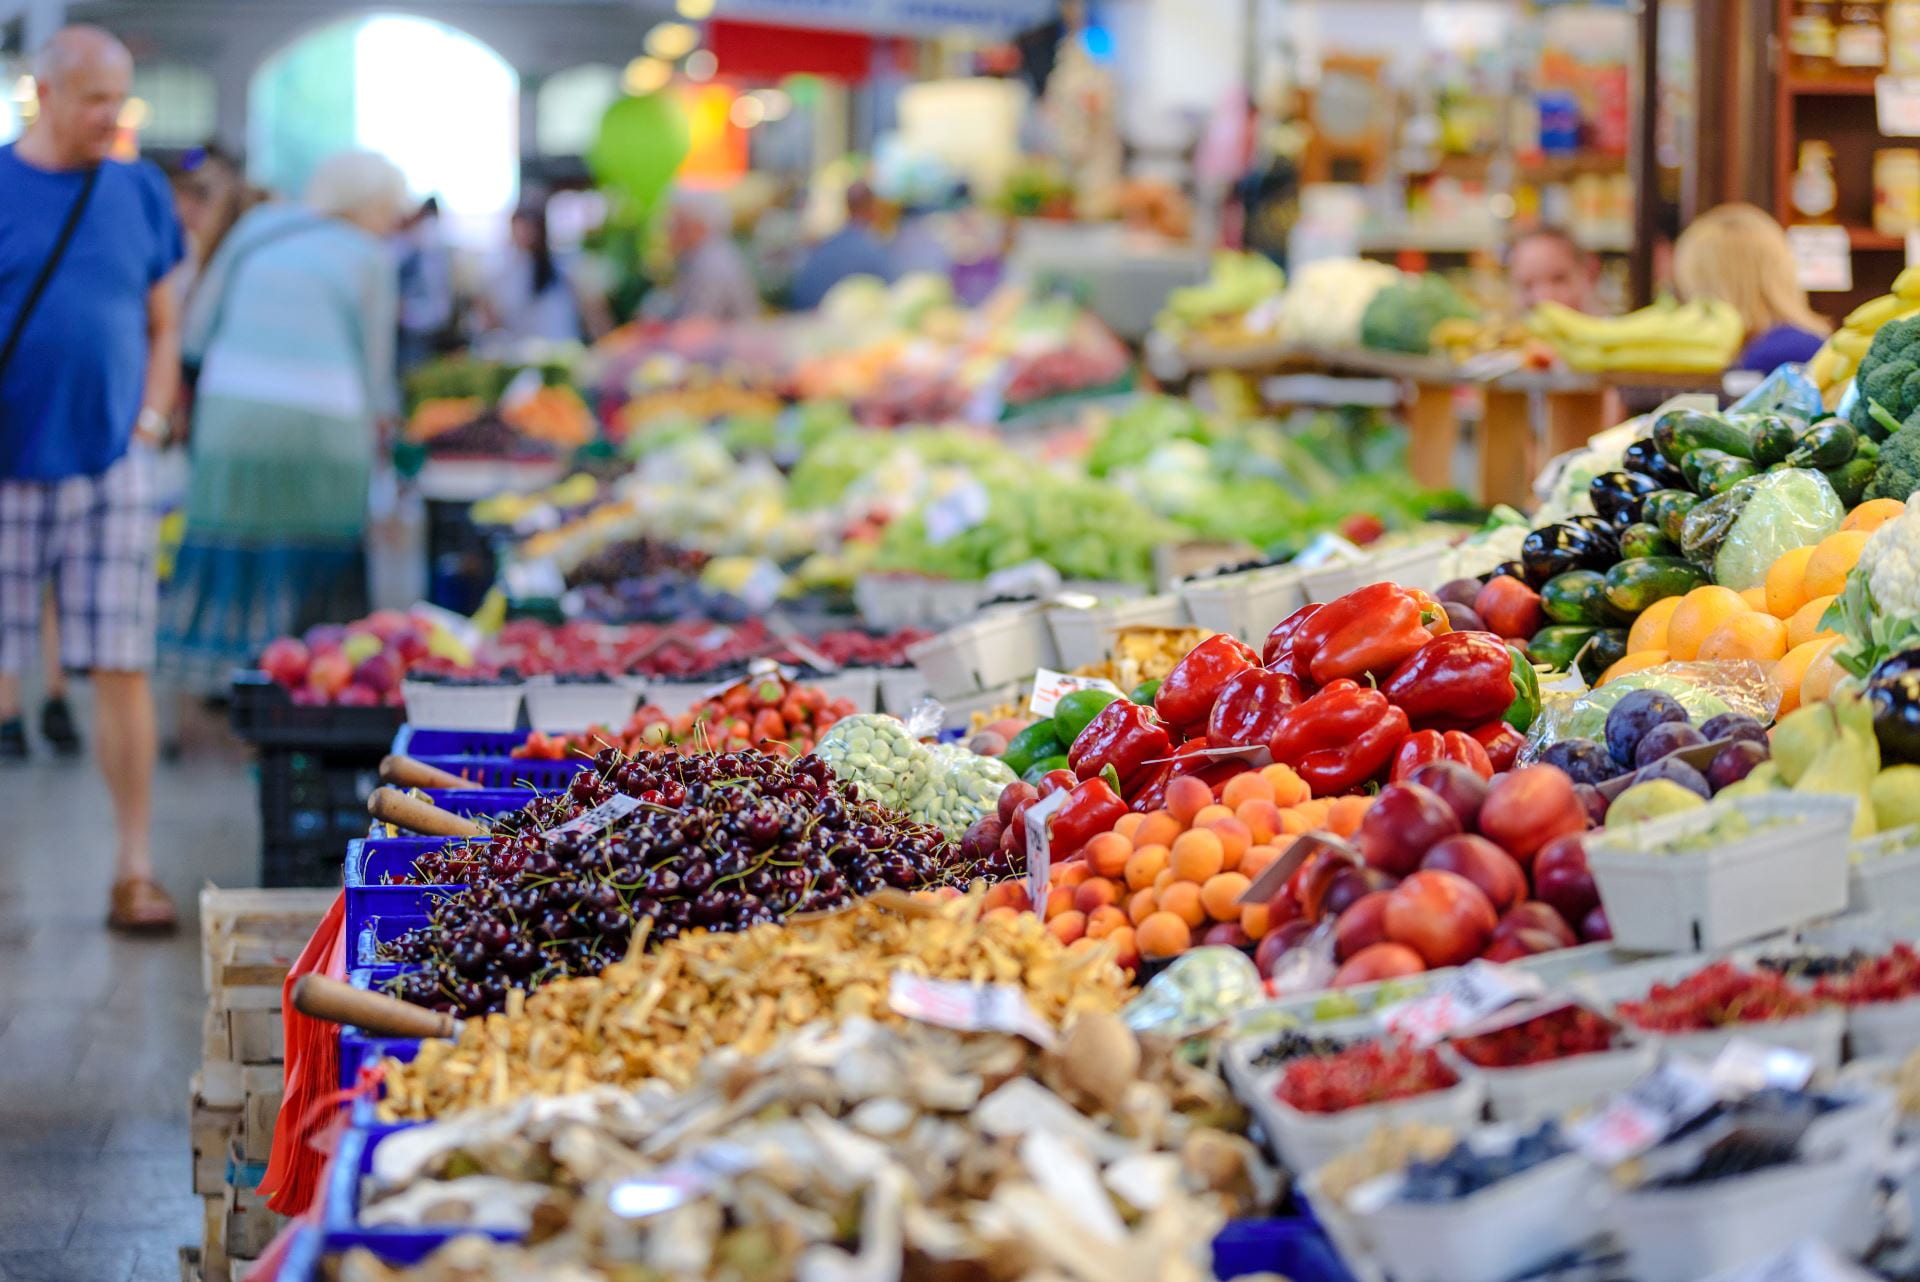
My first solution is to reduce my food waste when I am cooking. Food waste is a huge factor to increasing climate change because if food is put into the landfilI it rots and produces methane gas. This is a common greenhouse gas that adds to the heating of the earth. About 1 third of all the food produced in the world is lost or wasted. That is 1.3 billion tonnes of food every single year. Not only does this produce more methane gas, but it wastes money too. As the population of the earth gets bigger, we need more food and therefore make a bigger impact on the environment. All of this food being wasted could actually feed others who really need it.
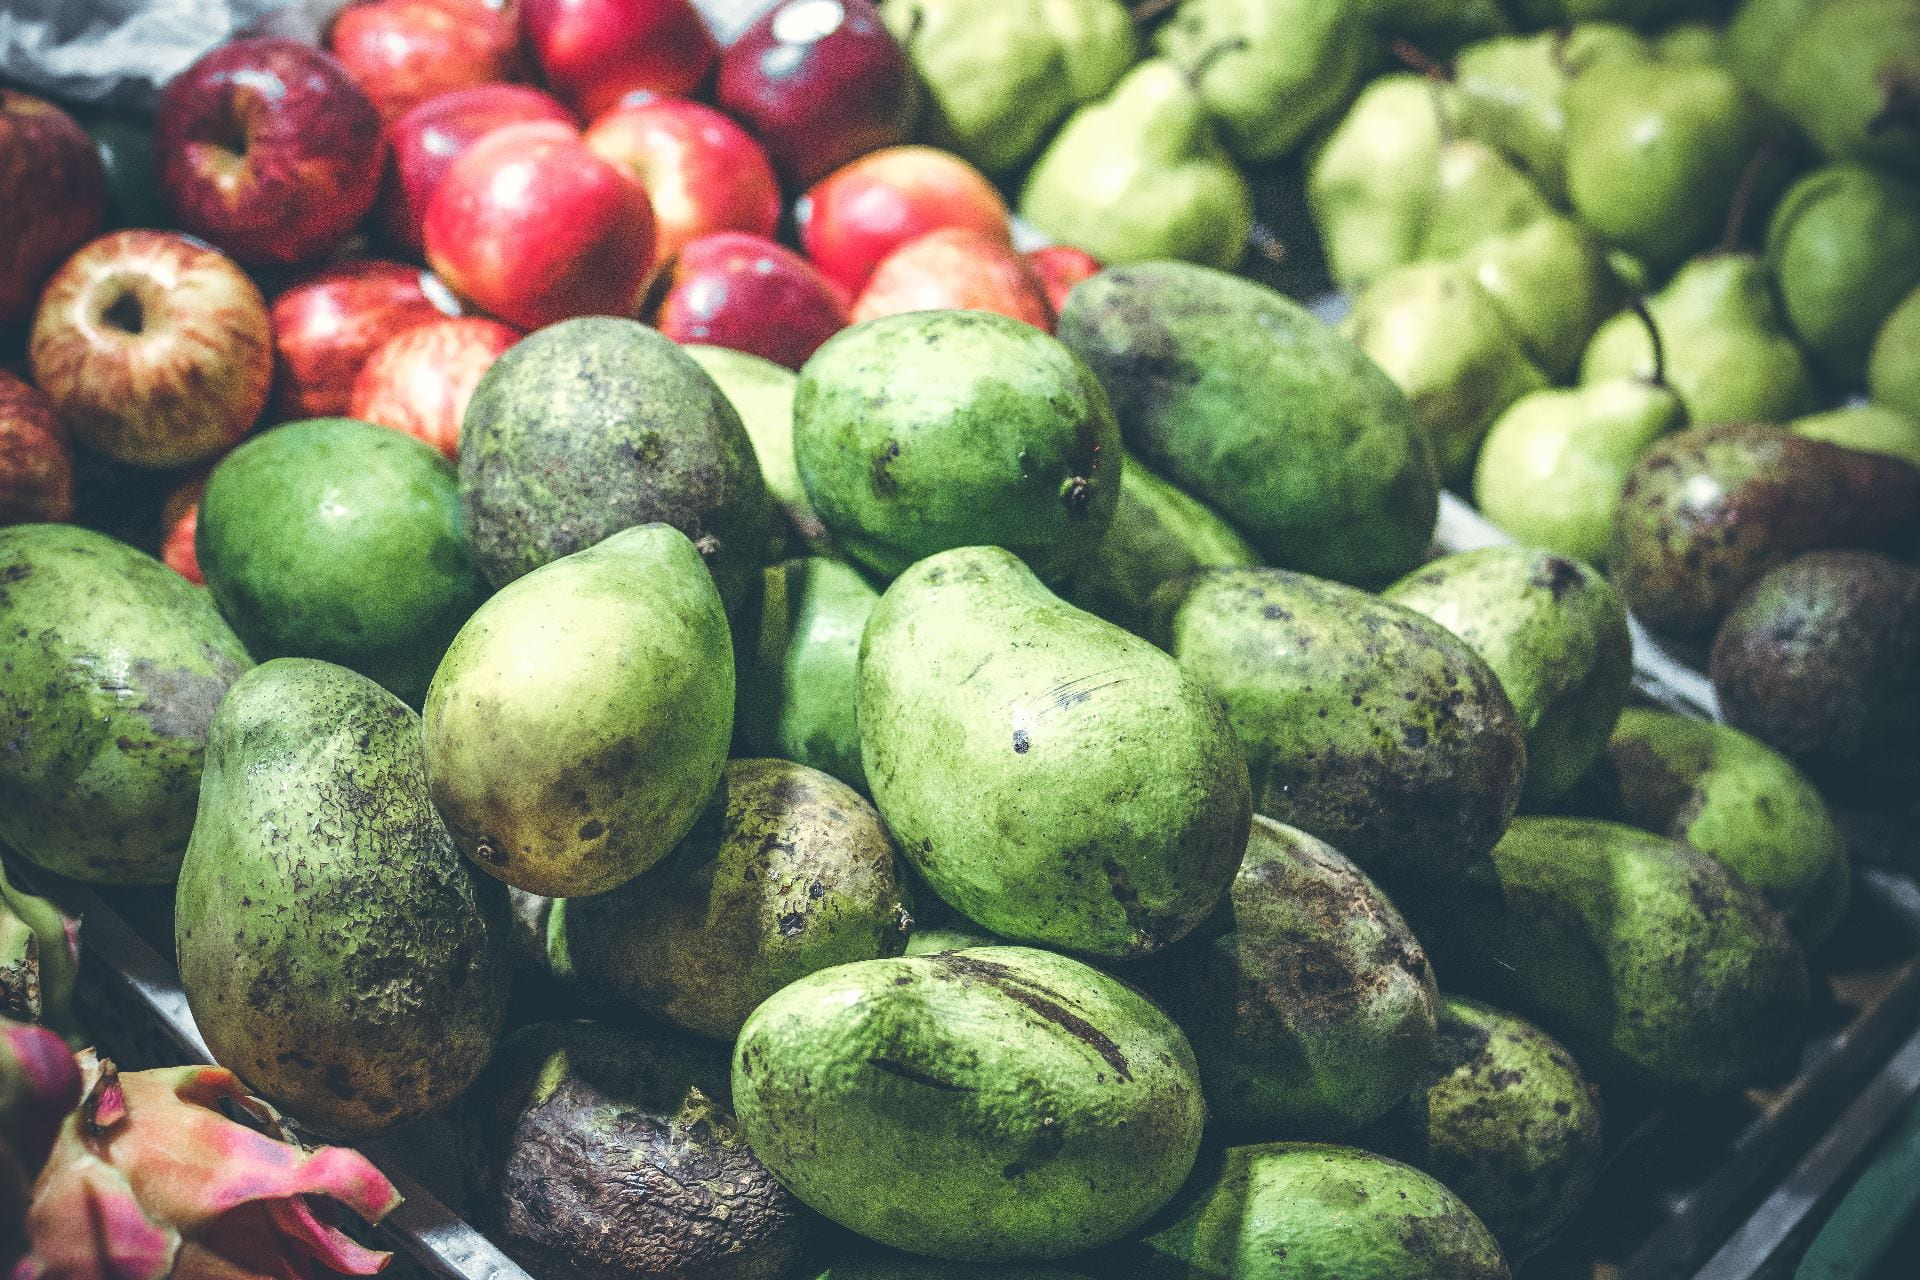
Overall, I realized that food waste has a bigger impact on climate change than I thought, and reducing it is a simple thing I can do when I am cooking. It is important to shop smart and only buy what I am going to eat. If I buy more than enough food, some will go rotten before I have a chance to eat it, and it will most likely go to waste. Food that rots easily often gets wasted. If I do have food that is going bad, I should eat it first, instead of something that I just bought. It is also very useful to freeze or pickle foods to preserve them so that they last much longer. When I am grocery shopping I could also choose produce that has a bruise or blemish. Even though they may not look perfect, it will still taste the same and the inside is completely fine to eat. Choosing foods that might not look perfect is a very good way to reduce food waste because if people are too picky to buy them they will go bad and get wasted.
The way food is stored is also a huge factor in how long it lasts. Food that is stored incorrectly will go bad sooner and therefore go to waste. If a refridgerator is disorganized, foods at the back can get forgotten and spoiled. An organized fridge will help to keep track of what foods need to be eaten when. Some foods, like bananas, tomatoes, peaches, and green onion, make a gas called ethylene when they ripen. If other foods, such as potatoes, apples, and peppers are stored next to a food producing ethylene, they ripen faster and spoil. So storing those foods separately cuts down on the amount of food that is wasted.
Parts of foods that are usually not eaten but still edible, can be saved and used in creative ways to reduce the food that is thrown out. Some examples are bread crust, fruit peels, stems or ends of produce, and carved pumpkins. These things can be used in soups or smoothies and then eaten. This reduces waste and is also more healthy because these foods that are usually wasted actually have lots of nutrients in them.
Finally, an easy way to save time, money, and reduce waste is to eat leftovers. Instead of buying a meal, eat the extra food that was made the night before. Leftovers can also be donated to help a good cause and reduce waste. Portion control is important as it makes sure that all the food is eaten instead of some being thrown away because it was too much.
Solution 2:
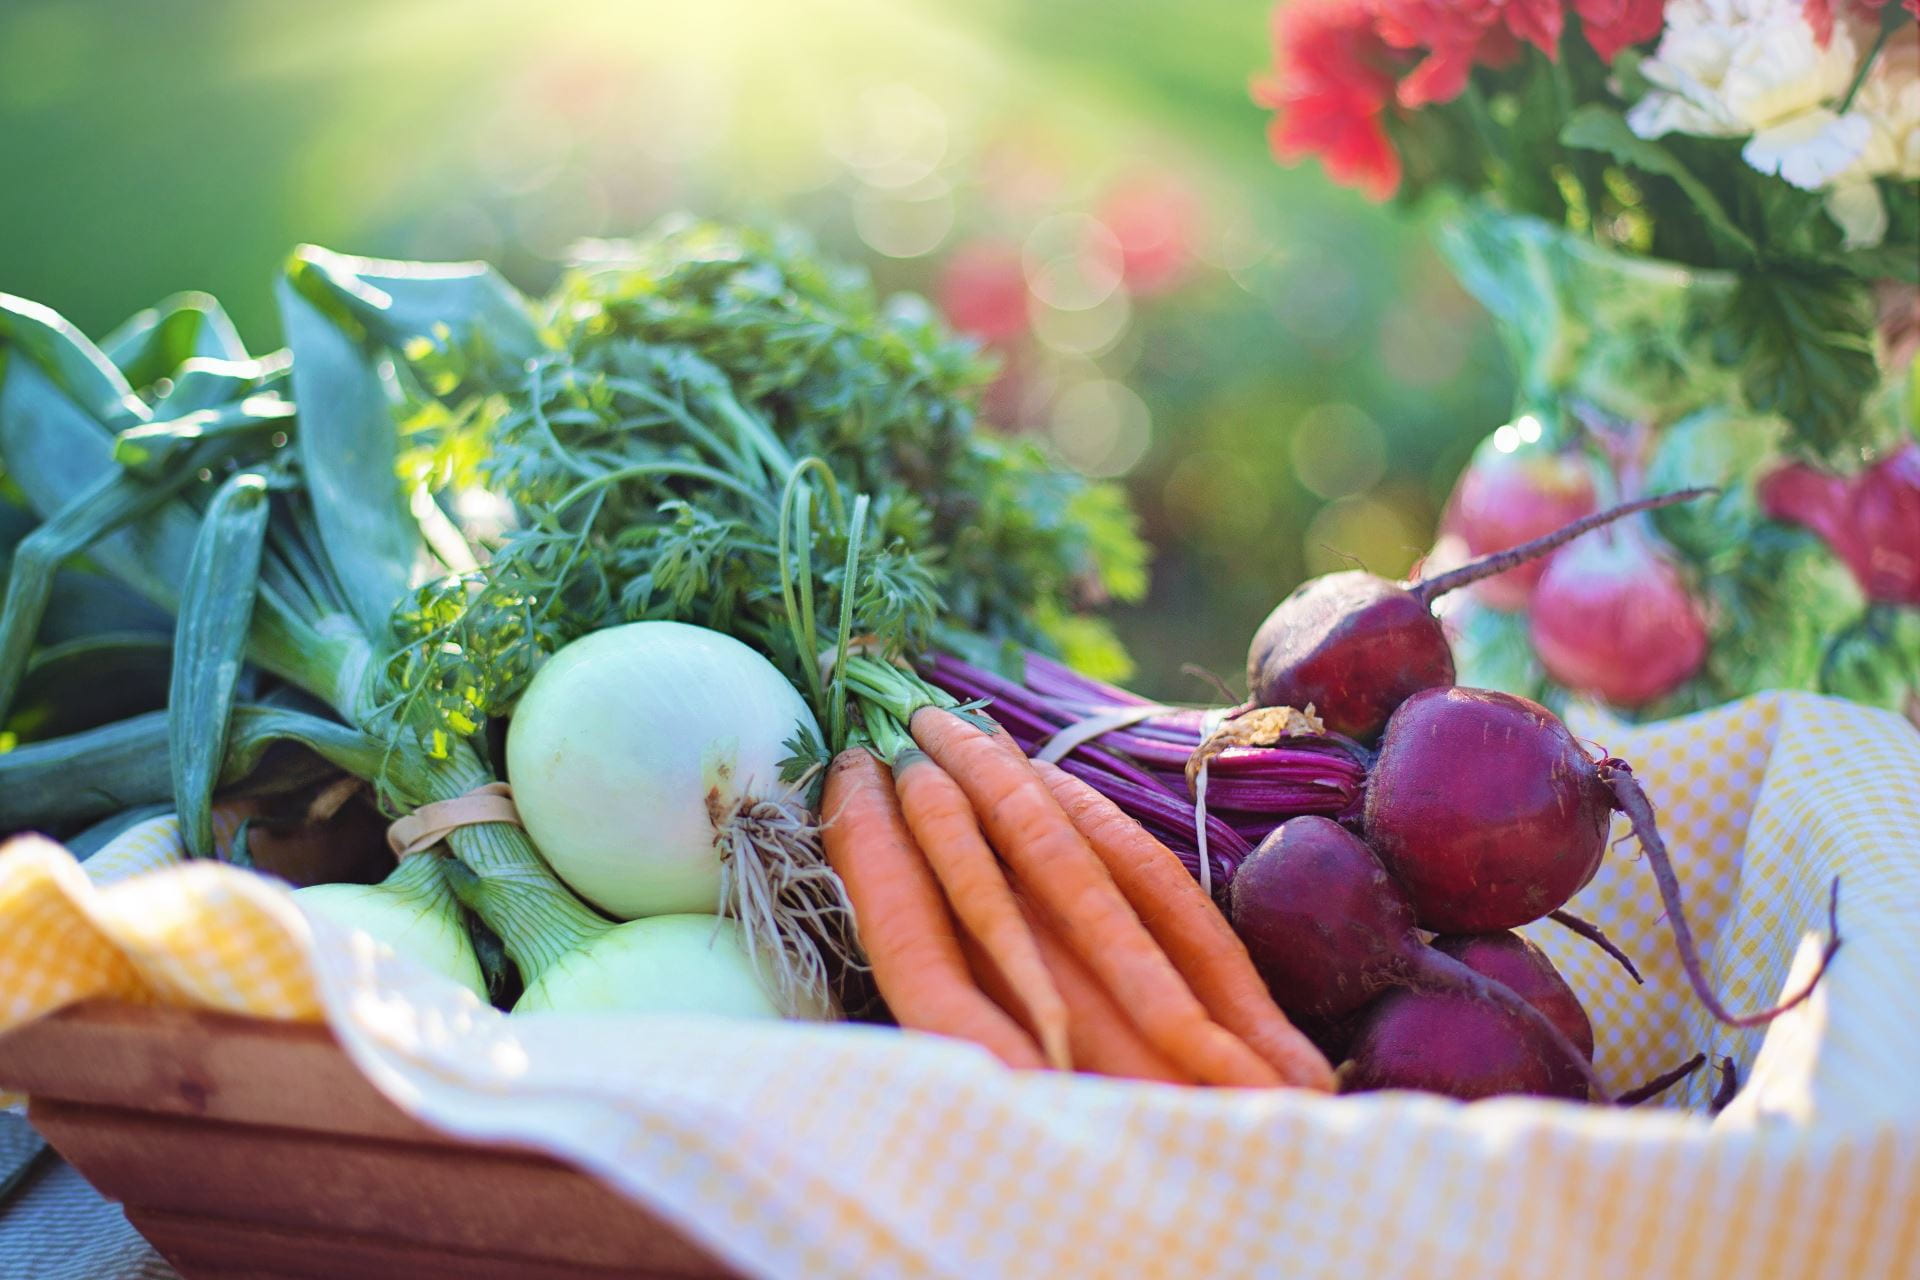
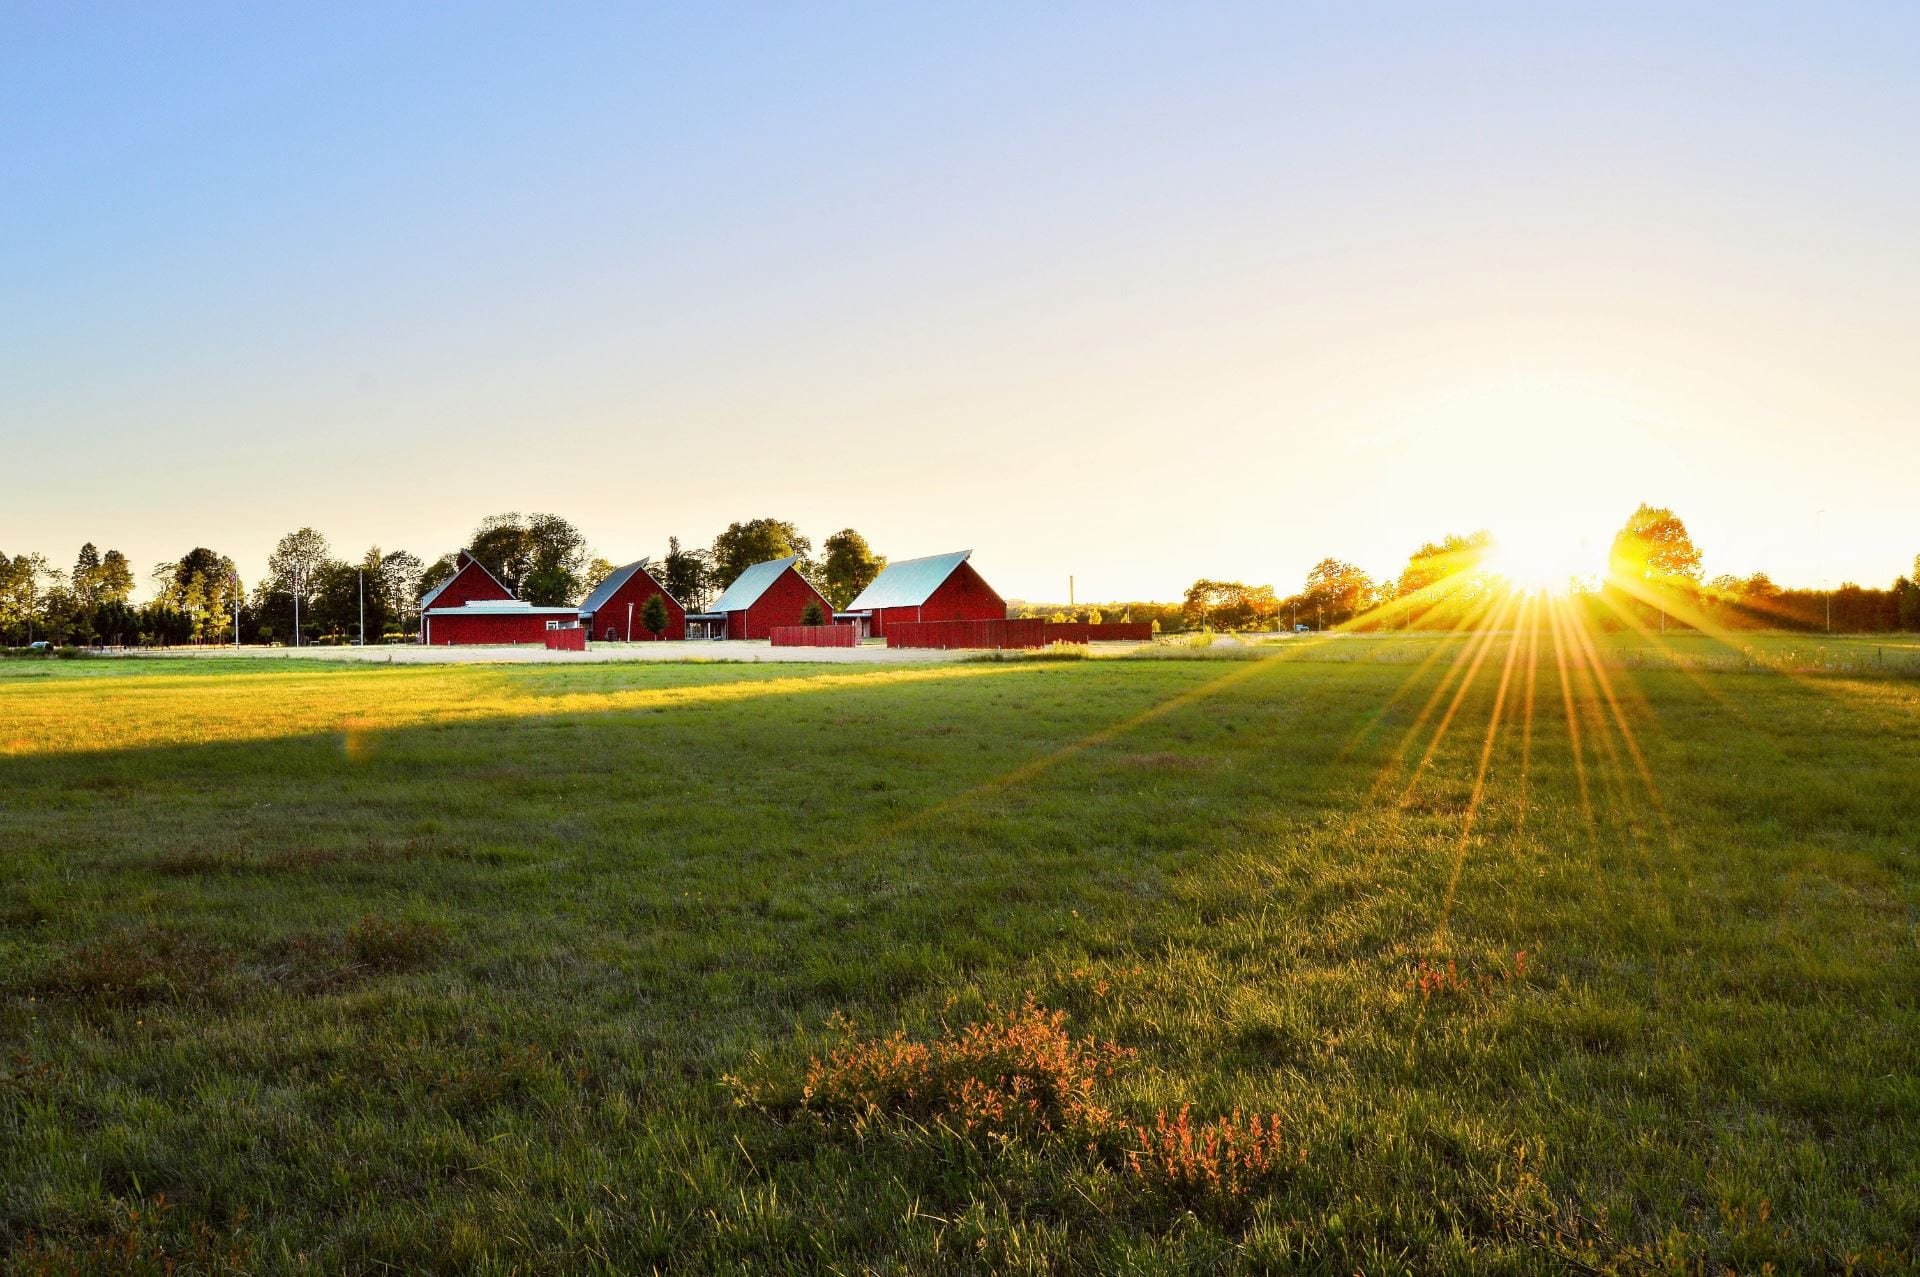
My second solution is to use more sustainable ingredients. A sustainable ingredient is grown, packaged, distributed, and consumed in a sustainable way. Using sustainable foods helps to keep ecosystems safe, supports biodiversity, respects natural resources and provides for the local economy. Sustainable food doesn’t waste or ruin natural earth resources, and the impact on ecosystems, air and water is considered by the farmers. They use the practice of crop rotation, where they grow a different food in a certain spot each year. This helps biodiversity and protects the soil’s health for the future.
Also, workers producing or transporting sustainable food are paid a fair, living wage and given safe, hygenic working conditions. Sustainable companies treat their animals respectfully, giving lots of care to their health and well-being. They are not confined to a cage, and farmers try to minimise or take away the suffering that the aninmal would go through when the food is being produced. Health and nutrition considerations are important in sustainable foods as well. The food produced should be healthy and safe with no chemicals, antibiotics, or growing supplements. Pesticides and GMOs are avoided as well.
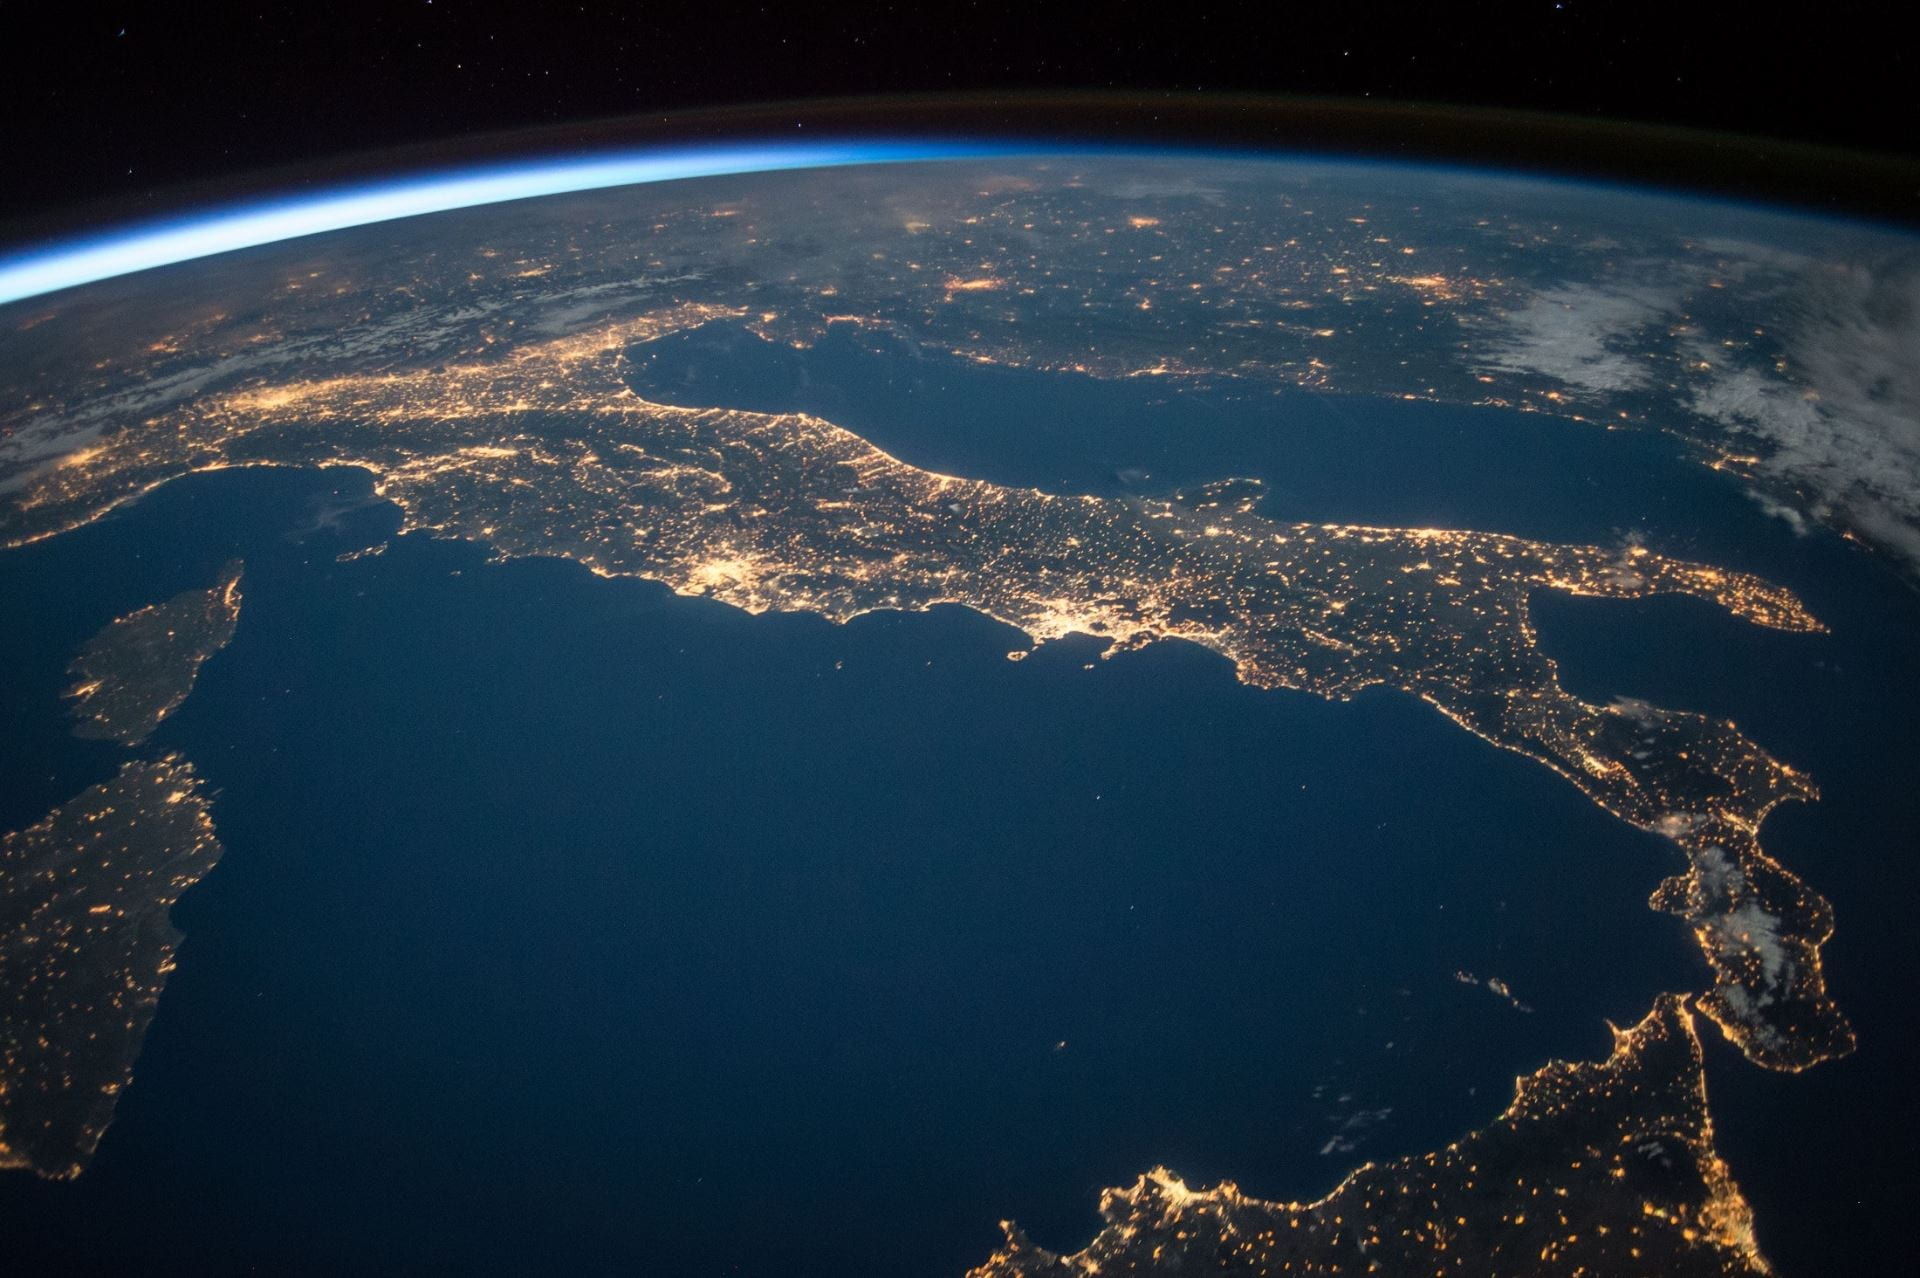
Most importantly, sustainable ingredients limit climate change by being produced and transported in a certain way. The use of energy is important when moving or storing food, especially animal agriculture, because it leaves a big carbon footprint. Food can travel a long way from the farm to the grocery store, and then the store to a plate. This can be known as “food miles”. Food that travels a long way greatly impacts climate change because it produces huge amounts of carbon, which goes into the atmosphere and adds to the greenhouse effect.
Overall, a sustainable ingredient benefits the diversity of the environment, is respectful to animals and workers, is nutritious, and has a positive impact on climate change. While farmers do need to make money, they can do it sustainably, improving their output of food while still respecting the environment around them.
After learning all of this about sustainable ingredients, I have found some ways in which I can use them more often in my cooking. First, I can buy seasonal food from local farmers. If the food was grown close-by, it leaves way less of a carbon footprint from transportation. If specific fruits or vegetables are in season, they are less likely to have growth chemicals in them. I can also do some more research on brands that support sustainability, and simply buy ingredients from those brands. Then I am supporting those brands, instead of other ones that don’t produce sustainable ingredients. Finally, I can grow food myself, because it would definitely be sustainable, and very nutritious.
Solution 3:
The final solution that I researched is to save energy in the kitchen and food I buy. Food grown in a greenhouse uses lots of energy from all the lighting and heating. Lettuce and tomatoes especially have been said to have a huge carbon footprint and take up a large amount of energy to be grown, stored and transported. It takes lots of transportation to bring food to homes and grocery stores. All of this energy produces greenhouse gas emissions which affects climate change. Food production creates up to 1/3 of greenhouse gas emissions on the earth.

Some easy ways I can save energy in my kitchen are to cook small dishes in the microwave or slow cooker instead of the full size oven. It uses 30% less energy and will put less heat into the house so less energy is used in air conditioning. Cooking without a lid also uses 3 times more energy than if I do use one. I can turn off the oven or stove early when making some meals, because it will still be hot to finish cooking. If I am pre-heating the oven, I should make sure that as soon as it is at the right temperature I put the food in. The best option would be to not cook at all, saving the most energy. It can be fun to experiment and find no-bake recipes.
Another way to save energy is to be smart with the fridge. 14 percent of a house’s energy is used by the refridgerator. To minimise the energy being used I can make sure the door isn’t leaking air, and taking more energy to keep itself cold. I shouldn’t keep the fridge door open for a long time because all the cold air will come out and it will take time to cool down again. Letting hot food cool before putting it in the fridge is also helpful so that the fridge doesn’t have to use more energy to cool down.

I can also reduce my water waste to conserve energy in my house. I find that whenever I cook I do use a lot of water and I want to practice using less. Wasting water contributes to climate change because it takes energy to treat water and transport it. I can save water by running the dishwasher only when it is a full load. If I am washing dishes by hand, I should not let the faucet run. I can also let dishes air dry instead of using energy for heat inside the dishwasher. I can line baking sheets with foil or parchment paper so that less water is used to wash them. Then I can reuse the foil or compost the parchment paper.
Finally, I can grow food myself. Growing food at my house saves energy because it has no food miles. Because it doesn’t travel at all, it therefore stays fresh longer. It is also more nutritious because it is natural, organic, and I know exactly what is in it. If I can’t grow it myself, buying food locally is better because it is grown on a farm, not in a greenhouse. This uses less energy, has less food miles, and supports local farmers. Producing livestock also uses a lot of energy, so if I reduce my meat consumption the carbon dioxide emitted into the atmosphere goes way down.
In conclusion, there are many things that I can do when I am cooking to reduce my impact on climate change. I can reduce my food waste to lessen the amount of methane gas produced, use sustainable ingredients to protect ecosystems and save energy to reduce greenhouse gas emmissions. There are other things I could do to reduce my impact as well, including shopping smart, recycling, and planning, but these are just a few of the many options. It is not complicated to reduce my impact on our changing climate, and I can even do it in an easy way while enjoying my favourite passion.
Infofluency questions:
1) In order to find solutions to my main topic question, I made a few smaller questions that were related to it. That way, I could research the answers to them and then put all the information together to make solutions. These are my smaller questions:
2) As I worked through this project, the digital tools I used were mostly familiar. I used the Riverside library website to get to some sources that I know are reliable, like World Book Online and Gale. I have used these in past middle school projects so I know that they are truthful and have good quality information. For this project though, I found it hard to find information on those sites that was related to my topic. I found one, but I also decided to use other websites I found because they had more information related to what I was looking for.
To make sure my sites were fully reliable I used the information fluency tools of acquiring, to find good information, and analyzing, to make sure it was good. Some of the digital tools I used were Google, EasyBib and Pexels. I have used EasyBib before but Pexels is a new tool that I learned about this year. I find it very helpful for my Edublog projects.
3) In order to investigate this topic, I used the process of CHOMPing that I learned in middle school. Basically I took brief notes in my own words with only the important information. I made sure I understood the whole idea of the concept I was learning about. Then I put the notes into paragraphs to demonstrate what I had learned. I think the information I found was definitely relevant to my topic and fully answered my small questions.
4) To verify and cite the information I found I first made sure the websites I used were trustworthy. I used ones where they showed and author and the date it was published. Also, some of the authors seemed very well-educated and the website’s purpose was to give true information. An example is the website Eco & Beyond, where their mission is “to empower everyone on the planet to make one small change towards a more sustainable future”. They also want to be a “directory and discovery tool” that people can use. I found this website very helpful with lots of good information.
To cite the information I found I used EasyBib. I have used it before in research projects and it has been very helpful to me. I found all of my pictures for this project on Pexels.com. Before inserting them into my post made sure they were “free to use”, and then I put the link below.
5) The process of completing this challenge went well overall. I enjoyed learning about something that I was interested in. I am really glad we got to choose our question, because it I know that I will use the information I learned in my passion of cooking. The researching went fairly well because I found a lot of information to use. I took lots of notes from the websites, which I didn’t find challenging because there was lots of information I needed. Then I put them into paragraphs that explained my solutions, which gives the whole idea to whoever is reading it.
I could have done better by using a bigger variety of sources for my research. I used all online sources, when instead I could have used a book or even a person who was experienced in my topic. If I was to do this again I would definitely use a book because it might be more reliable with information. I would also spend more time on the Riverside library databases, trying to find more information on my topic.
Photos I used (all photos from Pexels.com):
Image 1:
https://www.pexels.com/photo/green-mangoes-and-red-apples-1253193/
Image 2:
https://www.pexels.com/photo/agriculture-basket-beets-bokeh-533360/
Image 3:
https://www.pexels.com/photo/green-grass-field-near-houses-1198507/
Image 4:
https://www.pexels.com/photo/vegetables-stall-868110/
Image 5:
https://www.pexels.com/photo/air-air-pollution-chimney-clouds-459728/
Image 6:
https://www.pexels.com/photo/agriculture-alternative-energy-clouds-countryside-414837/
Image 7:
https://www.pexels.com/photo/astronomy-atmosphere-earth-exploration-220201/
Bibliography (all citations done by EasyBib.com):
Ackers, Kylie, et al. “What Does Food Sustainability Really Mean?” Eco & Beyond, 12 Sept. 2019, http://www.ecoandbeyond.co/articles/food-sustainability/.
Alter, Lloyd. “The Impact of Food Waste on Climate Change (And Just About Everything Else).” TreeHugger, Narrative Content Group, 5 Mar. 2010, http://www.treehugger.com/green-food/the-impact-of-food-waste-on-climate-change-and-just-about-everything-else.html.
Chung, Emily. “How to Eat More Sustainably without Giving up the Foods You Love | CBC News.” CBCnews, CBC/Radio Canada, 6 Dec. 2018, http://www.cbc.ca/news/technology/food-climate-change-carbon-footprint-1.4930062.
“Food and Climate Change.” David Suzuki Foundation, Briteweb, davidsuzuki.org/queen-of-green/food-climate-change/.
“Help End Food Waste.” David Suzuki Foundation, Briteweb, davidsuzuki.org/queen-of-green/help-end-food-waste/.
Kubala, Jillian. “20 Easy Ways to Reduce Your Food Waste.” Healthline, Healthline Media, 20 Nov. 2017, http://www.healthline.com/nutrition/reduce-food-waste.
Leschin-Hoar, Clare. “25 Ways to Be a More Sustainable Cook.” Cooking Light, Meredith Corporation, 28 Feb. 2018, http://www.cookinglight.com/healthy-living/green-living/ways-to-be-more-sustainable-cook.
Magee, Elaine. “8 Ways to Go ‘Green’ in Your Kitchen.” WebMD, WebMD, http://www.webmd.com/food-recipes/features/8-ways-to-go-green-in-your-kitchen#4.
“What Exactly Is a Sustainable Ingredient?” The Inside Scoop, theinsidescoop.eliorgroup.com/en/what-exactly-sustainable-ingredient.
Willsey, Marie. “10 Tips for Eco-Friendly Cooking.” HowStuffWorks Science, HowStuffWorks, 28 June 2018, science.howstuffworks.com/innovation/edible-innovations/10-tips-eco-friendly-cooking.htm.
Victoria, Don Gunasekera. “Cut food waste to help feed world.” Nature, vol. 524, no. 7566, 2015, p. 415. Gale In Context: Science, https://link.gale.com/apps/doc/A427008497/SCIC?u=43sbo&sid=SCIC&xid=d4707db1. Accessed 16 Oct. 2019.
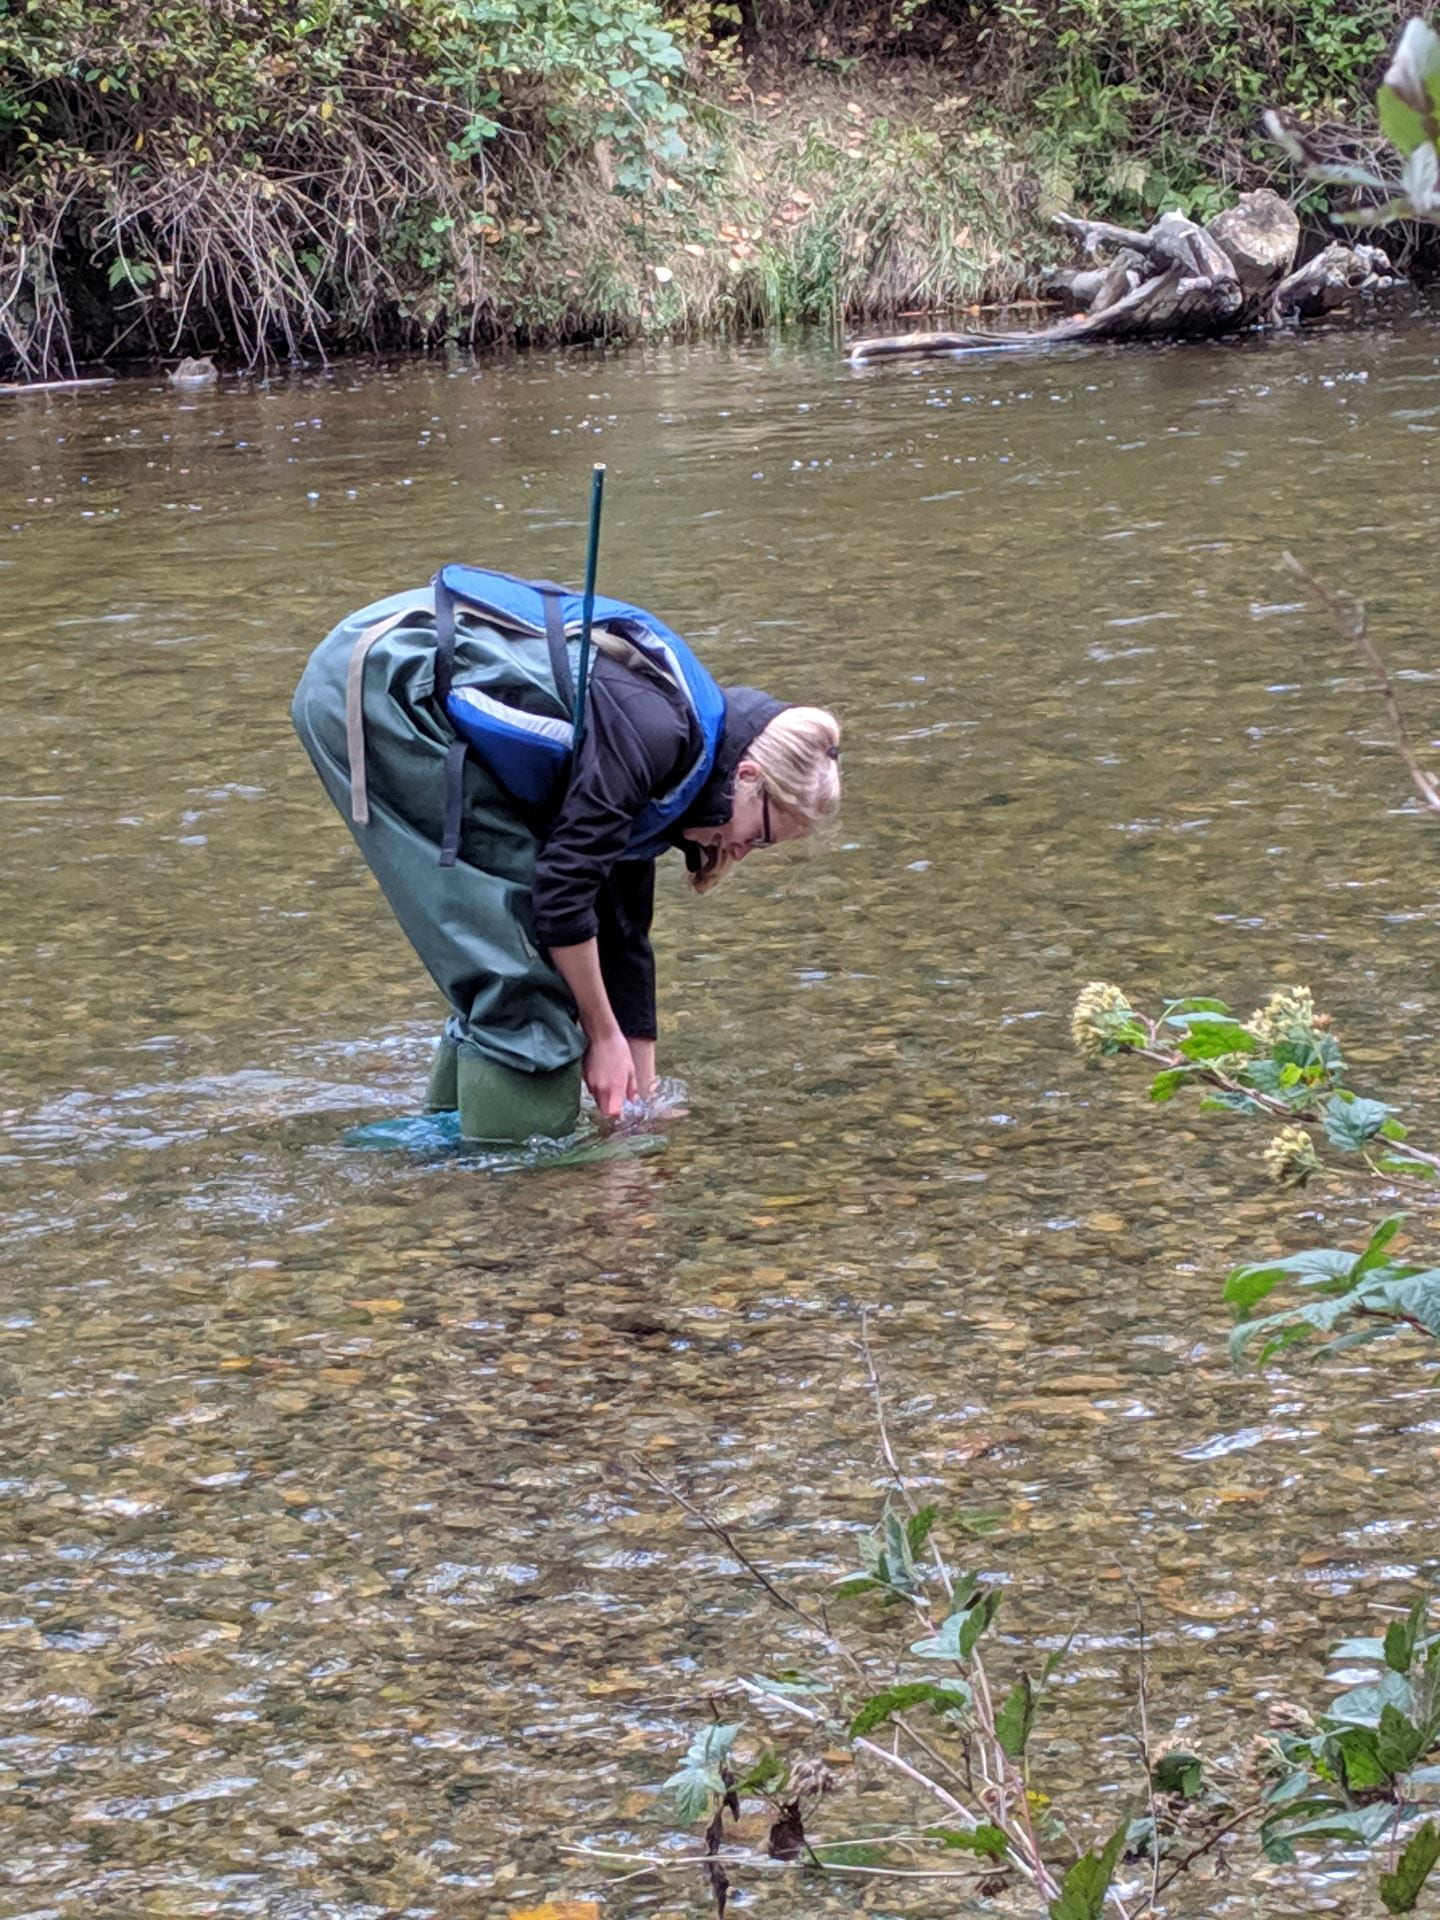
Over the past few weeks in my science honours class we have been studying water quality and invertebrates. First, we learned about invertebrates and how they related to the quality of the water they live in. Then we walked to the Coquitlam River and the Oxbow pond that is behind our school. We searched for the different invertebrates that were living in those two study environments and then made inferences about how they could tell us what the quality of the water was. These are some results from our field studies and how the water quality and life in the two study sites compare.
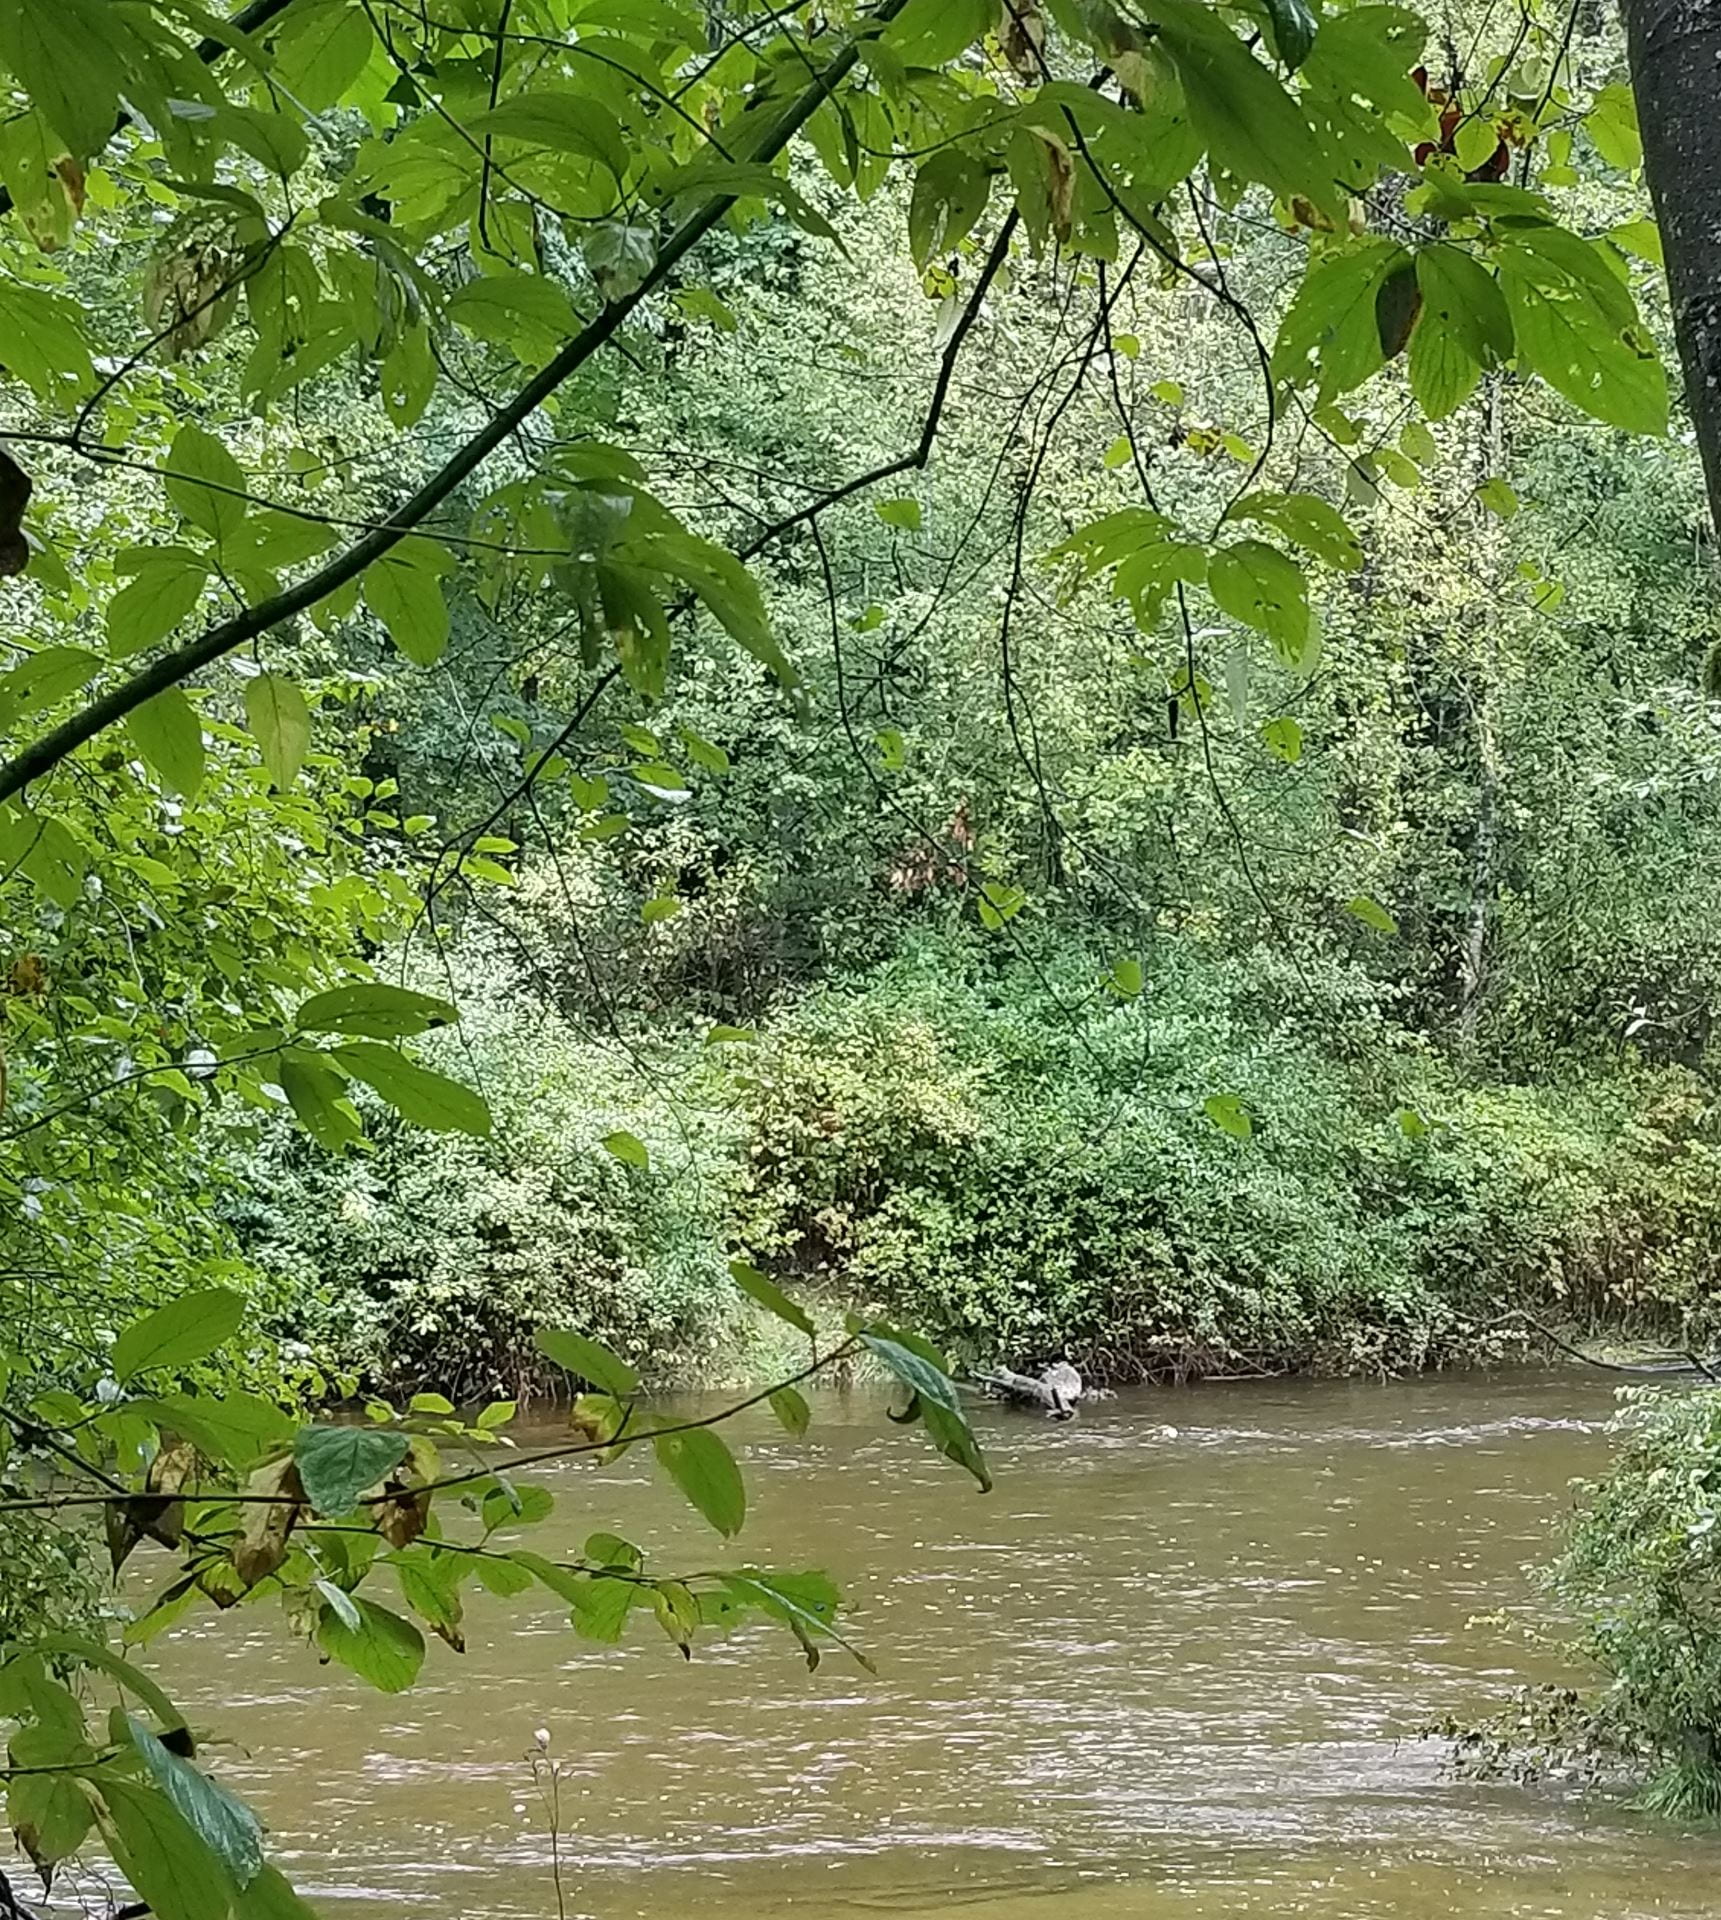
To test the water quality, we measured the water temperature, air temperature, and pH for both the river and pond. Then we used measurements previously taken by other students who were doing a similar unit. Some examples of those measurements were the turbidity, nitrates, phosphates and dissolved oxygen. The water quality is based on all of these parameters, so we combined all the measurements to find a total water quality index.
For the Coquitlam river study site, we calculated that the water quality index was 82.26 out of 100. That says that the water quality is good and supports a high diversity of life. For the Oxbow pond study site, the water quality index that we found was 74.14 out of 100, which says that the pond also has good quality water, but slightly less than the river.
At the Coquitlam river, we held a net under the water and scrubbed river rocks inside a 1-foot square in front of the net. That way, any living thing attached to the rock would flow into the net and we could study it close-up. My group found a cranefly larva, a dragonfly nymph, and two mayfly larvae. The class found a total of sixteen mayfly larvae, one caddisfly larva, two snails, two stonefly nymphs, a water mite, a crane fly larva, two dragonfly nymphs and a spider.
At the Oxbow pond behind Riverside, we brushed the net along the edge of the water and the bushes surrounding it, to try and catch living things in different areas of the water. Our group did the testing, but we couldn’t find any life in the Oxbow pond. I think this was because the water was very murky and so it was hard to see things moving. The class however found many different living things. As a class we found four dragonfly nymphs, three aquatic sow bugs, four different fish, three dragonfly larvae, two spiders, a dragonfly suborder, an alderfly and a water mite.

These sample results compare in a few different ways. Both study sites had many living things that we found, but we found more life in the Coquitlam river. This could have just been the way our testing went that specific day, but it could also mean that life is more abundant in the river than the pond. Also, there were dragonfly nymphs, spiders, and water mites found in both study sites. The other living things that we found were each in only one of the two locations. So the life was quite diverse between the two sites.
These different invertebrates come from three different categories that can indicate the quality of the water they are found in.
The living things found in the river were generally from category one, indicating good quality water. They can only live in good water so that means that the river must be fairly good quality or else those invertebrates wouldn’t survive. Eighteen out of twenty-three invertebrates we found in the river were from this category, which is the majority of them. Three invertebrates were from category two, which can tolerate some pollution but can also be in good quality water. Two invertebrates found were from category three and can tolerate any water quality.


Most of the living things found in the pond were from category two. The invertebrates in category two can be in good quality water but can also tolerate fair quality water. One invertebrate that we found in the pond was the water mite, which is from category three. The water mite can tolerate any quality of water. Since we didn’t find any invertebrates from category one in the pond, and found most from category two, this could mean that the water quality is fair, but not the best.
After gathering all this information, I believe that the water quality in the river is generally really good, and therefore supports a high number of living things. The majority of the invertebrates found in the river indicate good water quality, which is another reason why I think the water quality is good.
I believe that the water quality in the pond is fair, but not as good as the river. This is because the invertebrates found in the pond were mostly from category two, which can tolerate some pollution. Since no invertebrates found in the pond were form category one, I think this is a clear sign that the water quality isn’t the best.
In conclusion, I really enjoyed studying this topic in science class because it was interesting and hands-on. I think it is way more fun to learn in a way when you get to actually do the learning yourself instead of being told the information. It is also fun to be outside and do something you wouldn’t normally do in school.
I learned a lot during this unit. I didn’t know very much about invertebrates and I thought it was very cool that they can actually tell us about water quality in a certain location. I learned that there are many factors in determining water quality and each one is very unique and specific. I also learned that there are tons of living things in nature even when you don’t see them at first. Most importantly, I learned that you can complete field science experiments right in our neighbourhood!
If we were to do this again, I would like to study the invertebrates that we found a little bit more. We could take more of them back to the classroom to look at them under the microscopes. I think this activity would have been more meaningful if we had more people wearing chest waders in the water. I understand that we only have a certain amount for the class, but I think we should have gone to the study sites more than once so that everyone understood what it was like to wear the chest waders and test for invertebrates.

Overall, I really enjoyed learning hands-on during this project and being in nature during science class!
All pictures taken by group members in science 9 honours.
This is a reflection that I wrote about creative and critical thinking. It was done in my 3D Studio Art class:
Loading...
1) How might your digital footprint affect your future opportunities? Give at least two examples.
My digital footprint could affect my future opportunities by making it more difficult to find a good job. If I apply for a job, the boss might search me up online or go to my social media. If I had posted something inappropriate, it could take away my chance of getting the job because the boss wouldn’t want to hire me. They would choose someone else with a more appropriate digital footprint.

My digital footprint could also affect my future opportunities by teaching people about who I am. The messages and photos that I post online can reflect on the type of person I am. They can also show my likes/dislikes. Depending on what I post, this can help me to make friends or lose friends. If I post appropriate and positive messages online, the people who I know now will remember that as I get older. When I am an adult, friends from high school might remember the things I posted online as a teenager, and that could be negative or positive.
2) Describe at least three strategies that you can use to keep your digital footprint appropriate and safe.
One way I can keep my digital footprint appropriate and safe is to think before I post something online. Whether I am commenting on a video or posting a picture, I should make sure it is kind, intelligent and truthful. It should also send the people who see it a positive message. I should be careful as to what I post to make sure that it is not too personal, since I don’t know who might see it.

Another strategy I can use is to make sure I am only posting things that I know my parents and teachers would want to see. If I wouldn’t want them to see, then I know that it is not appropriate to post. I need to make sure I don’t put things like my address or phone number anywhere online.
A third strategy is to only follow people who I know. I shouldn’t follow someone if they are a stranger because I don’t know who they are, and they could post or comment inappropriately. If I am following someone who isn’t a close friend or relative, I should be careful about what I share with them. I shouldn’t post something personal because I don’t know much about that person.
Over the course of this assignment I learned that if I post something, it is important to look at the privacy settings. Even if I think it is private, it could be public by accident and then anyone can see it. Even if I delete something from the internet, it is never fully gone. Anyone could take a screen shot and then share it with others. The message I meant to show to a only few people could easily get shared with people all over the world.

I also learned that the devices I use, like phones or computers, can take away my privacy. Phones can track my location and know exactly when and where I go every day. Computers also have cookies, which remember exactly which websites I go to. Then the devices can make predictions about what places I like to go and what things I like to do. This can be helpful because it could give updates on traffic, recommendations for restaurants, etc. It can also be threatening and creepy though, because then my device would know lots of personal information that I might not want to share.
To pass this information on to other students, I could make a poster about digital safety and post it around Riverside. It would be bold to catch people’s attention. That way many students would be able to read it and maybe learn things that they didn’t know. I could also just talk to my classmates or friends at Riverside. I could tell them about the dangers of social media and the digital world, and how to stay safe and protected.
Sources: (all photos taken from pexels.com)
Image 1:
https://www.pexels.com/photo/man-and-woman-shaking-hands-1249158/
Image 2:
https://www.pexels.com/photo/person-holding-silver-iphone-7-887751/
Image 3:
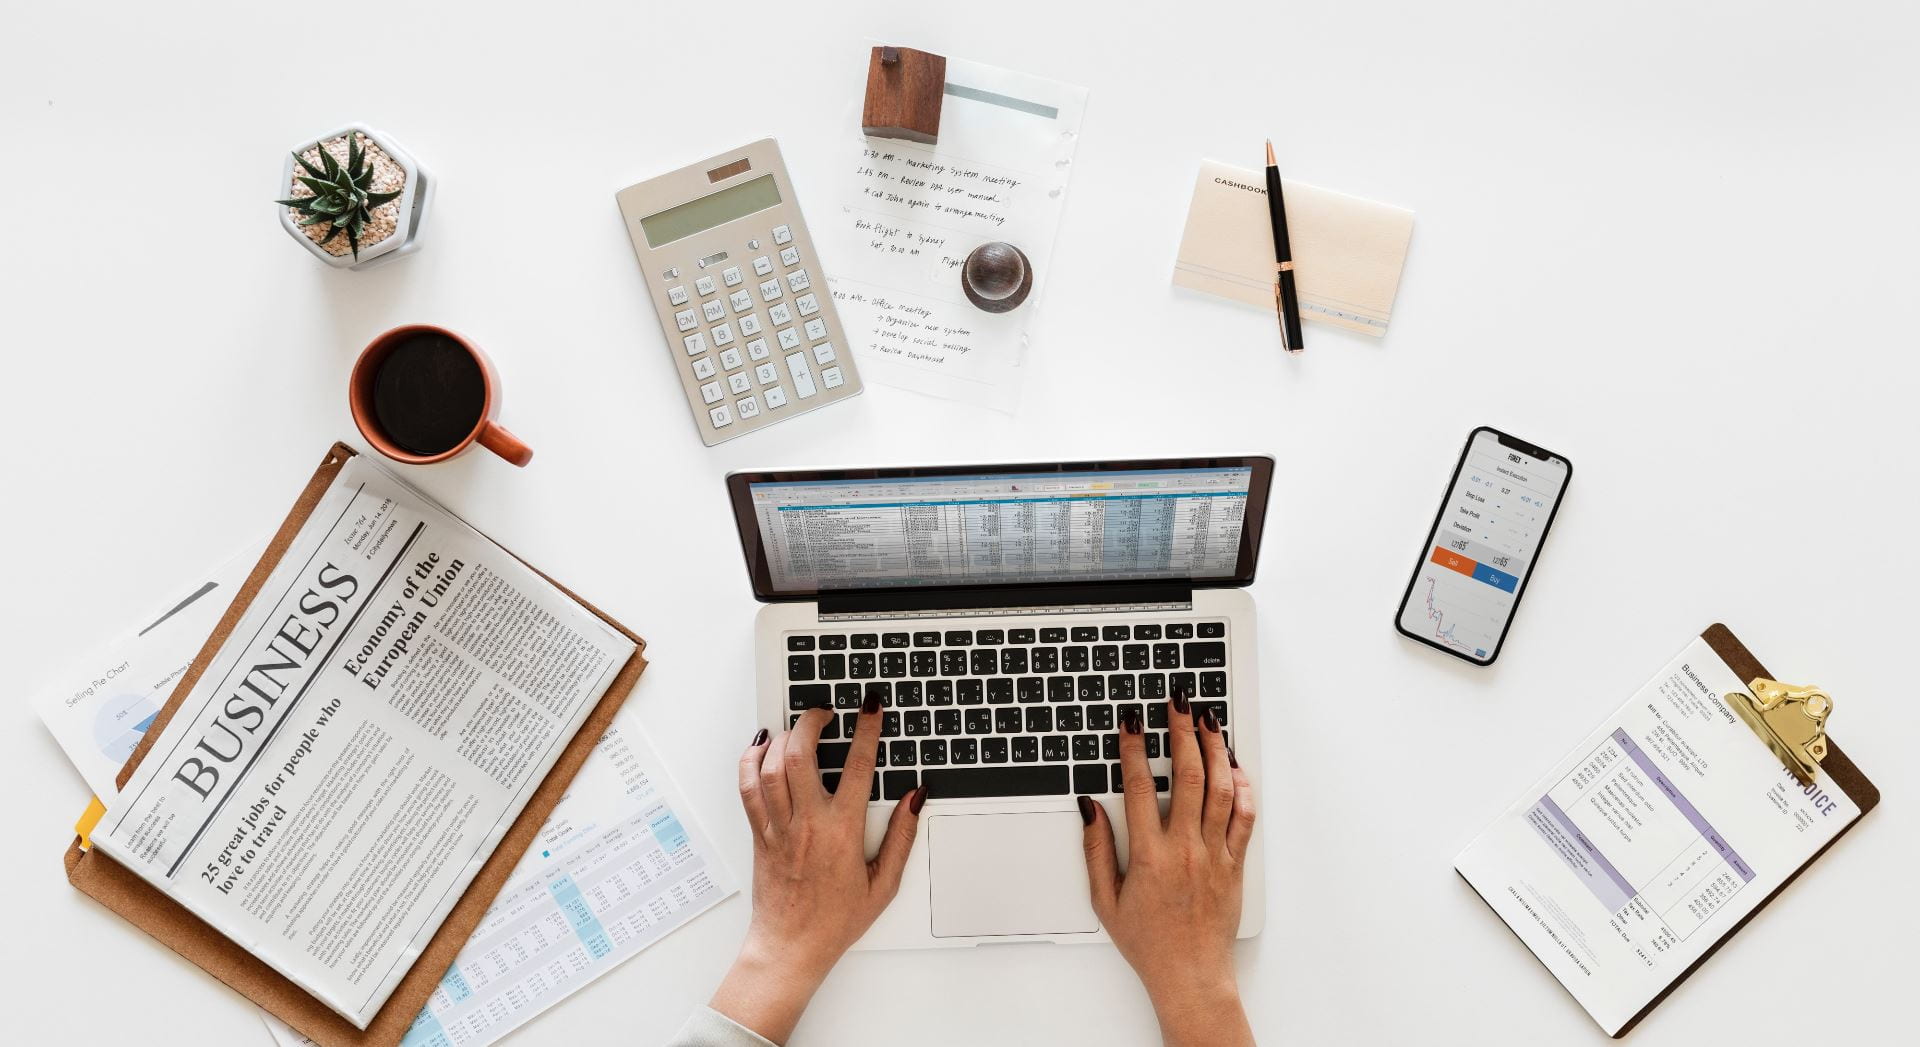
https://www.pexels.com/photo/person-typing-on-macbook-pro-1548999/
Image 4:
https://www.pexels.com/photo/atlas-continent-country-creativity-269850/
Image 5:
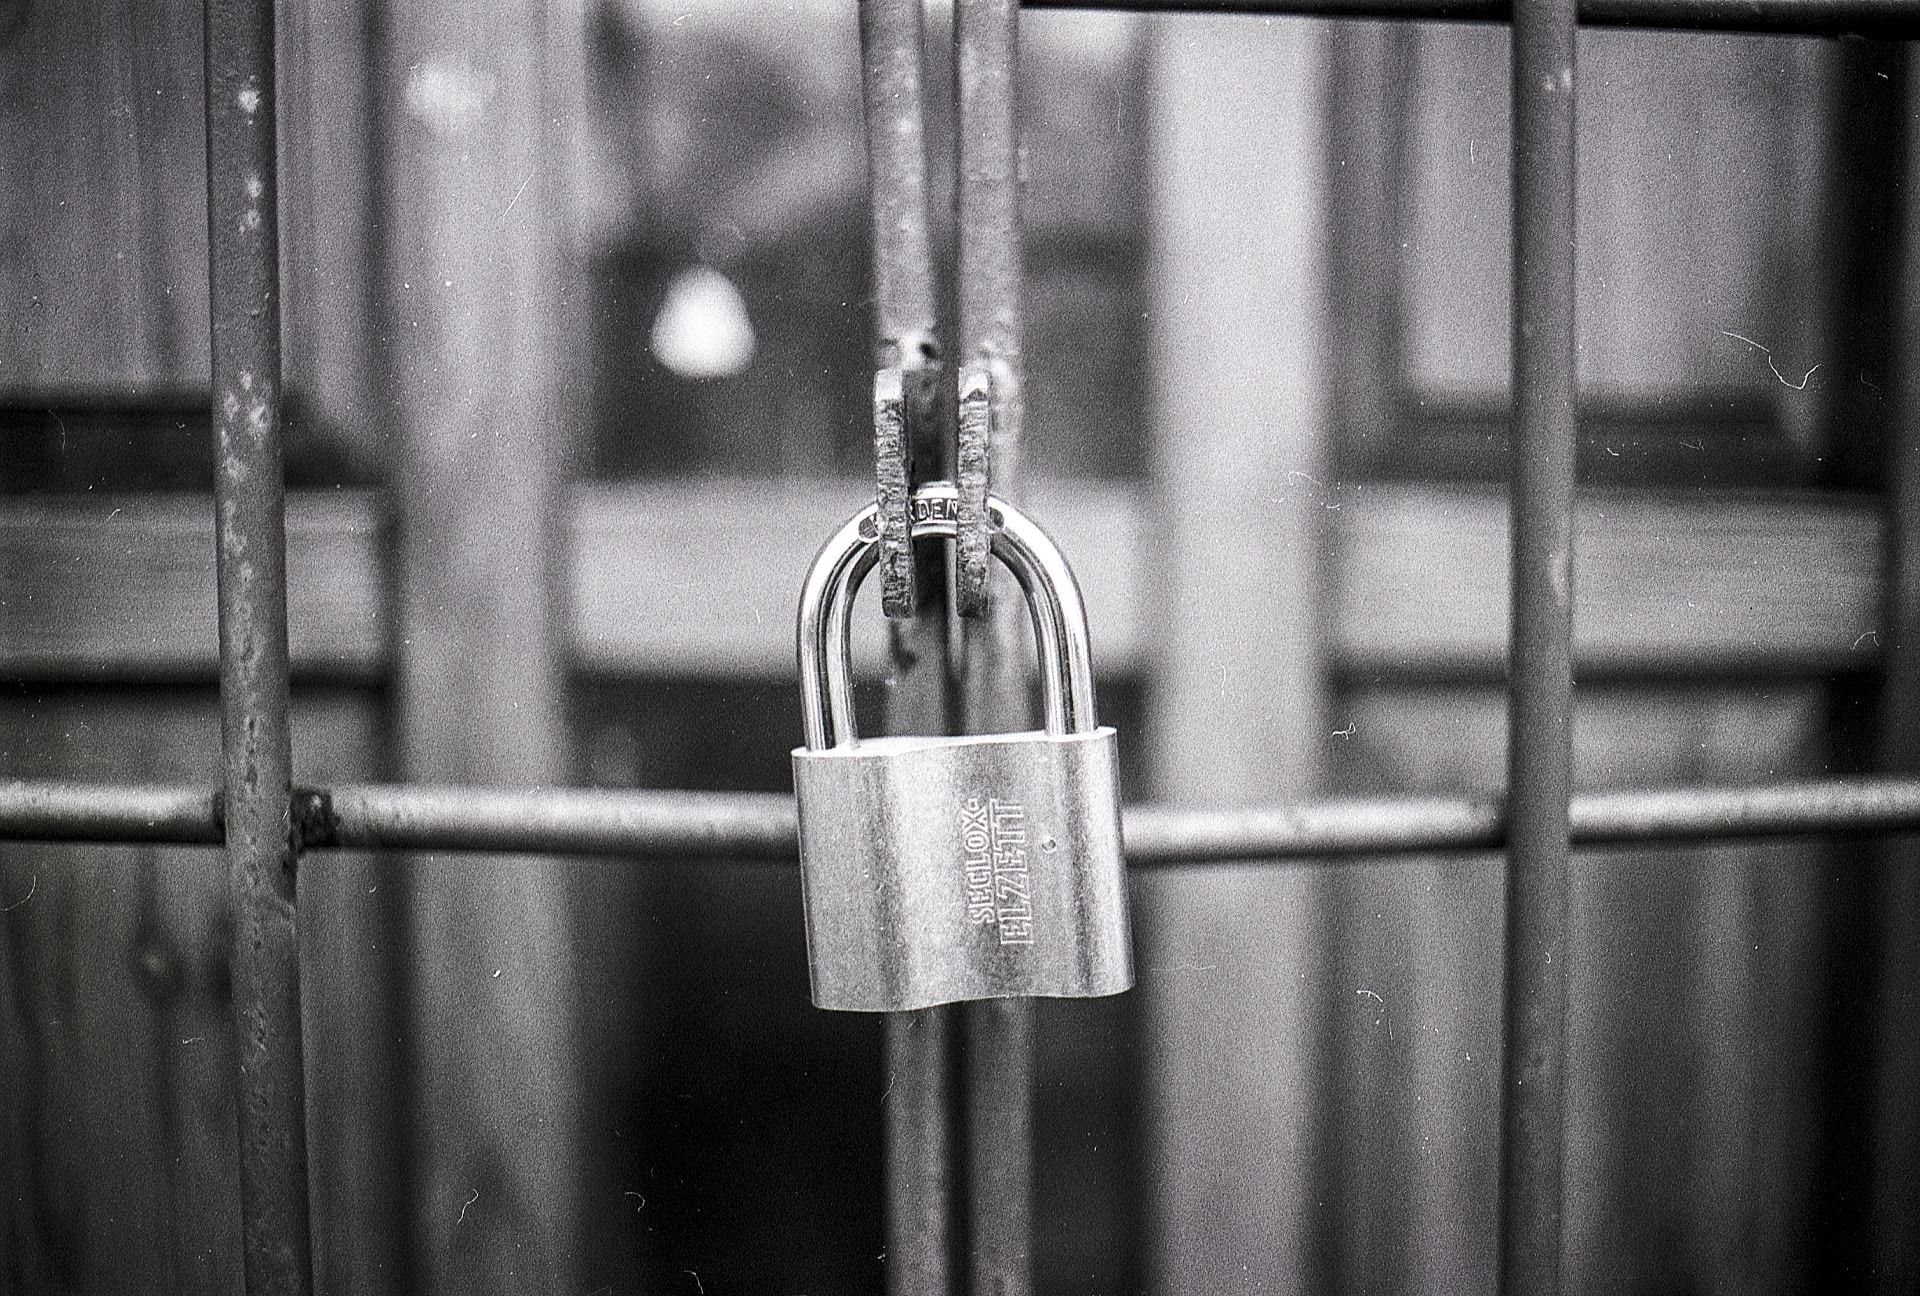
https://www.pexels.com/photo/access-black-and-white-blur-cage-270514/
Image 6:
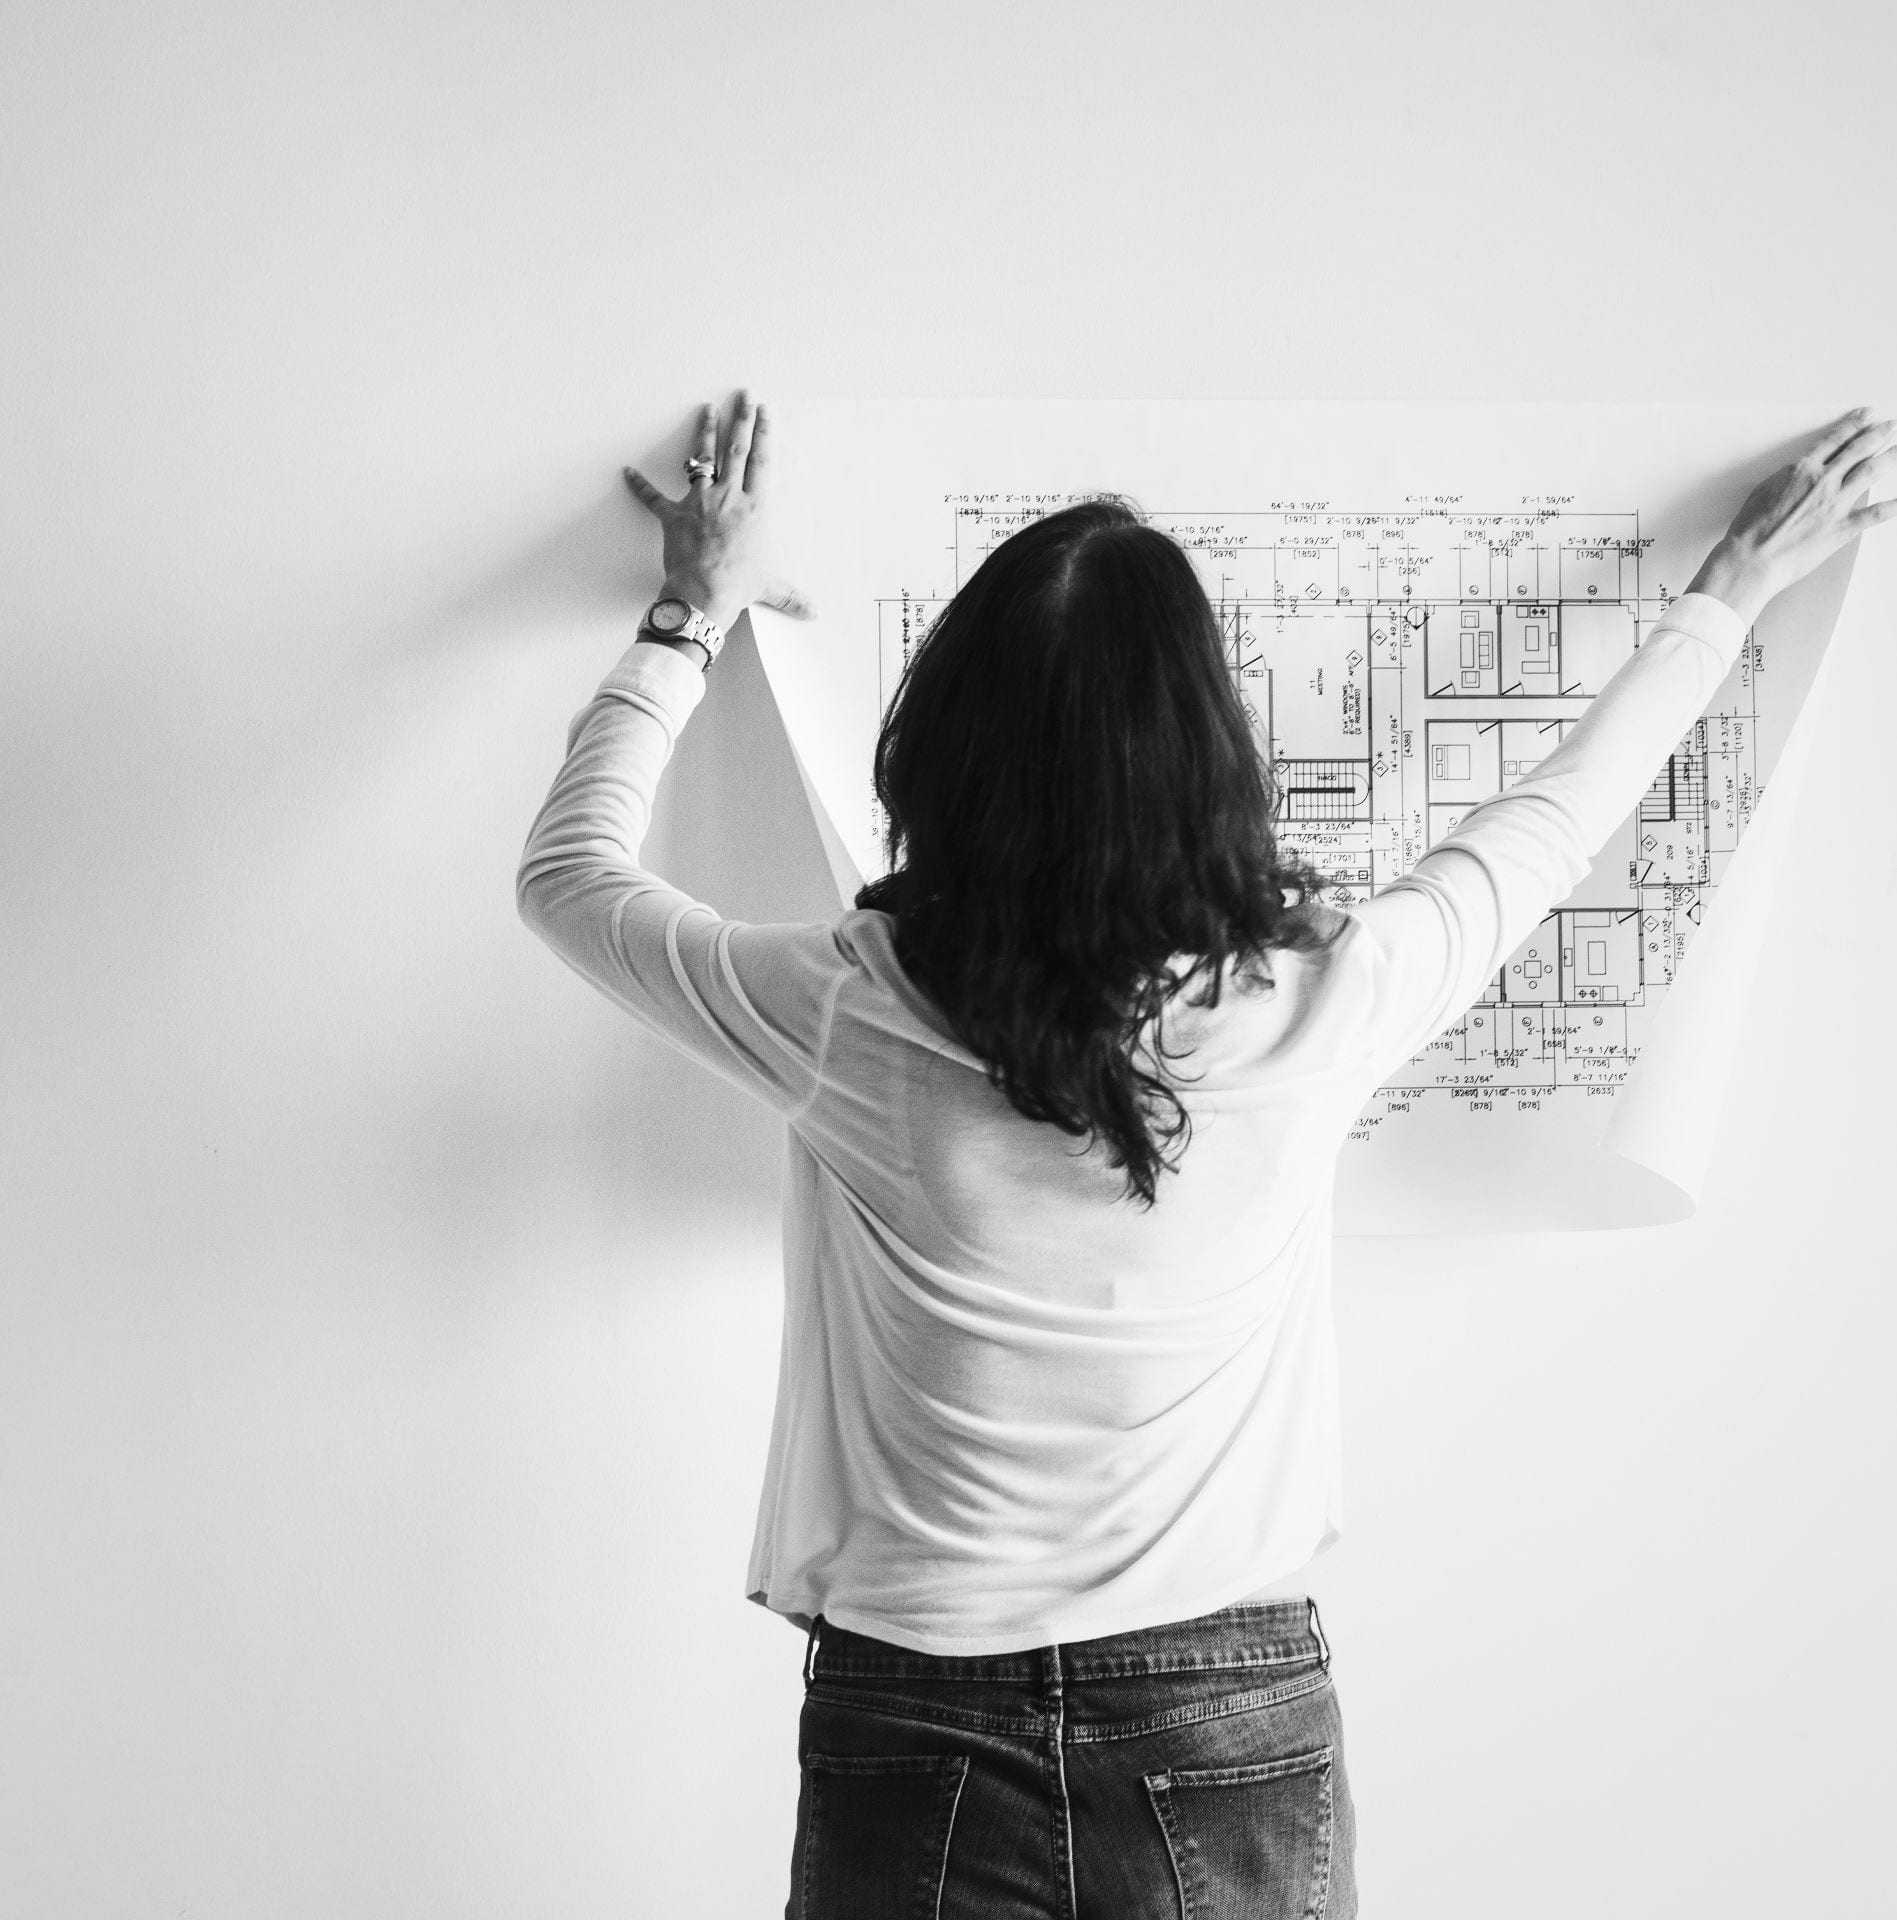
https://www.pexels.com/photo/woman-putting-map-on-wall-1496141/

2 items intersecting

An array

A number in word form

A group of 6 objects

A price tag with a monetary amount