Title: Determining the Base of Oxalic Acid Dihydrate
Purpose
- The purpose of this lab is to accurately determine the base and the molar concentration, of oxalic acid dihydrate (C2H2O4·2H2O) solution through a titration and flame test. By accurately determining its base, we can understand its chemical behavior and properties and optimize its usage in various processes.
- In this experiment, we performed a titration using H2O as our base, against a known volume of the oxalic acid dihydrate solution. The reaction between the acid and base will form water and a salt, sodium oxalate (Na2C2O4). The balanced chemical equation for the reaction is as follows:
C2H2O4·2H2O + 2Ca(OH)2 → Ca(C2O4) + 4H2O
List of Materials
- Oxalic acid dihydrate (C2H2O4·2H2O) 0.4g
- 100ml H2O
- Analytical balance
- Burette
- Burette clamp
- Funnel
- Pipette
- Beaker
- Volumetric flask
- Stirring rod
- Phenolphthalein indicator
- Bunsen burner
- Wire loop
- Lighter/Striker
- Safety goggles
attire
- protective clothing
- closed-toe shoes
- hair tie
Procedure
- Preparations
- read over the procedure to understand the lab and its purpose
- ensure that you are wearing proper lab attire, put goggles on, and sanitize hands
- gather materials and clean/rinse all of them
2. Weighing of Oxalic Acid Dihydrate
- weight 0.4g of oxalic acid dihydrate (C2H2O4·2H2O)
- record the weight of the oxalic acid dihydrate
3. Dissolution of Oxalic Acid Dihydrate
- transfer the weighed oxalic acid dihydrate to a clean and dry beaker
- add 100ml of H2O to the beaker
- stir the mixture using a stirring rod until all the solid has been dissolved which will form a clear solution
- add a few drops (we used 3) of phenolphthalein indicator to the solution to help the ending visual results
4. Titration
- set up a burette, making sure that it is clean and free of any air bubbles
- fill the burette with the prepared base solution
- record the initial volume (V1) of the base solution in the burette
- slowly add the base solution from the burette into the oxalic acid solution int he beaker, while stirring with a stirring constantly
- continue the addition until a permanent colour change is observed, which indicates its neutralization
- using the phenolphthalein indicator, the solution should turn from colourless to a pale pink
- record the final volume (V2) of the base solution in the burette
5. Repeating titration procedure
- perform titration 2 more times using fresh samples of the oxalic acid dihydrate
- calculate the average volume of H2O used in the titrations
6. Flame Test
- Safety precautions: ensure that your work environment is a well-ventilated area and has appropriate safety equipment
- Clean wire by dipping it in water and holding it in the flame until it burns off any impurities, repeat until clean
- Light the bunsen burner
- Soak the wire in the unknown solution
- hold it above the bunsen burner
- watch as the flame changes colour and write down any observations and its final colour
- compare the observed flame colour with a reference flame colour chart or a table that indicates the characteristic colours associated with different metal ions
- Identify the metal ion present in the compound based on the observed flame color.

Our flame burned orange, which led us to believe that the base was calcium (Ca).
7. Calculation of concentration
- calculate the volume of the base solution used in the titration by doing: V=V2-V1
- calculate the concentration of the base solution using the volume of the base used (V) and the known concentration
Work:
V: V2-V1 = 25.7 – 15.7 = 10.0
concentration of the base solution:
find mol of Ca(OH)2: M(L)
0.03M (0.0157L)
mol of Ca(OH)2 = 0.000471
concentration of base solution: mol/L
0.000471/0.01567 L
M = 0.03
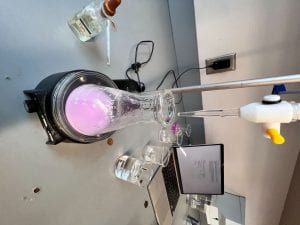
Pictures


Data Table for Titration Data
| MOLARITY OF H2O |
TRIAL 1 |
TRIAL 2 |
TRIAL 3 |
| initial reading of burette |
10. |
10. |
10. |
| final reading of burette |
25.5 |
25.8 |
25.7 |
| mL base used |
15.5 |
15.8 |
15.7 |
| average mL of base |
15.7 |
|
|
Conclusion
The objective of the experiment was to determine the concentration of a base solution using a titration method to find the concentration of the acid first, and find the identity of the base as well. We found that the base solution, has a concentration of 0.03 M. We found the identity of the base to be calcium hydroxide Ca(OH)2.
We chose to follow this procedure because the purpose of a titration is to determine the unknown concentration of a substance by comparing it to a known concentration. By measuring the volumes, we can calculate the concentration of the substance being analyzed. So we were able to find the concentration of the solution, but then we had to find the identity of the base, which we did with a flame test. The flame test determined that our base solution was calcium hydroxide.
During the experiment, the volume of the base solution used in three trials was measured, resulting in values of 15.5 mL, 15.8 mL, and 15.7 mL. The average volume of the base used was calculated as 15.7 mL.
Using the known concentration of the base and the volume of the base solution used, the concentration of the base solution was determined to be 0.03 M.
This conclusion suggests that the concentration of the base solution remained consistent throughout the experiment, as the calculated concentration closely matched the known concentration. It also indicates that the titration method used to determine the concentration of the base solution was accurate and reliable.
Errors and how to fix them:
1. Instrumental errors can arise from inaccuracies or limitations in the laboratory equipment used. In this experiment, the burette readings could have given us potential instrumental errors.
How to fix it:
– Ensure the burette is properly cleaned before the experiment and periodically checked for accuracy.
– Use a burette with a clear and accurate scale, making it easier to read and reduce parallax errors.
– Take multiple readings and average them to improve accuracy and makes up for any individual errors.
2. Contamination or impurities in the reagents or equipment can affect the accuracy of the experiment. For example, if the base solution or the burette was contaminated with another substance, it could change the volume measurements or react with the solution, leading to incorrect results.
How to fix it:
– Handle the tools used properly to avoid contamination from outside sources
– Make sure that the equipment is thoroughly cleaned and rinsed to remove any residue from previous use.
– Ensure that the chemicals are pure to minimize the risk of impurities affecting the experiment’s results.


