
Week 1
Wednesday, September 7, 2022
Today we are starting with Edublog tests.
Friday, September 9, 2022
What would you like to investigate/make as a term-long project?
As a term-long project, I would like to learn to use the pottery wheel proficiently.
Examples of what kind of project(s) I want to complete:


What do you need to get started?
When I signed up for this class I was expecting to use the pottery wheel for every project. Since I am at a beginning level of pottery, all of my projects for this semester’s class will not include using the wheel. The reason I made learning the pottery wheel my inquiry project is that it is something that is not included within my required projects list for this course and that I am interested in making a polished final product on the wheel, like something you would purchase at a gift shop.
How will you begin the project?
I plan to use most of my time during “Freedom Fridays” researching, learning, and working on the wheel. Some challenges that I might face are using my time wisely, getting distracted, getting impatient with the work, and procrastinating. How I am going to resolve my problems is to try not to spend all of my time chatting with friends, and really let the fact that not all my projects on the wheel are going to come out perfect the first, second, or third time. Additionally, I want to realize that my failures are just a part of the learning process.
Week 2
Monday, September 8, 2022
My goal this week is to complete my sgraffito sketch and have my tile ready to get fired in the kiln.
The challenge I have faced this week is staying on task. I know I like to converse along with my peers but work is also very important and it needs to be done. How I adapted is to control my talk-to-work ratio and make sure that I could complete my goal for the week.
My goal for next week is to be finished my tile and to be starting up a new project.
Week 3
Wednesday, September 21, 2022
Sgraffito Tile
My inspiration for this project:
This is what I created:

Cameleon of Connection
Angela Cheng
Ceramic Tile
October 2022
For this project, I collaborated with Monica. Our tiles match up where the vines flow. Another thing about our collab is that she uses positive space for her design, and I used the negative; which I think, gives it a contrasting “ying-yang” effect.

The process:
Day 1
I first used the “Ram’s Head Wedge” to wedge a chunk of clay so that there are no longer air pockets within the clay. Wedging is important because f air pockets exist within the clay project, when you fire it in the kiln, it will burst and combust your project and may damage the projects around it. After wedging, I rolled out my clay using a rolling pin, and before rolling the clay, I put slats on the sides of my clay to keep it the proper width that I wanted it to stay. After that, I used the tile cutter to create the square shape. I put my clay slap onto a whiteboard and into a plastic bag so that the clay can slowly dry into leather hard for the next day.
Day 2
I took my clay out of the bag and the clay was leather hard. This means that the clay is dry enough to carve into and hold it’s form, but not as hard as when it’s fired in the kiln. I used a brush and coated three coats of black underglaze onto my slab. Underglaze is pigmented slip that you can paint onto your ceramic to give it a pop of colour. I put it back into my plastic bag and continue on the design part for the next day.
Day 3
I used white chalk and rubbed it onto the back of my sketched design. I then taped the design onto my tile and started to use a pencil to trace my existing lines. The chalk imprint of the design on my slab is a guideline to help me carve my design out. I decided to use the negative space and carve out the background of my design, leaving the subject (chameleon) black from the underglaze. When I was done carving, I put my tile in the “To Be Bisque Fired” tray. Bisque fire is a cone 04 fire whose purpose is to suck out the moisture of the clay.
Day 4
Thankfully my tile survived the kiln, a select few. not so much. I start putting a layer of clear glaze on my tile. One layer at a time, and smoothing the bubbles with my finger along the way. I consulted with my teacher about my glazing, but they were not quite impressed. I put way too much glaze on mine and had to take some off using a damp paper towel. This resulted in the glaze not being evenly distributed. After glazing, I put my tile on the “Cone 05” tray. The temperature of cone 05 fire is much higher than that of cone 04. Essentially, what it does is that it petrified the glaze and turns everything into liquid, and then it comes back together. Not too sure about the details of how it works but along those lines.

Day 5
My tile survives the cone 05 fire and now I have my lovely tile!
Week 4
My goal this week is to complete my coil pot, under glazed, and ready-to-be cone 04 fired.
Monday, October 3, 2022
Today I started my coil pot project. First, I wedged the clay on the wedging table to make sure my clay is air-pocket free. Then, I used slats to roll out my clay and then used a yogurt container to press out a circular shape to form the base of my coil pot. After that, I rolled out a coiled strand of clay and scored the circular base, and the strand then applied slip to both sides in order to stick my strand on top of my base. The reason why we score and put slip the clay before we attach anything together is that it acts like Velcro and glue to attach clay together. After the attachment process, I blended the inside of the coil pot to provide more support for the structure. I will do this for every piece of clay I apply to my pot. After that, the class was over and I put my project in a plastic bag and placed it in my project box.
Wednesday, October 5, 2022:
Today I was more creative with the coils I made. Some include a braid, swirl, and teardrop. A challenge I faced during this process was that it was hard to roll out my clay and have it be a perfectly smooth, coil. I found that my coils were looking a bit rough and uneven. To solve this issue I sprayed lots of water and started to roll out the clay with both hands constantly moving left and right. This made the clay smooth out and look a lot better. A success that I had was that while putting my project away, my plastic bag accidentally knocked over one of my coils because it was still quite wet, I quickly took my project out and fixed it by smoothing the inside connections more to make it stable.
Thursday, October 6, 2022:
I added a few of my own custom coils including leaves, stars, and flowers. More so shapes rather than coils but it added a personal touch to my work. I completed my pot construction and I put my pot into the slow-dry rack for it to dry.
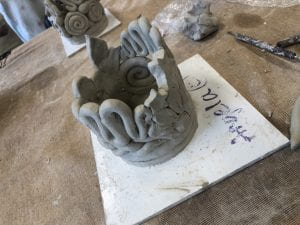
This is when the clay hasn’t completely dried yet, (leather hard) you can see that it is a medium shade of grey.
Friday, October 7, 2022:
Today I was hoping that my coil pot was dry enough to apply underglaze on, but it wasn’t. So instead, I hopped onto the wheel in hopes to work on my inquiry project- which is learning how to make a bowl or mug with the wheel. This time I had more success in forming a cup-like shape, but I could not bring the sides of it up and it was starting to get wobbly. Today I may have failed, but next time I will make it my goal to be able to make a congruent cup-like shape.
Week 5
Tuesday, October 11, 2022:
My pot thoroughly dried out, (bone dry) and I was able to start under glazing. Unfortunately, we had class personations so I did not get much painting done.
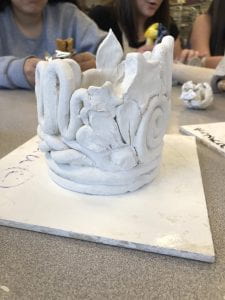
This is when the clay is bone dry and looks white because of the type of clay that it is. (White Salmon)
Wednesday, October 12, 2022:
I continued to underglaze my coil pot, applying at least 3 coats to each area I choose to paint. I did not get to finish it, but I hope to complete it, ready for the cone 04 fire by the end of the week.
Friday, October 14, 2022:
I finished applying my underglaze, and my coil pot is ready to be cone 04 fired.

Week 6
My goal for this week is to glaze and finish my coil pot, and to be finished my Life Under Water research portion, and potentially start it.
Monday, October 17, 2022:
I applied glaze to my coil pot and placed it into the cone 05 fire tray.
Tuesday, October 18, 2022:
This is how my pot turned out!


Happy Day Coil
Angela Cheng
Coil Pot
October 2022
October 20, 2022, Week 6, Life Below Water Research
The creature I would like to take out of clay for this project is the North American River Otter.
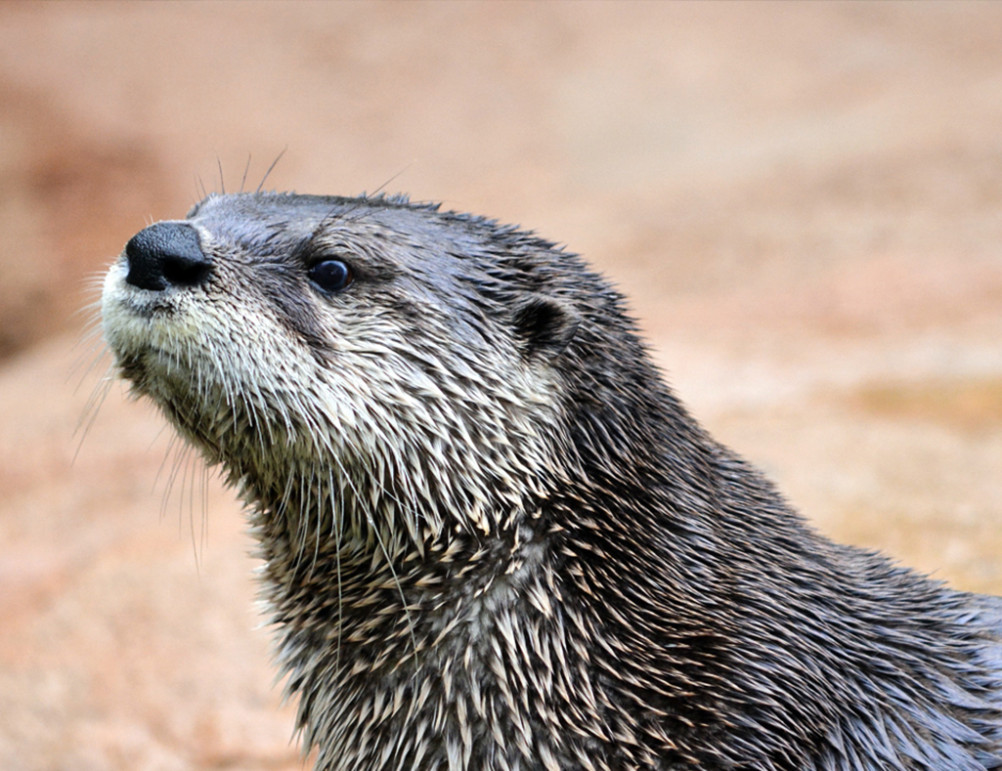
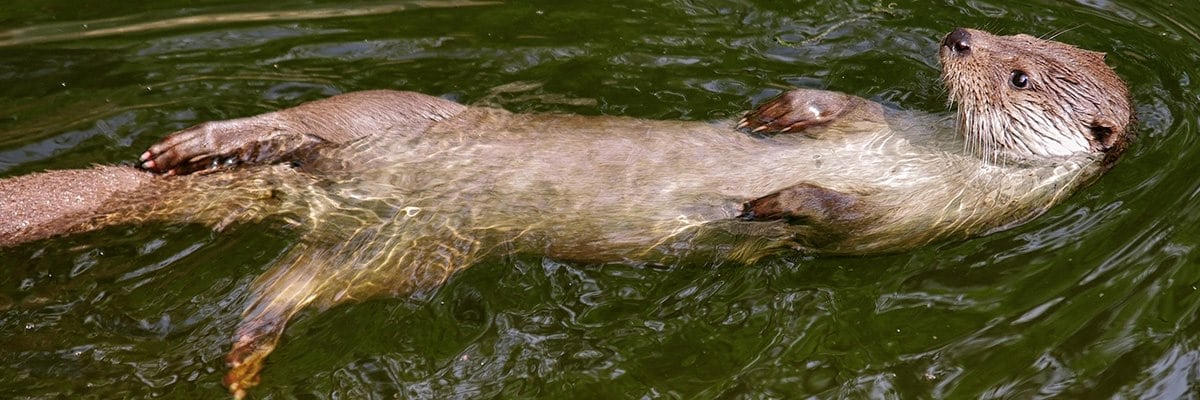

River Otters used to inhabit almost all the large rivers of North America. But during the late 1800s and early 1900s river otters have been hunted for their thick and waterproof fur. River otters’ natural prey is fish, but because of water pollution, many species of fish are increasing in numbers, making it harder for a river otter to hunt and survive.
Since the river otter’s diet is affected by water pollution, we can take action against the river otter endangerment by starting with reducing water pollution. One way to use fewer chemicals for household cleaning. An alternative is to use organic supplements instead like white vinegar and baking soda, or EPA-approved cleaning supplies that aren’t going to pollute our water. Another way is to avoid using plastic. Nowadays almost all supermarkets no longer supply plastic bags, which encourages shoppers to use their own reusable bags. Plastic is harmful to our waters because most of the garbage dumped at The Great Pacific Garbage Patch is plastic and most of which is not biodegradable. A way to avoid using plastic is to stop buying plastic drink bottles, not using plastic straws, not using plastic cutlery, and much more single-use plasticware that could be substituted with reusable ones. One other important rule to follow is to never dump non-biodegradable substances down the drains. A list of non-biodegradable substances includes Paint, Motor oil, Cleaning solvents, Ammonia, and Pool chemicals. If the time comes to dispose of these products and you are unsure how to, check the local government’s website or contact a sanitation department to find out how to properly dispose of them without harming our waters.
Week 7:
Monday, October 21, 2022
Today I started my otter sculpture. I first wedged some clay, got some slacks and a rolling pin, and started rolling out a slab of clay that is about 1cm thick. I then shaped a clump of scrunched-up newspaper to form the body of my otter. I then laid my 1cm clay layer onto the newspaper and started forming the shape with my hands.
Tuesday-Friday October 22-25, 2022

These past few days I have been working on my River Otter sculpture. As you can see, I have added a head, legs, and a tail. I also worked on constructing its facial features. I have not made ears for it yet but I will do that next week.
Week 8:
Monday, October 31, 2022
My goal for this week is to be completed my otter sculpture and have it ready to bisque fire.
Tuesday, November 1st, 2022
Today I gave my otter ears, while also making some final touch-ups. I have placed my project on the slow-dry rack for it to dry off and be ready for the bisque fire. I might add a star or a fish to my project so that it makes it look like the otter is holding it. We’ll see.
Friday, November 4, 2022
My otter came out of the kiln with a decapitated head. I think what went wrong is that I did not make the otter’s head hollow.

Sadness. A humble mistake on my end.
Week 9:
Monday, November 7, 2022
My goal for this week is to create my otter’s head, have it glued onto the body, and start painting my otter. How I am going to accomplish this is to try to work hard with no distractions.
Week 10:
Monday, November 14, 2022
I wish to complete my otter sculpture and artist statement by the end of the week! Hopefully, my otter does not explode and I can actually start painting. I made my head hollow this time.
Tuesday, November 15, 2022
Today I decided to work on an inquiry project, I figured I should make a hand-built mug instead of a wheel mug as that is not at the level of wheelwork I am at but I still want to make something. I first wedged my clay, rolled it out, and then created a circular base using the bottom of a cup as a circle template. I then rolled out a slab of clay, used the rib on it to make sure it is smooth and had no air bubbles, and then aligned my slab vertically with the base of my mug. I of course scored the clay first before I connected the two parts and smoothed out the inside. Initially, I was going to create a mug with star patterns, and a rainbow as the handle, but while I was working with the clay, I thought it looked similar to a tulip, so now I’m going to make a tulip mug with leaf details as the handle.
Paper Mache Purpose- Drago Chimera Head
Wednesday, November 16, 2022
Today I sketched out my idea for what I am going to do for my dragon chimera mask.
This was my process:

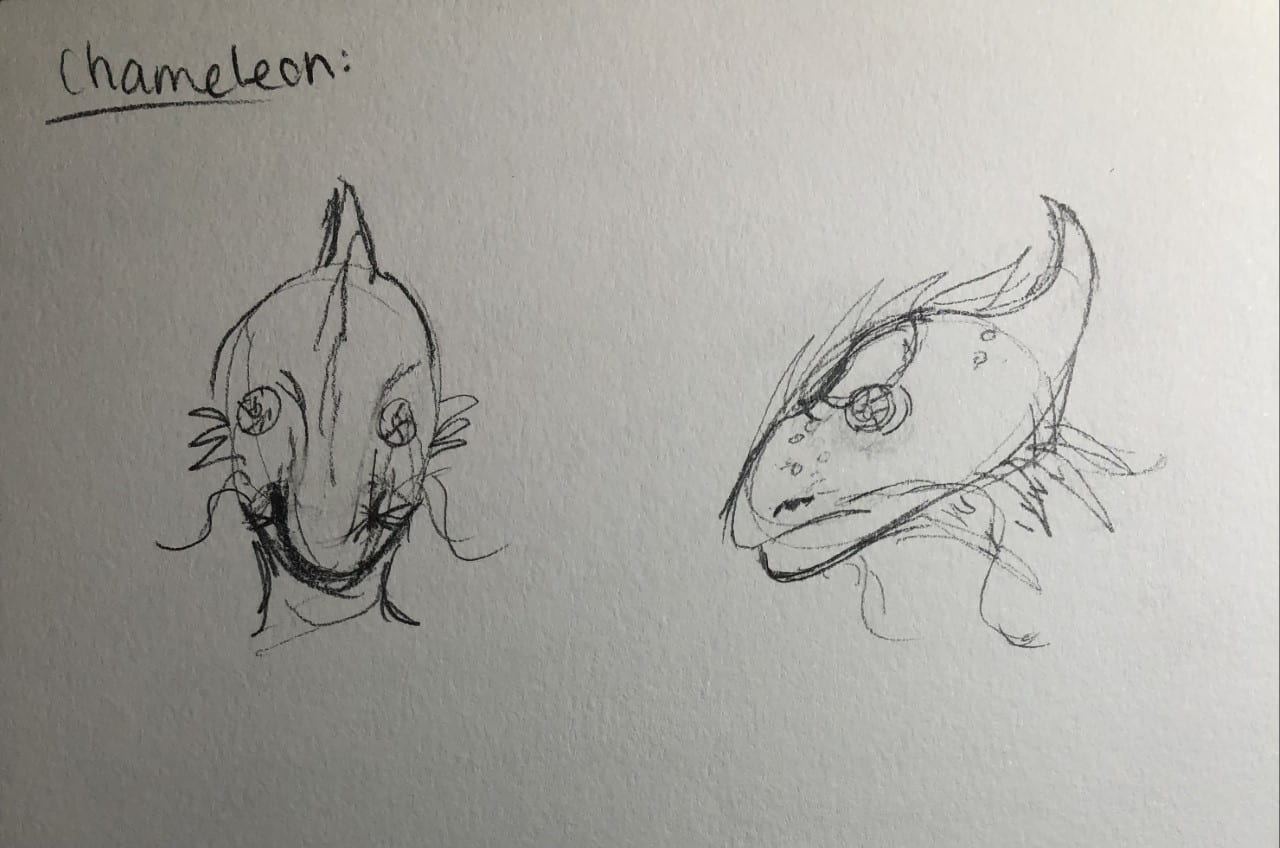
I decide I am going to use the hummingbird.
The light side would be represented by the bright colors, delicate features and kind eyes: Happiness, enjoyment of life, good vibes, optimism, hope, appreciation, comfort, love
The dark side would be represented by the horns/spikes, gills, downturned beak/mouth: Untrusting, naive, selfish, defensive
Thursday, November 16, 2022
My otter head that I remade successfully come out of the kiln unharmed. I began to paint my otter today.
Week 11:
Monday, November 21, 2022
My goal this week is to begin drafting the shape of my dragon’s head. I plan to watch the tutorials given in Teams and follow the directions.
Life Below Water- Sculpt and Paint
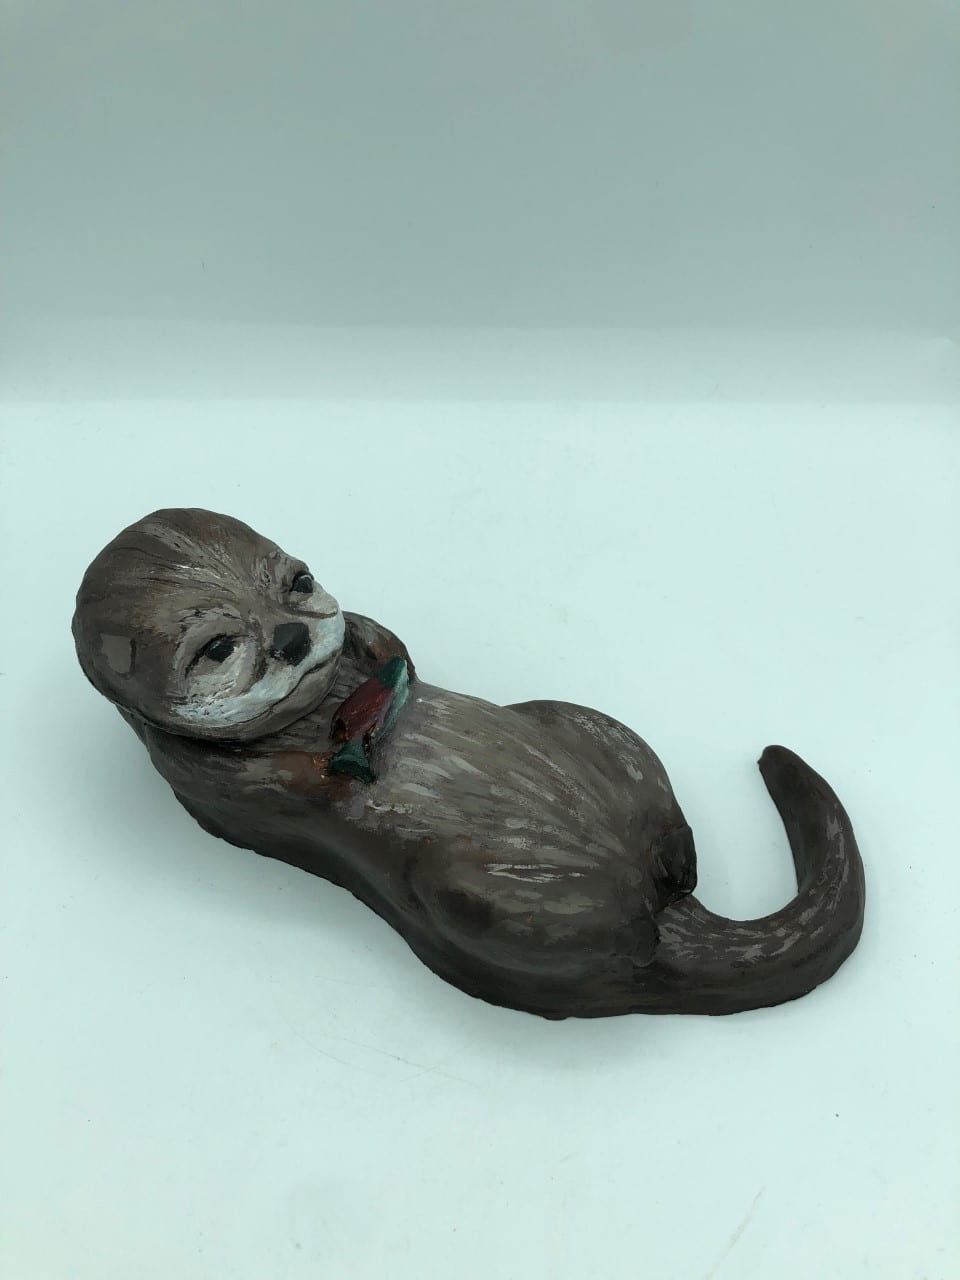

North American River Otter
November 30, 2022, Acrylic on Ceramic
Angela Cheng
The Life Below Water project focuses on bringing awareness to animals that are endangered in our local waters.
My ceramic sculpture is of a North American River Otter, and they reside in all the different kinds of rivers that BC beholds. It holds a sockeye salmon, one of BC’s Native fish types. I chose to do the North American River Otter because of its cute and playful nature that our ecosystem needs.
Because of all the chemicals, we dump down the drain, which flows into the ecosystem of our rivers, which affect the common fishes and the animals that consume the fish in their Everyday diet: The river otters. Help the otters by using eco-friendly cleaning supplies, and if you do use chemicals, do not dump them down the drains!
————————————————————————
This week I worked on painting my otter with acrylic paint. I used layering to achieve the fur’s 3D look. After painting, I decided to add a layer of clear glaze to give it a shimmery and wet look. After the glaze, I had to touch up the eye highlights with acrylic again as the glaze dulled the eyes.
Inquiry Project PRODUCT:
December 12 Monday
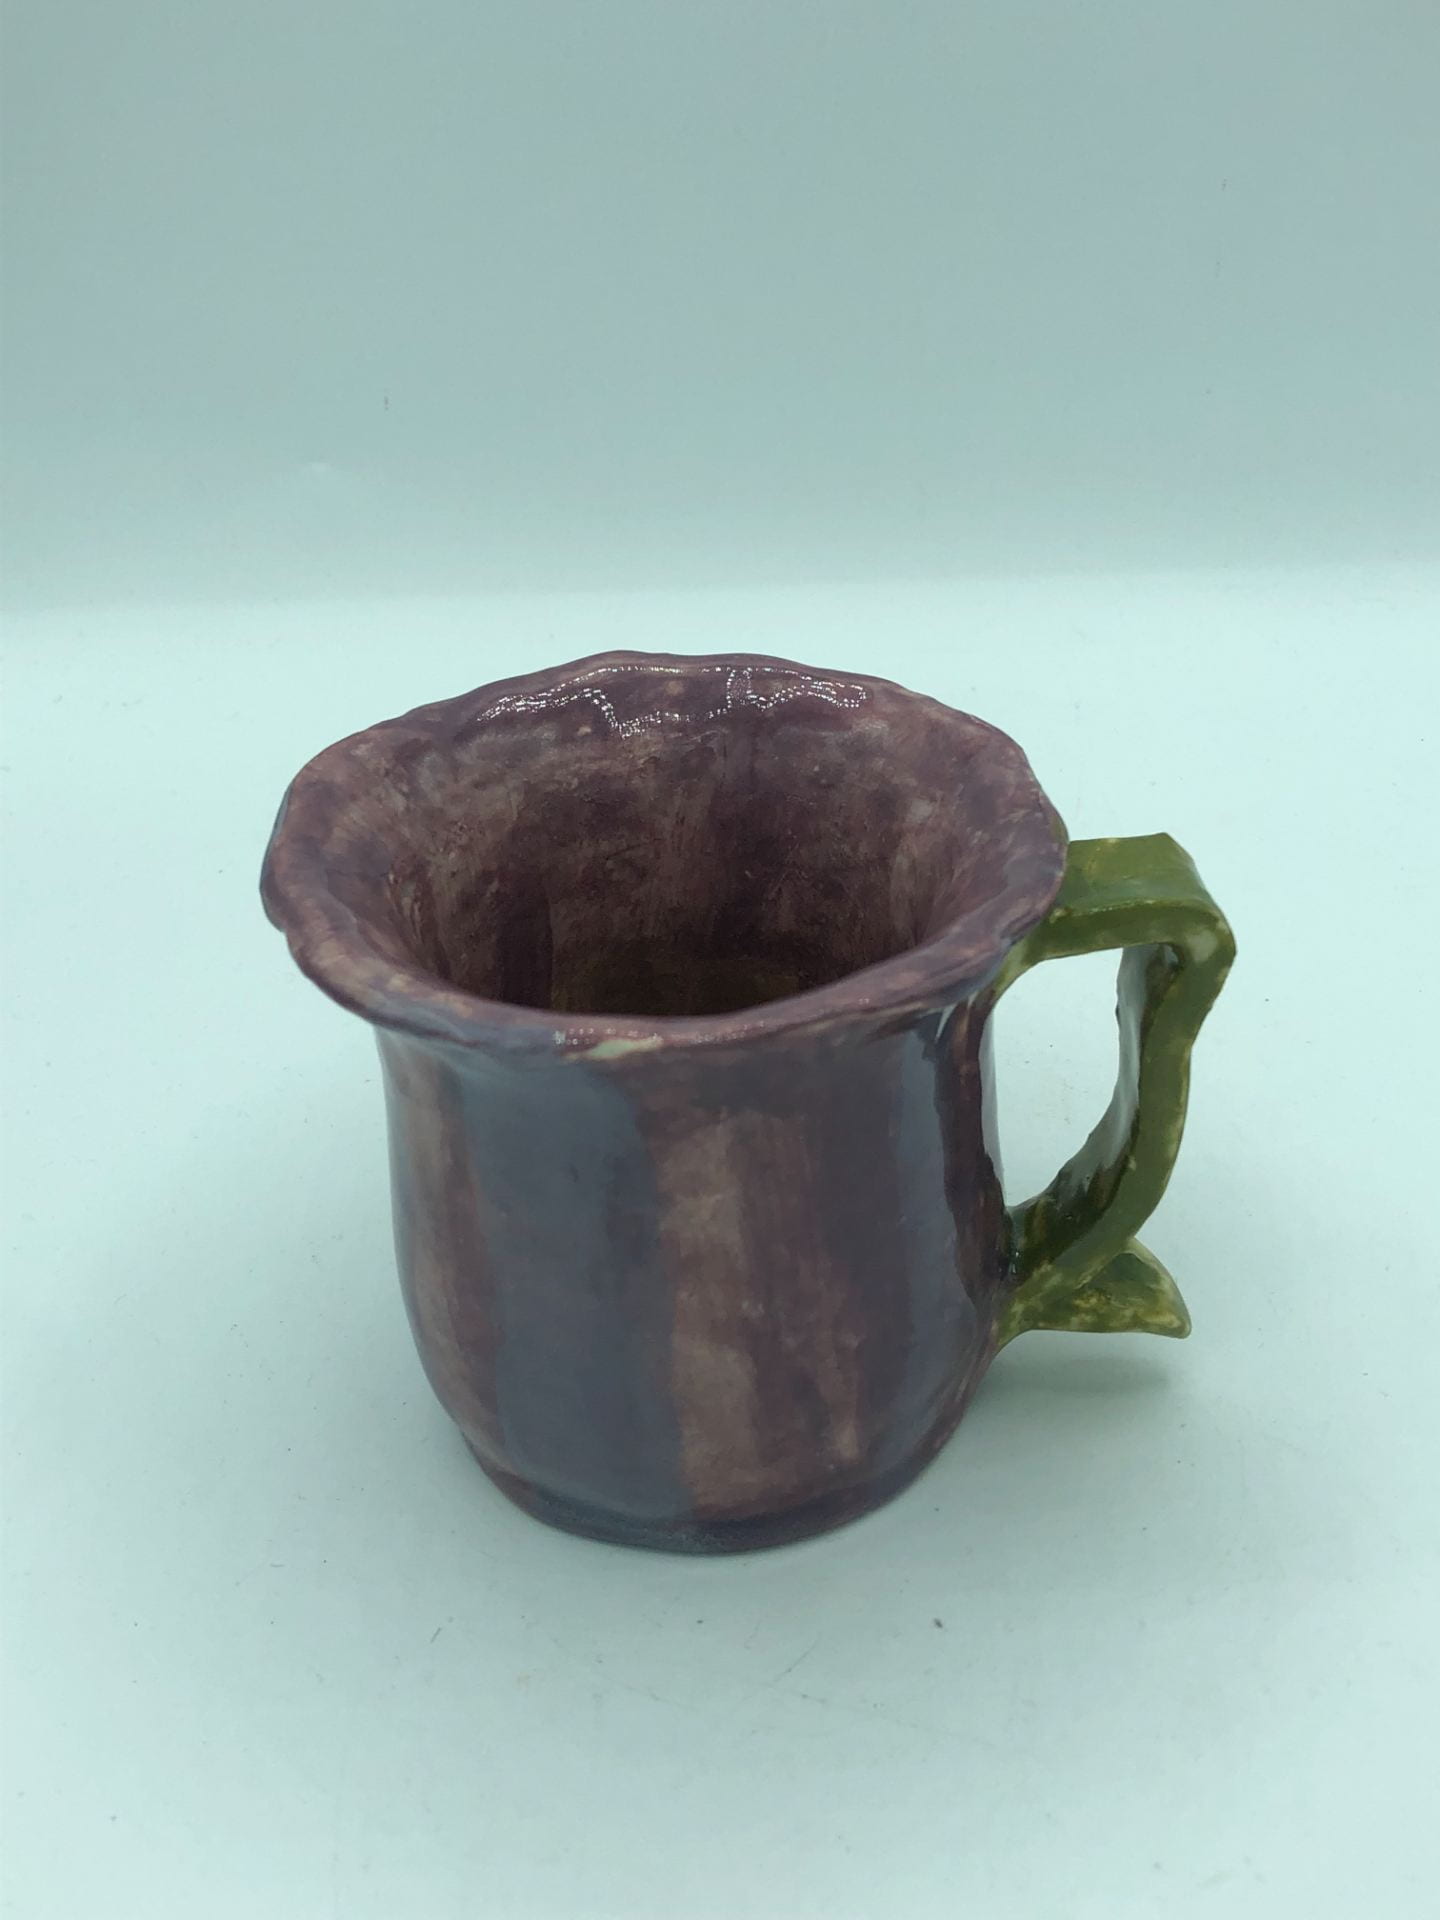

Tulip Mug
Ceramic
December 12 Monday
Angela Cheng
I made this mug using rolled-out clay, and a cup helped guide me. I sadly forgot to take process photos for this project; I only have the final product.
In the beginning, I was not planning to do a tulip cup, I just wanted to make a rounded-off cup. But as I was shaping it I saw a tulip so I thought it would be a cute idea. So for that handle, I made it into a floral leafy shape. After that, I applied coloured glaze, and coloured the bottom of the mug a yellow seedy colour. I like it, but one thing about it is that it is too thick and heavy to be used as an everyday mug, so I told my mother to repurpose it into a flower pot. One thing I learned was that clay is thicker than I think and while the mug is intact and totally usable, the thickness may inhibit it from being conventional.
Week 13:
Monday, November 19, 2022
My goal for this week is to start my dragon chimera paper mâché and have the general structure ready.

I started off by taping clumps of newspaper together to make bean-like shapes. After that, we took strips of miscellaneous pieces of newspaper and started paper macheing it.
After it dries, I cut it open and decided which half is the top and which half is the bottom.

I taped the two sides, using cardboard and tin foil to create more structure and form to the head.

Week 14
I added spikes to the head using coils. I poked them through the head of my dragon and then taped them in place.

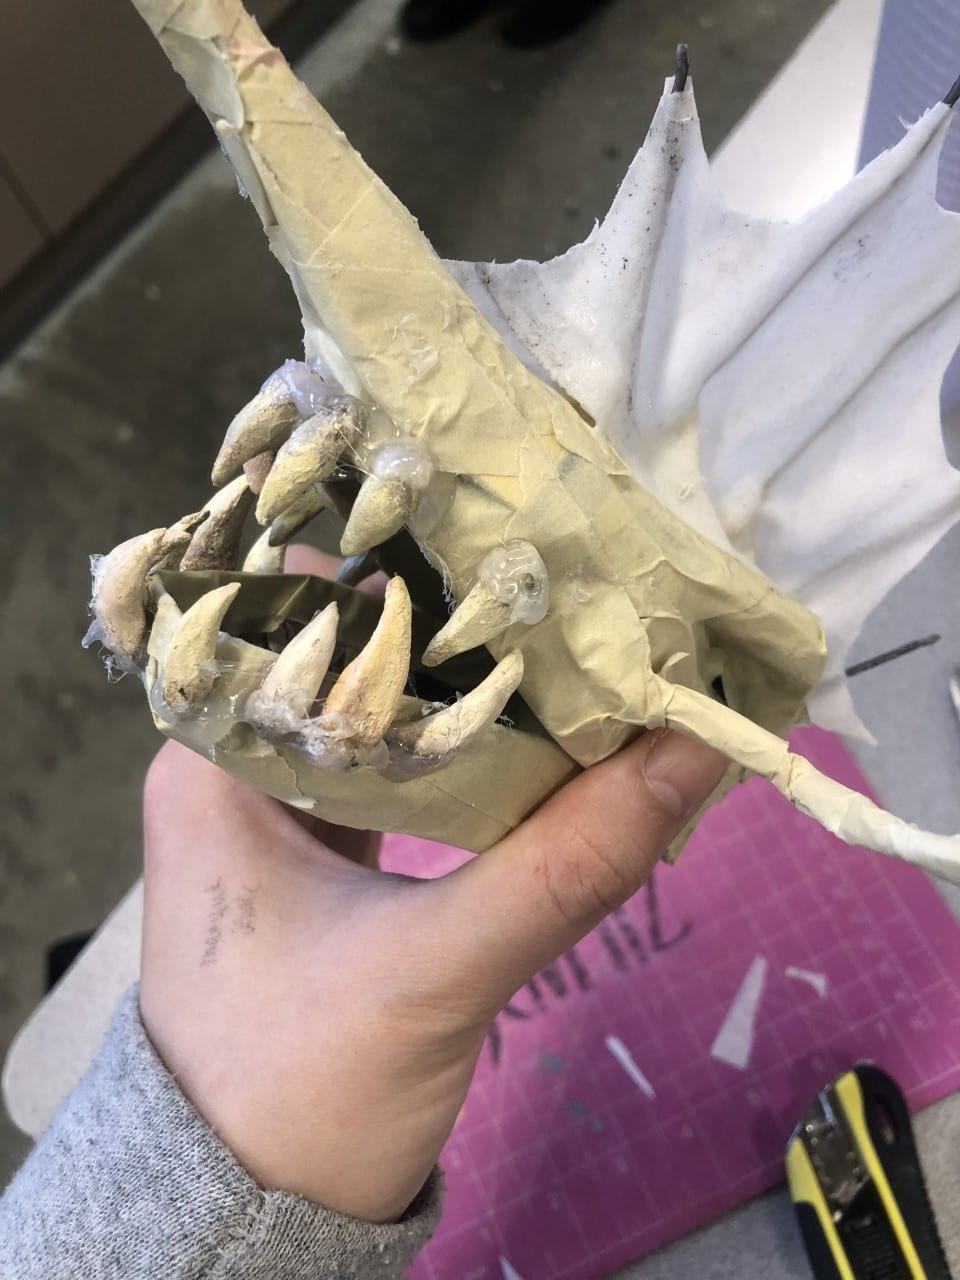
I made ceramic teeth and painted them a yellow-brownish color to create an unhygienic feel. I glued the teeth on using hot glue.
Week 18:
I laid the fabric on my spikes, using glue.

Week 19:
I laid the fabric on my dragon’s face to give it a leathery, textured look and also to give my dragon eyelids. I also laid the folded fabric inside the mouth.

I painted the inside of my dragon a gummy red shade.

I painted my dragon green and red, to represent the hummingbird’s colorful feathers with the spikey part a shade of beige brown to represent the hummingbird’s wings.
Week 20:
My goal for this week is to be finished my dragon project and then work on an inquiry. For my inquiry, I want to do something on the wheel, but I am not sure if I could master it in this amount of time. I make either a plate or another mug, or both.

I tried attaching the neck using a piece of cardboard, but it made the neck look too straight and unnatural.

Cut the neck in half and then used cardboard to fill in the gaps, looks more like a natural and curved neck. I used wire and fabric to attach the head.

I covered the cloth in fabric and made scale-like projections with little pieces of fabric at the back of the neck. After that, I painted the neck and scales in a transition from green-blue-purple. This hummingbird is a colourful one.
I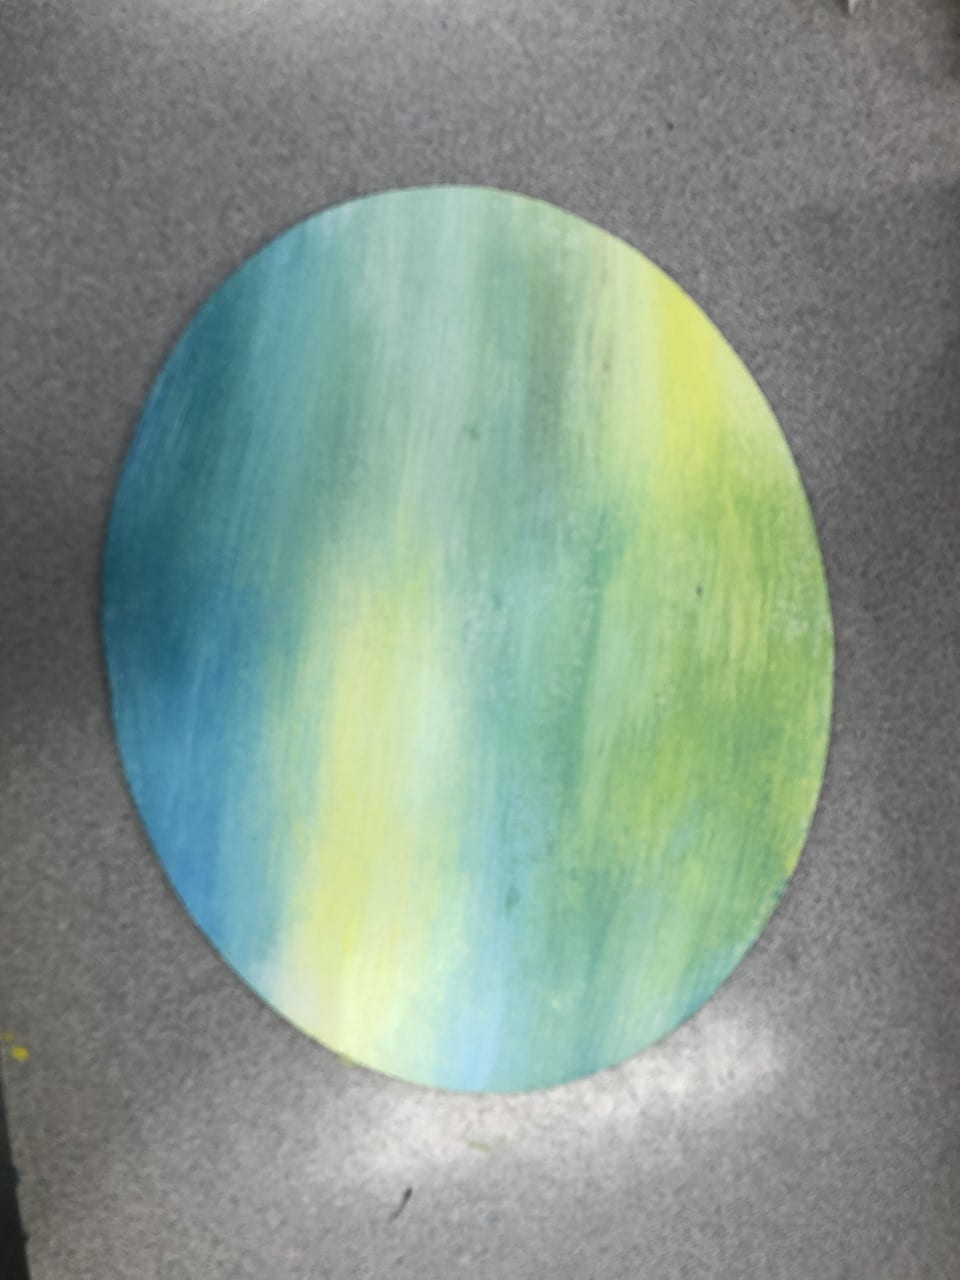
I used a fan brush and painted my mounting board a hazy yellow, green, and blue background, trying to imitate the natural background the hummingbird resides.

I mounted my dragon on the board using wire and cloth. I used hot glue to connect the neck region and then used a moldable paper medium (I forgot the name) to cover the base of the neck with it to hide the hot glue residue.
January 18, Wednesday
Today I finally finished my hummingbird dragon chimera Paper Mache sculpture. I added a few more details, like feathers on the back, a pearlescent medium on the bumps on the head, and some glaze in the mouth to give it a more slobbery look. I forgot to give the dragon some nostrils while I was painting, so I just drew in the nostril details after I took the photo on my phone in the photos app. Overall I am very proud of how it turned out, and I enjoyed working on it and seeing it come to life.
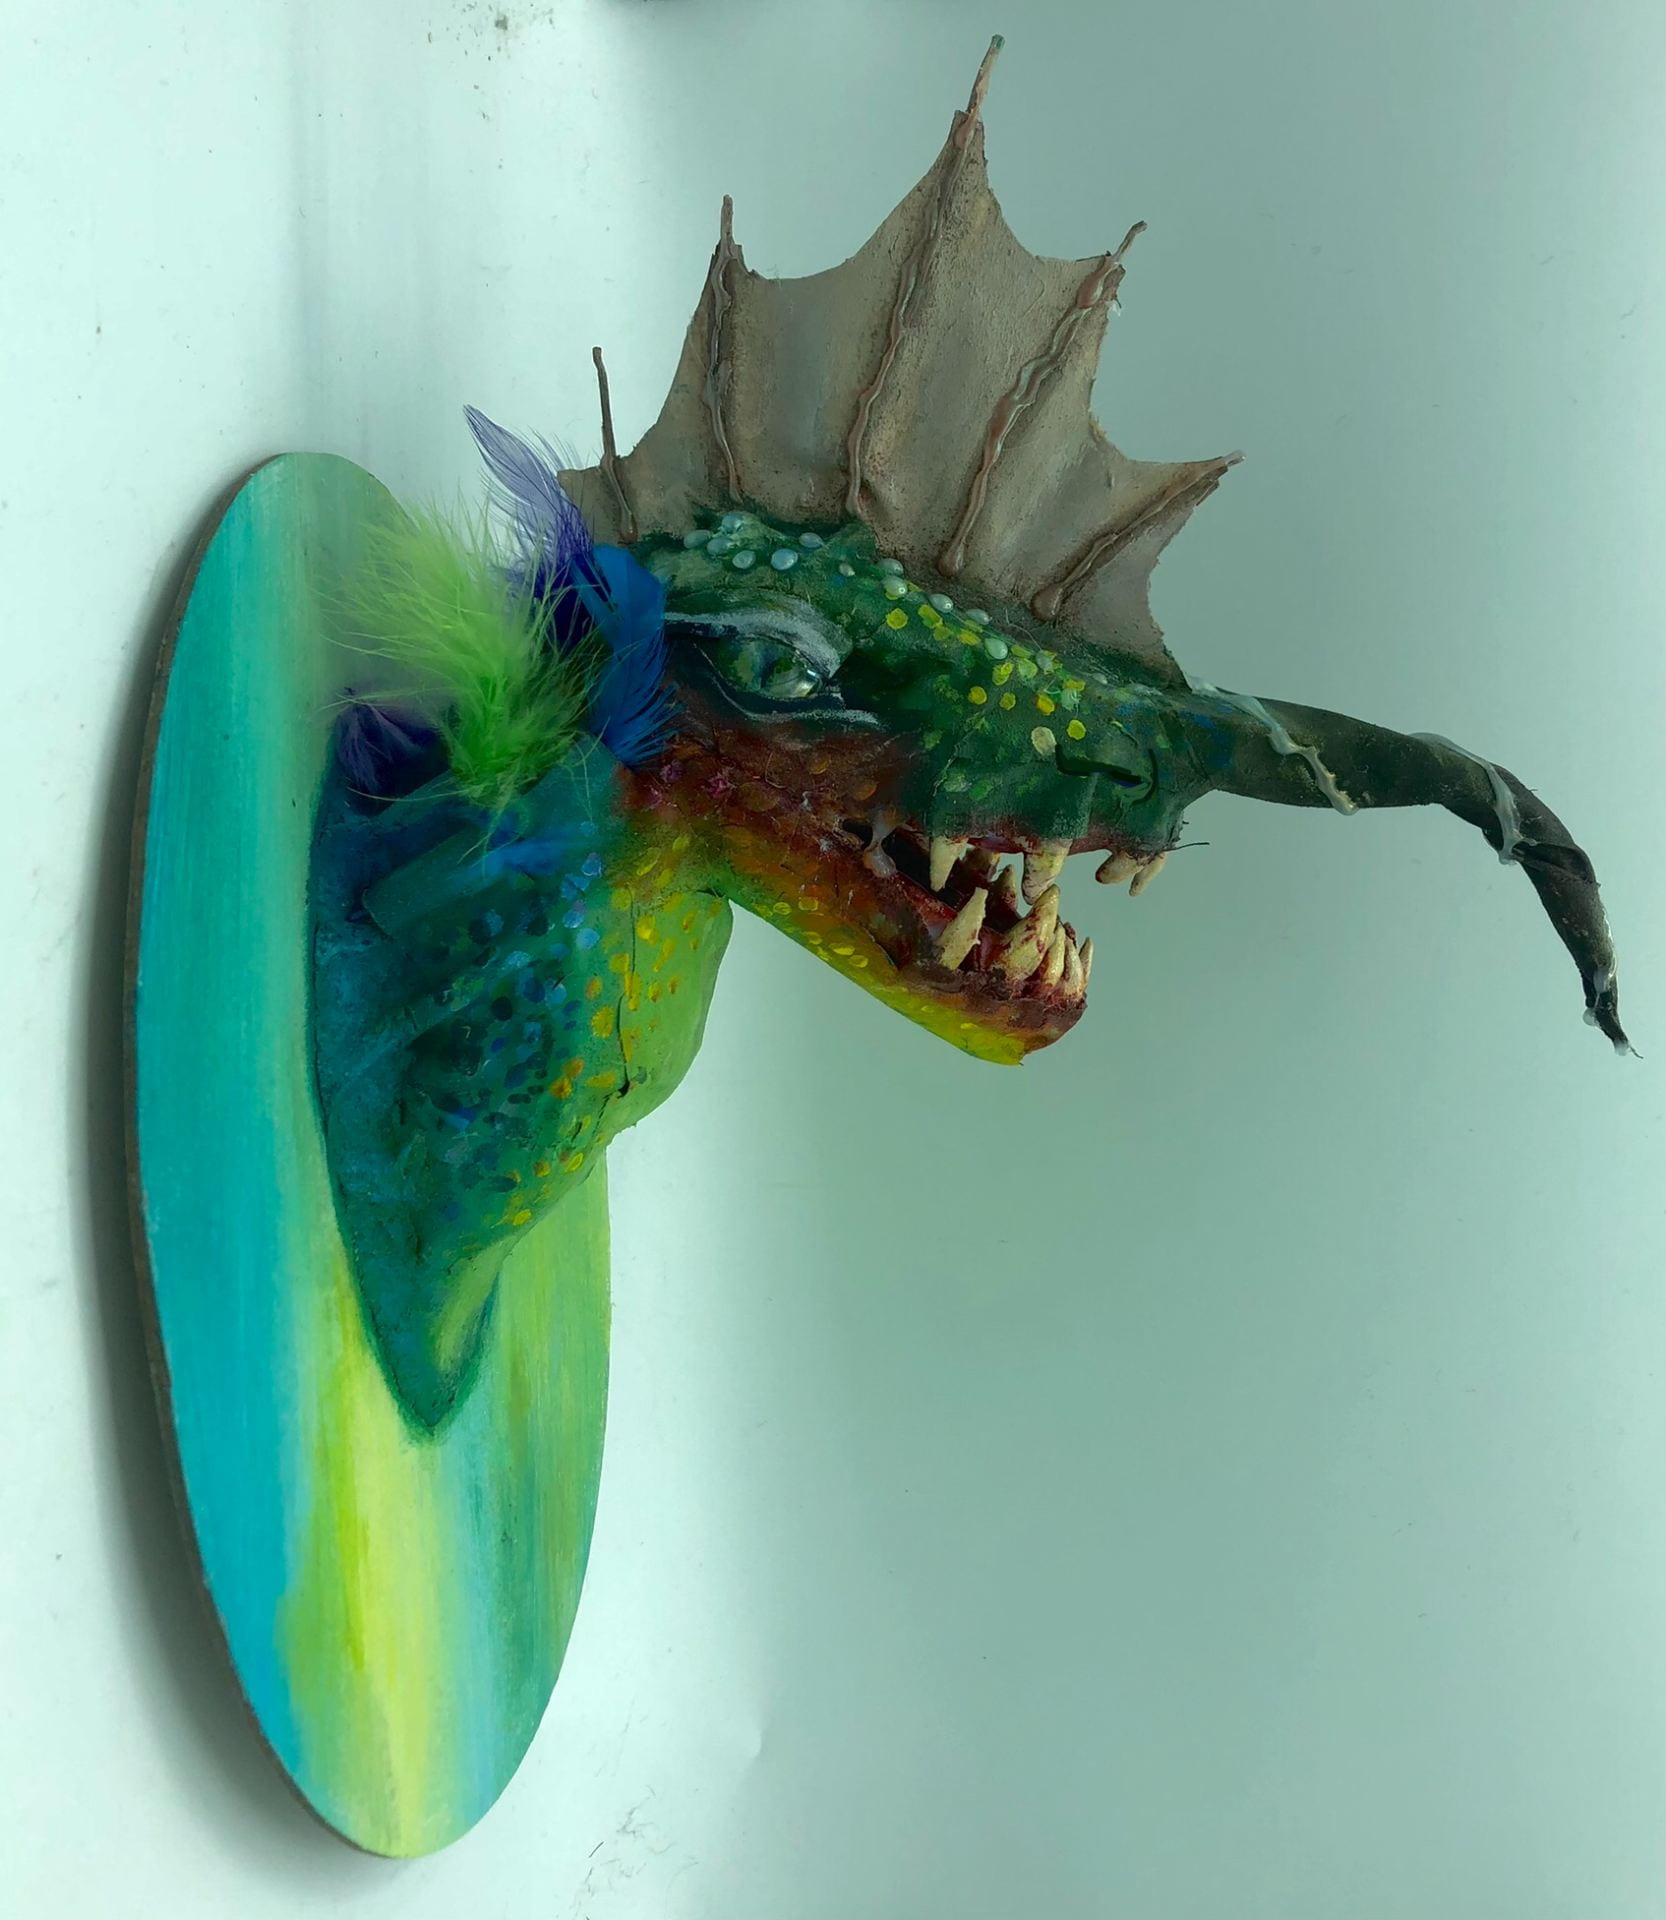
Hummingbird-Dragon Chimera
January 18, 2023, Paper Mache Sculpture
Angela Cheng
For this assignment, I made a paper mâché dragon chimera with any other animal of my choosing. With some thought, I chose the hummingbird as my subject.
The hummingbird symbolizes hope, appreciation, comfort, happiness, and optimism, and I chose the hummingbird for these reasons. At times I lack these qualities but making this sculpture will be a reminder to always look on the bright side, and there is no reason to lose sight of hope in my life. To extenuate the hope and happiness of a hummingbird, I chose to paint with bright rainbow colours. The part I enjoyed adding the most is the pearlescent medium that I added to make the dragon shiny-one finds hope within the light.
Inquiry Project: Attempt
January 20, 2023, Friday
I tried making a plate using the available molds we had. When rolling out the clay using the manual roller, I accidentally set the setting to 0.8 instead of stopping before that. This resulted in my slap being very thin, very fragile. Despite knowing this, I just tried to mold it anyway using the sponge, and so far it seemed fine.

The next day, when the clay dried, the plate definitely felt very thin and fragile, but since it still kept it’s shape, I thought to try bisquing it to see if it’ll work.

Before bisquing, I applied a coat of pink underglaze on the edge of the plate.
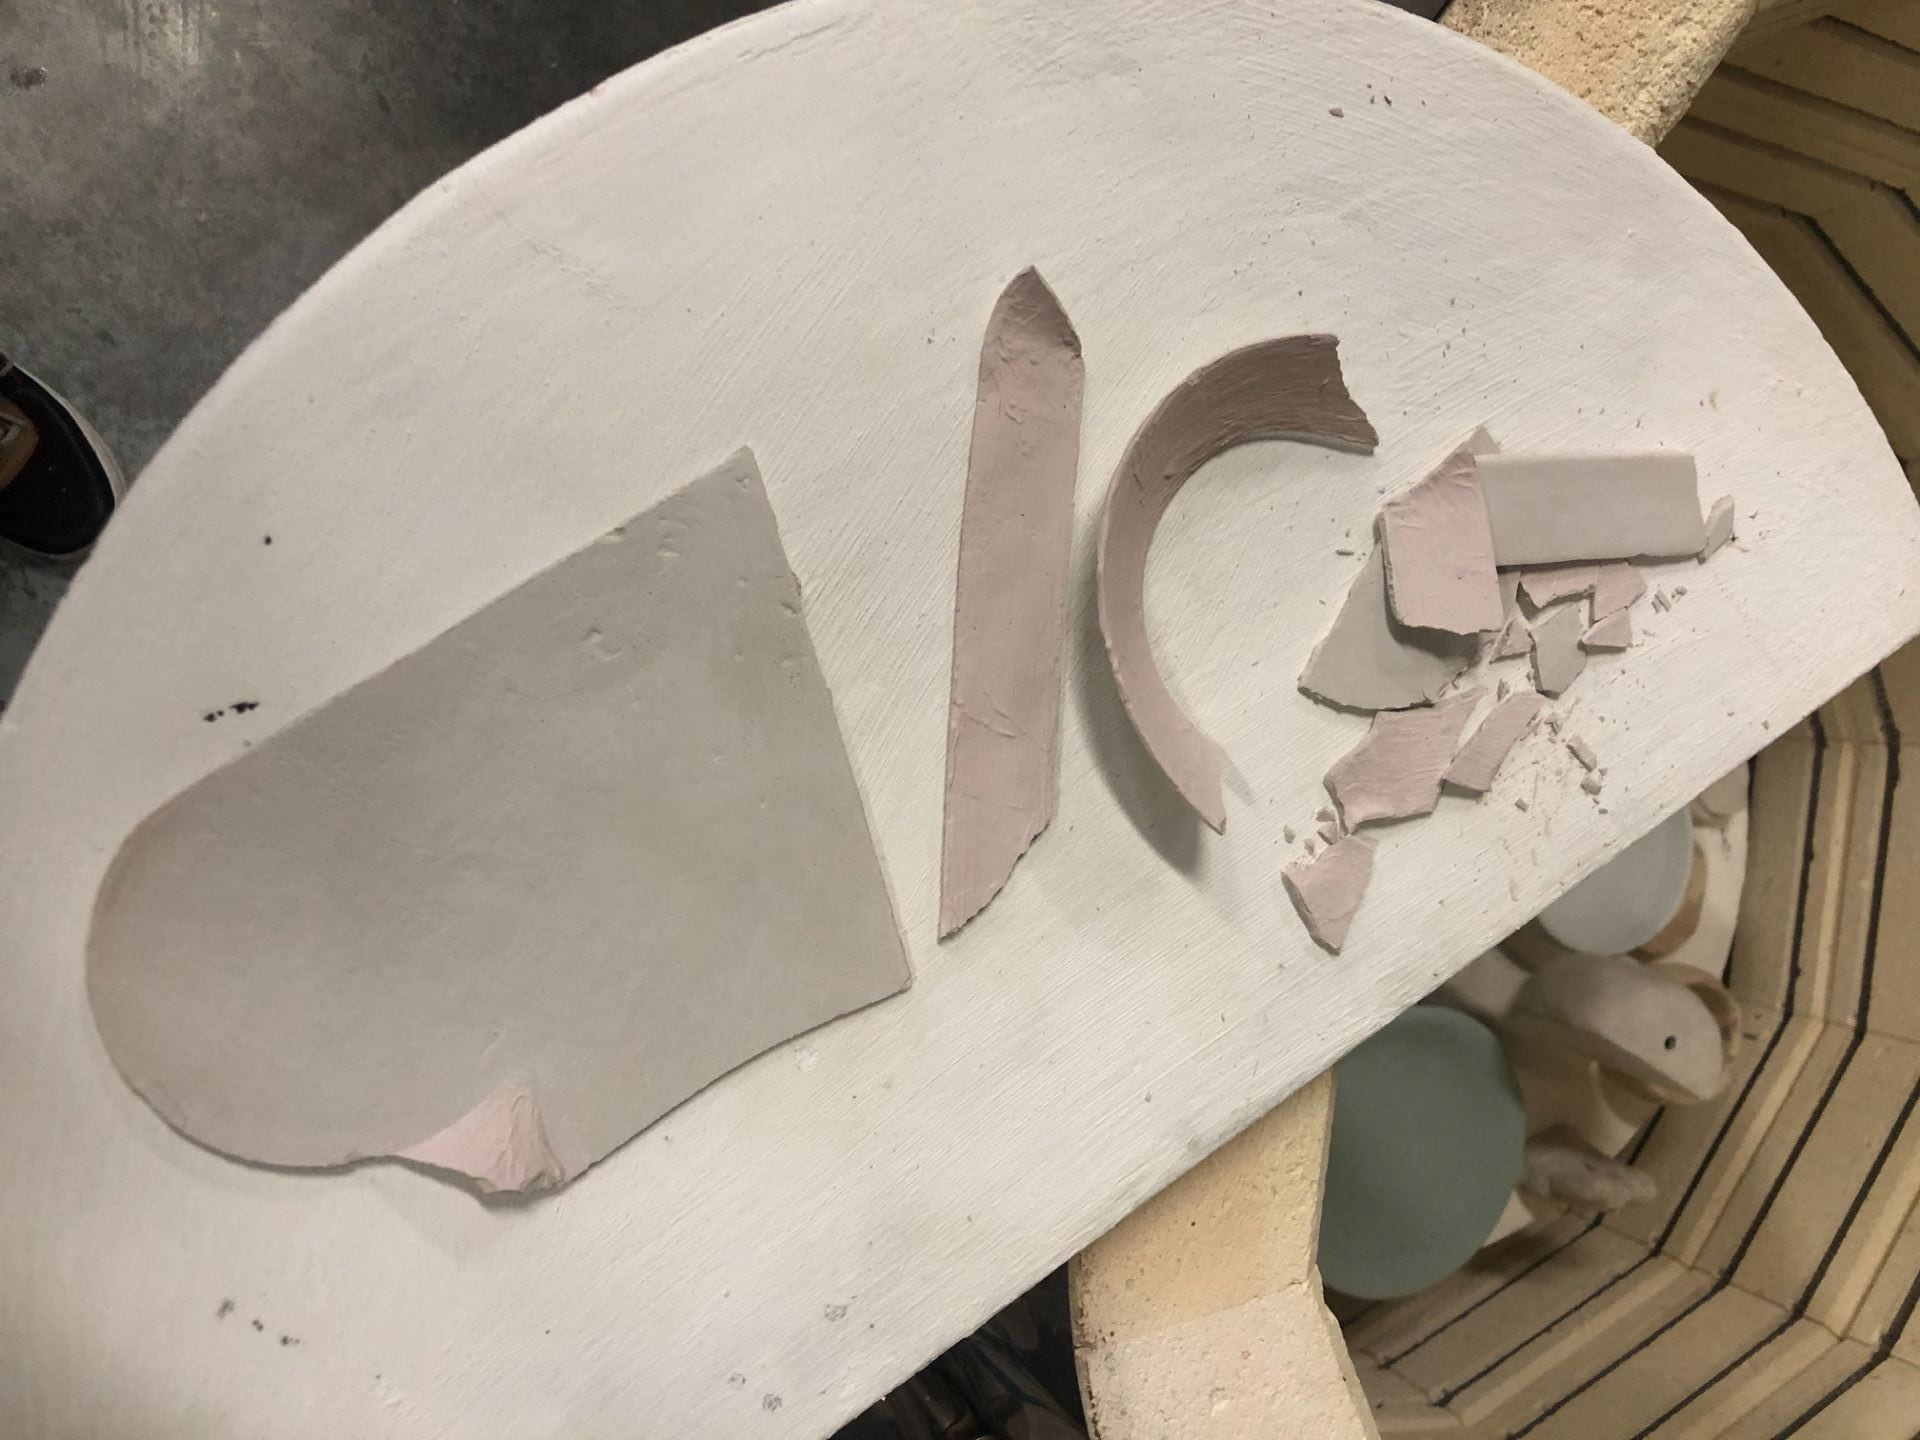
Before it even got bisque’d, the plate crumbled into pieces while being loaded. I was a bit disappointed, but honestly, I expected the plate to break much earlier and just was experimenting just to see how long it would last, and if I could get it to the cone 05 fire. Even if I completed the cone 05 fire, the plate probably would not last very long if I had used it because of its fragility.
Since the semester has come to an end, it is too late to restart, but it definitely served as a learning experience, and if I had to do this again, I would know not to compress it too thin.