for my paper Mache project I made a heart with a bandage on it, this is for giving advice to people and myself and helping feel better. I started by making a tin foil heart, I then cut a zigzag down the middle. after that I wrapped the heart in paper with the potato starch stuff. Once it dried I attached a bandage made out of strips of paper, then I painted it. my main struggles with this project was using the potato starch stuff for the paper Mache, I struggled because it was sorta hard to work with and was kind of gross to touch but I did it anyways. Success I had with this project was getting the right color i wanted and the shape of the heart.
Grade 10
Sgrafitto Tile Purpose
I took inspiration from the hippy style of art.
my partner is ionalyn and Katelyn, our plan or connecting the tiles is that I’m doing a sun, Katelyn is doing a moon, and ionalyn is doing a star.
inspiration image:

I don’t have any photos of the sketches I made for my tile
monster mug finished product
title: The April Fool
date: 2022/04/13
medium: clay, underglaze (food safe), over glaze (food safe)
artist name: Kate Van Veen
QUESTIONS TO ANSWER ABOUT YOUR PROJECT:
HOW DIFFICULT DID YOU FIND THIS PROJECT?
This project wasn’t very difficult, the most difficult project yet was the coil pot.
WHAT DID YOU LEARN THE MOST ABOUT DURING THIS PROCESS?
I learned about how much glaze to put on and how the amount used will affect the look and texture of your project.
WHAT WOULD YOU DO DIFFERENTLY IF YOU HAD TO DO THIS PROJECT AGAIN?
I would use vinegar to fix the cracks by the nose and ears, and I would put less under glaze on the now and lips, I would have also put more glaze on the inside and outside of the body of the mug. Maybe I would have also used a different shade of red for the brain.
PICTURES OF FINAL PRODUCT:
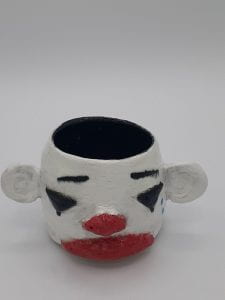


front of mug inside of mug (birds eye view) back\side angle of mug
monster mug process
title: The April Fool
artist: Kate Van Veen
this is the final product:


this is it painted:

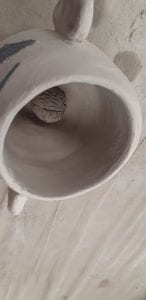
this when i added the brain:

march 13 2022
artists name: Kate Van Veen
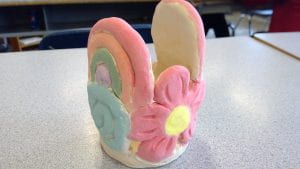
title: flower and rainbows coil pot
medium: clay, glaze
date finished: none (hasn’t been fired yet)
this blog post is about the final details for the coil pot
I was unable to get photos of my final product because it was sitting in the “to be glazed area” since the 3rd and still hasn’t been fired. But I did get photos of the process.
I am kind of satisfied with the end product, I don’t dislike it but I don’t love it either. I’m not sure i will find a use for it but that’s okay because its just a skill builder. 🙂
after I coloured it:

after I put clear glaze:


after fired and glazed:


march 2, 2022
Artist name: Kate Van Veen
the medium used for this project was clay, and glaze
I forgot to take photos of my coil pots but I will give you a description
coil pot #1: for this first coil pot it was supposed to end up being a flower pot in the end. I panned to make it in the shape of a skull, as I progressed in making it I realized that this idea wasn’t working because the weight was uneven and pulled down the sides of the pot. the pulled it down because the sides went outwards to create the skull shape. it eventually cracked and fell apart.
coil pot #2: for this next coil pot attempt I tried creating a more “simpler” design than my last. So I did three regular “snake” coils then I did a “coil patch” where you blend a chunk of coils together and make a design in it, then attach it to your pot. Then I put it in cubby for a few days and it molded…. but I scrapped off the mold and in the end my coil pot cracked again…
coil pot #3 I used 3 different techniques, I put a flower design on it, then I made 2 coil swirls on the side, and then last but not least I made 2 coil rainbows. This was my most successful pot yet, after I finished blending everything I smoothed it all over with a sponge then redid the fine details since they got covered by the sponge. After that painted the pot and fired it in the kiln. I will put the rest of the details about this pot in the next blog post where we talk about finishing touches, I will also share a few photos on there.
Career & Life Education 10 Core Competency Reflection
here is my artifact: kates career path project.pptx
here is my core competency reflection: core competency.docx