
Week 1
sept. 7 2022
Inquiry
This is week one in 3D Art, I’ve started to plan for what I’m going to do for my inquiry project and I’ve come up with hopefully the perfect idea! My parents can be quite investigative into my life and will quite frequently search my whole room head to toe in case i’m hiding a body or something. Recently though, my therapist has been trying to talk me into doing a bit of journaling to let out my thoughts in a safe way when needed and I think I would like to give it a try eventually. But I need a space to keep these pieces of paper without fear of my parents coming across them while doing one of their searches. So i’ve come up with the genius idea of creating a box (out of clay so the only materials i will need are underglaze, overglaze, clay etc.) that looks like a book! Then I can take this box, fold up the papers and keep them inside it, while storing the box in the back of my shelf with all my other books. I’m gonna start this project by trying to get the perfect sized box by comparing it to real books and making all those measurements.
I couldnt find any pictures of a fake book made of clay which I’m honestly quite surprised by, but I found some other pictures that maybe you can get the same feeling of what I’m going for with them…


Week 2
This week I mostly brainstormed ideas for my inquiry in case i get bored of my book box idea. I also helped out Elora and Gavrielle get their sgraffito tiles done because the first time that they tried it both of their tiles exploded. We figured out later that one of them didn’t use a rib, and the other didn’t use the rib properly and also didn’t knead it enough. Was happy to help them though and now they both have great tiles!


Week 3
This week I started planning out my box, and i was going to make a heart with sharp edges so I measured it out and cut out paper pieces to make the outlines but they were super flimsy and so with your help I put them through the laminating machine. But we accidentally grabbed the wrong size plastic film so instead of them coming out laminated they didn’t come out at all and when we finally got them out they were bent and completely unusable. So after mourning the paper i decided to redo it and this time make them rounded and larger and thicker all for support but also be more useful! I then made the base to my heart with a heart shaped slab and let it dry a bit overnight. I also helped Elora and Gavirelle start their coil pots and gave them advice and ideas on what to do and how best to do it!

Week 4
Box project
This week i made the edges (walls) of my box and they took a lot longer than i thought they would! I’m happy i was able to make them attach so well with the drying method you requested of us in the assignment. I can really see how much better and skilled I’ve gotten with cly since last year and I’m quite proud of myself! I still have to make the lid for the box but I am going to let the rest of the box get as dry as i can before making it so i can use to box itself as well as the meausrements to make it fit perfectly together! I’m so far planning to make the heart have either a medium sized circle or a medium sized square or rectangle at the top of a heart shaped slab so that i can easily remove to lid without having to push it off and potentially break it.


Week 5
Box Project
I painted my heart box, and I started making the lid for the box aswell! I decided to paint it a light pink-ish color to make it seem very fragile and light so it’s not too heavy on the eyes. I’ve also started making the lid and ive decided to paint it a darker color (I’m thinking red but not decided yet) Here’s some pictures of what I’ve done to visually explain better!


I’ve decided to add some depth and texture by making heart shaped divets in the lid!
Week 6
Box Project

I painted my lid this week! I also finished pinting the bottom portion of the box and it was fired, so then i glazed it and that came out of the kiln as well! So now I’m done with the box and halfways done the lid! The divets in the lid were much harder to carve out than i thought because when the underglaze went in them, i had to carve it out and that was a lot more time and effort than I had planned on putting in. But hopefully it’ll be worth it and it’ll all turn out perfect!
Week 7
Box project
This week, sadly, disaster struck. My lid cracked near the bottom, but it was still salvagable so i put lots of slip in the crack (it was only broken into 2 large peices) and it stayed together! But s=unfortunately the next day as I was carrying it, I seemed to have done such a good job at patching it back together that i forgot where it had broken in the first place and was carrying it by the broken portion, and it broke in half again and crashed on the floor. This time it was broken into many many tiny pieces and un-salvagable shards so I made the decision to scrap it and start over with a new, better, lid.


Inquiry
I’ve decided to try and improve my realism skills and begin drawing a hopefully realistic ROV machine which is used to explore the deepest parts of the ocean! It’s a very complex machine that’s made to with-stand the harshest conditions on earth so the tiny details and overwhelming amount of wires and more will be difficult but I’m still excited to give it a try! I drew it all in pencil to begin with, and then i outlined it all with a black pen and next week i plan to add some (but not a lot) of colour to it.


Week 8
Box project and Inquiry


The bottom of the box came out and I’m so happy with it!! And i also re-did the lid because the lid was definitely not fixable this time.
Inquiry
I decided to also continue my inquiry today which is my realism drawing of an ROV which is used to explore deep trenches in the ocean! I’ve colored it in today and I’m very happy with how it turned out! I know that some of the dimmensions are slightly off but it’s almost an exact replica with some (chosen) changes to it and I’m surprised I did this well considering I’m not the best at realism!


Week 9
Inquiry
Since I’m still waiting for my lid of my box to come out of the kiln, I decided to start a new Inquiry project because my best friend saw a cup at the flea market we were at together this weekend that was so beautiful and had no handle on it but it’s background was very similar to the famous Stary nights painting and she wanted it very badly but decided it was much too expensive to buy so I thought it’d be a great surprise to attempt to make one similar to it for her! I’m trying to do this off of memory which is already something i struggle with, but I’m hoping for the best and I know that she’d be exstatic if i were to make her the ugliest cup to ever exist so I’m very excited to begin this project! As of right now I’ve just made the mug and i’m waiting over the weekend for it to be completely bone dry before i begin trying to paint it because i dont want to accidentally ruin the shape that I’ve worked very hard on while trying to make those precise brush strokes. here are some pictures of the cup while I was fixing the shape, so it has improved quite a bit since then!


Week 10
Inquiry
this week I continued making the cup for my inquiry and it’s turning out really well! So far I’m very happy with it and it’s looking how I wanted it (starry nights painting inspired but not at all identical). I keep adding more and more little layers of different lines/patterns on top of each other in different shapes sizes and colours to give it more depth and make it more appealing. I’ve even added some colours I didn’t imagine I would add when I first started this project such as purple, gray, and yellow! I decided to paint the inside of the cup white but I actually struggled with this a bit because since I painted the outside first, the dark blues keep sticking to my fingers and then transfer into the bright white inside which I definitely don’t want, but eventually I managed to get all the blue off and enough white underglaze on to make it how I wanted.


Week 11
Inquiry
This week I put in my cup for inquiry into the kiln and then glazed it and finally put it in to be fired for the last time. Though when I came out it wasn’t exactly the way I imagined it would be. I am still very happy with it but because of all the different layers I added to it, the glaze was too thin on certain areas which made it not as thickly covered in glaze that I had wanted it. This gave it a more rough texture rather than galssy smooth one but I still truly love the finished product it’s just the texture that I’m not overwhelmingly pleased with but I’ve come up with a solution! Instead of using the cup as a glass, I’m going to use it as a pot for a small plant I just got! The colours will perfectly contrast the green colour of the plant and it’s going to look perfect on my window sill!
Week 12
Under the Sea Project
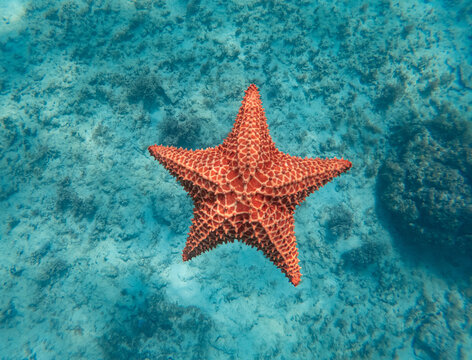
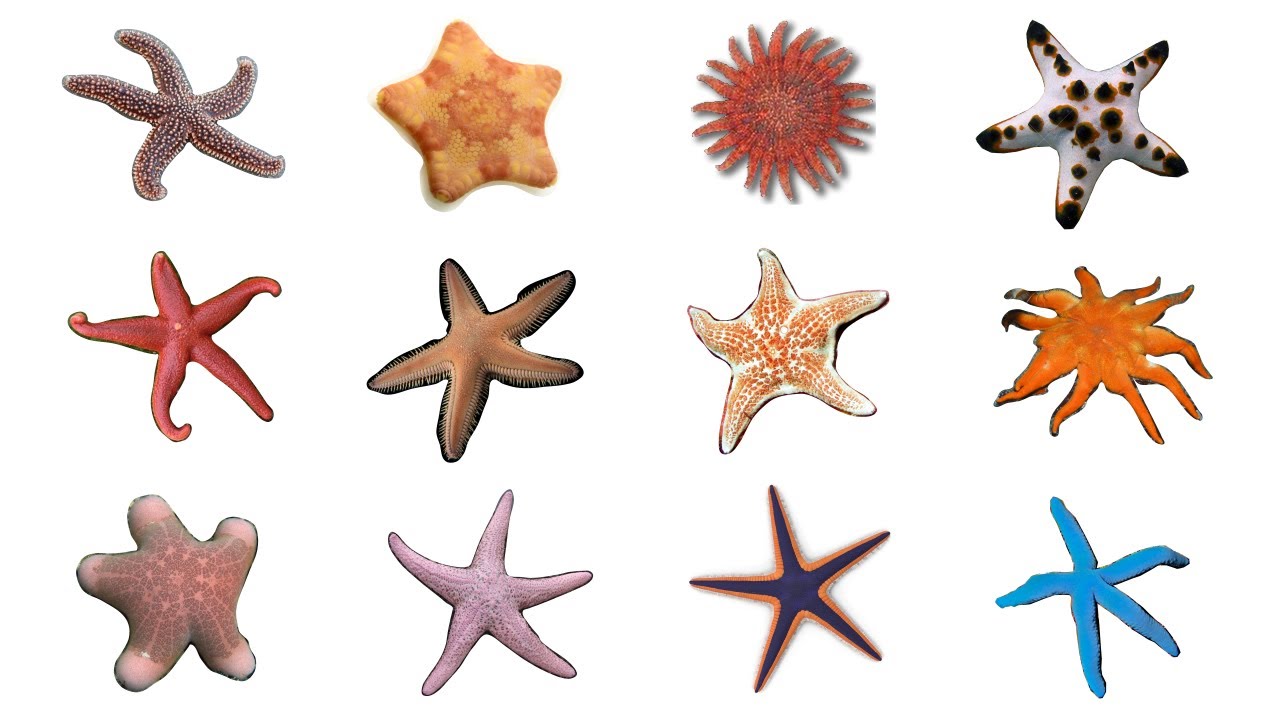
This week I realized I had not finished my under the sea project! I had tried to make an orca tail fin but it was very difficult and ended up crumbling because I forgot about it, and let it dry too fast. So this week I worked very quickly and made a starfish on a rock which I then painted and added deatils with the slip dispenser/dropper tool! At first I began painting without putting the clay in the kiln and then was told of my mistake and let the paint burn off while getting fired and then re-painted but I’m very pleased with how it turned out! Here’s some pictures of the process of making the rock and starfish, attaching the starfish to the rock, and the painting process!
For my under the sea project i decided to go with the starfish and put it on a rock to add more dimension, and make it appear more grand and impressive! Starfish sadly have many threats towards them, with the main ones being loss of coral reefs, pollution, and changes in temperature due to these issues as well as others and global warming. The solution to all of these is to try our absolute best to not leave garbage behind and clean up the existing pollution in the ocean and not allow any more in it! Reducing our carbon footprint will aid with climate change and help the temperature rises and drops.
:max_bytes(150000):strip_icc()/Facts-about-sea-stars-2291865-STILL02-v2-69e6acc9f20f470cbfed7b7083a9f178.png)


Week 13
Mask Project
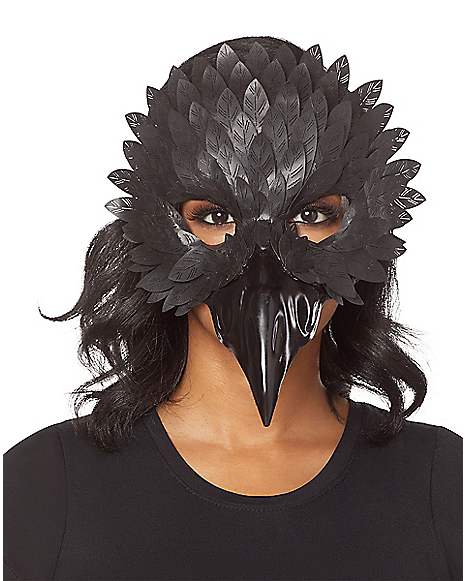
I started my mask this week! for inspiration on which animal to choose, I thought back in my life to which animal was important to me in one way or another, and I instantly thought about the crow! When I was much younger I knew a woman we all called the “Crow Lady” because she fed a large group of crows (15-20 of them) and became they are very intelligent animals who can remember faces, they proceeded to follow her around everywhere she went for years! It was an amazing sight where you’d see a woman walking by unbothered with 20 crowd jumping from tree to tree and flying high above her circling her head! They never once tried to hurt her it was almost as if she had super human abilities and they were protecting her. So I thought I’d make a crow mask! Here’s a picture of my overall plan for it, I plan to attach a headband to the inside so I can hide to strap under my hair, and I also plan to buy some black feathers to attach it on to the mask and make it appear more realistic and add more depth! Here are some pictures of my plan as well as some pictures I’ve used for inspiration.


Week 14
Inquiry
This week I was told by my mother that we would be meeting my aunt’s side of the family for an early Christmas gathering because they would be going back to Spain during the true Christmas time so I began making some presents for them! They all love homemade gifts and are definite clay fanatics so I thought I’d make them some pendants for necklaces! I cut out circles and made sure they were all uniform sizes and then I poked a hole in each of them so I could loop a clasp through it to make necklaces! I made each circle and different colour and I plan to paint something (probably the first initial of their names) on the front. I managed to get everything but the final painting part done this week! I even glazed them all and hopefully over this weekend when I return they will have home in the kiln and will be ready for the final painting!


Week 15
Inquiry
This week, I worked on two different inquiry projects! I finished the little necklace tiles from last week (they came out of the kiln) and I also started a new necklace for myself! When I was younger, me and my brother used to absolutely love watching Scobby-Doo and we ended up watching every episode/movie etc. at least 5 times and one of our personal favourites would definitely be the one where they’re in Egypt and running from a demonic reincarnation of Cleopatra. One of the main points of that movie was Cleopatra’s necklace which had magical powers and was a very beautiful pendant. So i thought i would atempt to make one because it’s of course a very beautiful piece of jewlery but it also has a lot of sentimental value to me and my brother and I know he’d love to walk home one day and recognize it hanging from my neck! Here is a picture of the necklace and for my attempt i ended up painting it a different colour (a light cream colour) and making it much smaller. A picture of it with the underglaze on it is below the image of Cleopatra.


Week 16
Mask Project
This week I have begun choosing the style of mask that I want to achieve and also started cutting out the cardboard! I started by choosing what style mask I was wanting to create and decided i would take inspiration from old ballroom masks that are still very present in movies and tv shows because i thought that a crow mask that is black with blsack feathers would look more elegant with a more formal mask. I used several different types of cardboard (different thicknesses, textures, shapes etc.) to make a 3d product that the paper mache could be easily draped over but still create a more advanced end product. I had a bit of struggle with cutting out some of the thicker boards and the fact that i kept grabbing dull box knives certainly did not help my sitation, but after eventually getting every peice i needed, i hot glued them all together and layered many peices on top of each other or at angles to create even more depth in the mask. Then, I finally got to use the paper mache and because I had learned from last year that using your fingers and dipping the newspaper can lead to big messes, and disorganized projects, i also used a medium sized paintbrush which helped to also stick down the paper better!


Week 17
Inquiry
This week I finished my final inquiry project! Throughout this course, I’ve made several inquiries and i feel, i put a lot of great work into each of them! I’ve made a very detailed and honestly quite beautiful cup, aswell as many many peices of brightly coloured jewlery which I used as christmas gifts for some of my loved ones. I also drew a remotely controlled undersea vehicle which was difficult but I’m very pleased with the end product, and now I’ve finished the necklace! It turned out exactly how I wanted to and I plan to get a silver chain to hang it on during the weekend. Though this exact peice isn’t the most difficult project for inquiry it definitelty has the most sentimental value to me and is a very personal and comforting artwork that only I completely understand the backstory and my own personal connection to it so i’m really glad I thought up this idea! I was worried that the underglaze might turn out a little patchy because I wanted to do a light cream-pink colour and in the past I’ve struggled with it but this time I got it perfect! I’ve most definitely leafrned from my past mistakes and successes and applied them all thoughout the course of this semester and it feels great being able to not just know, but also show how ive learned and grown in these few months!

Week 18
Mask Project
Over the weekend, my mask with the paper mache had fully dried and was ready to paint, so i did exactly that! I first made sure to cut off any edges of newspaper that had come up off the board or fix any parts that weren’t precisely how i wanted them, then after began painting! Since the majoirty of my mask will be covered in black feathers, i did not use too much black paint because i felt it would be wasteful and also take away valuable time that i could be using elsewhere. After allowing the paint to fully dry, i began cutting the feathers to the precise size i wanted and organizing them in layers depending on their size to make the whole peice more cohessive. Once finished, i glued them down to my mask in groups of 2 or 3 in line going right to left. My reasoning for this is because crow’s have almost layered rows of feathers which make them much more water resistant and therfore able to fly better even while wet which they need in the climates they normally inhabit, and i wanted the mask to be not 100% completely realistic but realistic to a certain degree. I am very happy with my final project and I am proud of myself for how much planning and organisation I implemented during the course of the work. I am also happy i used things that I had learned already and used them during the project because they helped me greatly and really proved how much i had already learnt!

